Summary
This document will guide you through the steps to customize pages used during HTTP authentication.
System Requirements
- PhenixID Server installed
Instruction
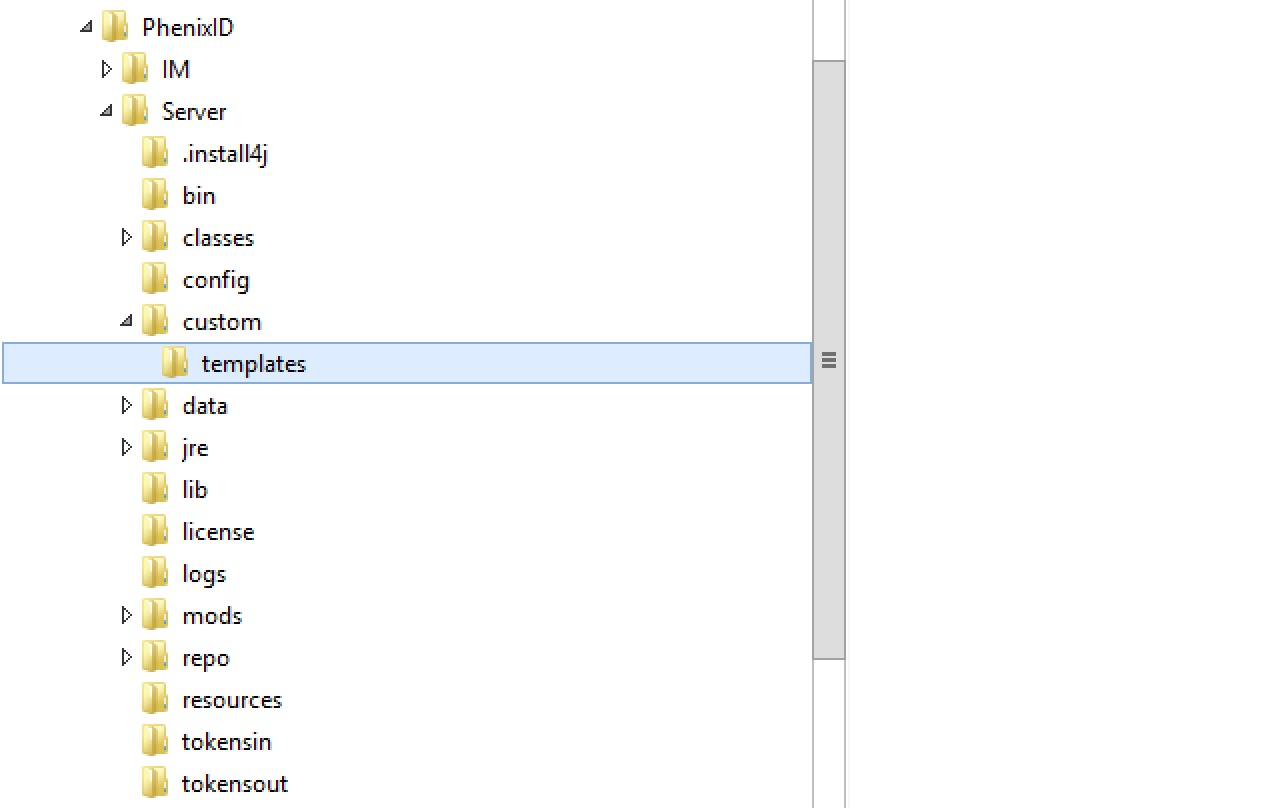
Create customized templates folder
Create a folder called custom/templates in PhenixID server root folder.
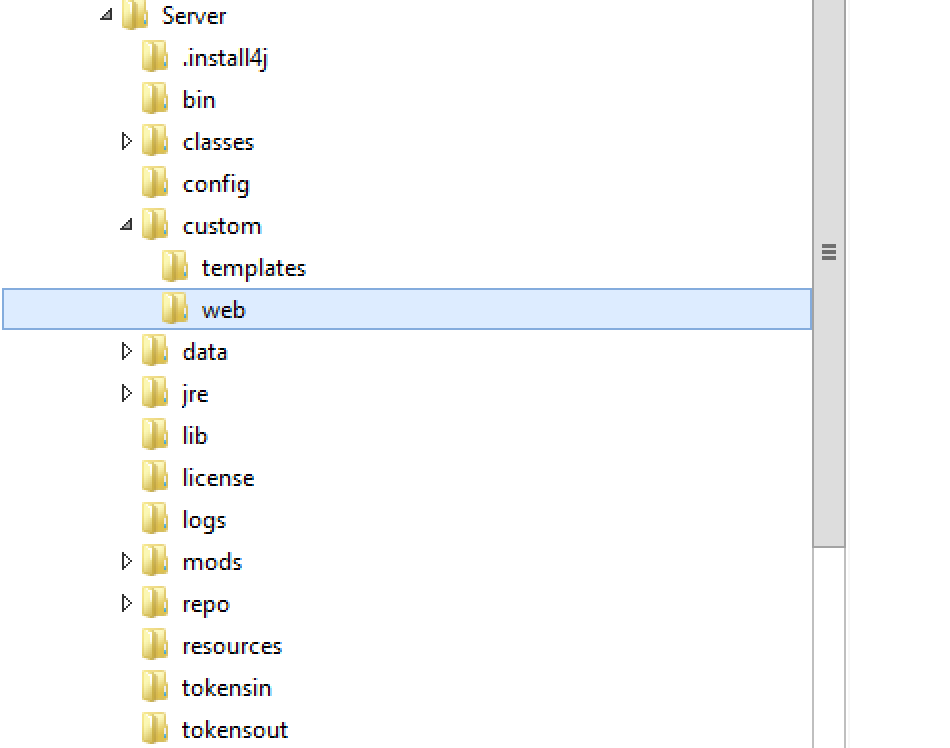
Create customized web files folder
Create a folder called custom/web in PhenixID server root folder. This folder will contain customized css etc.
Copy template(s)
- Open the default templates folder (<phenix_server_root>/mods/com.phenixidentity~auth-http~1.5.0/templates/)
- Copy all files in the folder.
- Paste the files to <phenix_server_root>/custom/templates
- Now, copy the template file(s) you would like to customize. This is based on the authenticator(s) you use. Pls view this document if you need to find out which template each authenticator use.
- Paste the file and rename it.
- If you have more than one authenticator of the same type and would like to use different templates, copy the template twice, paste and rename
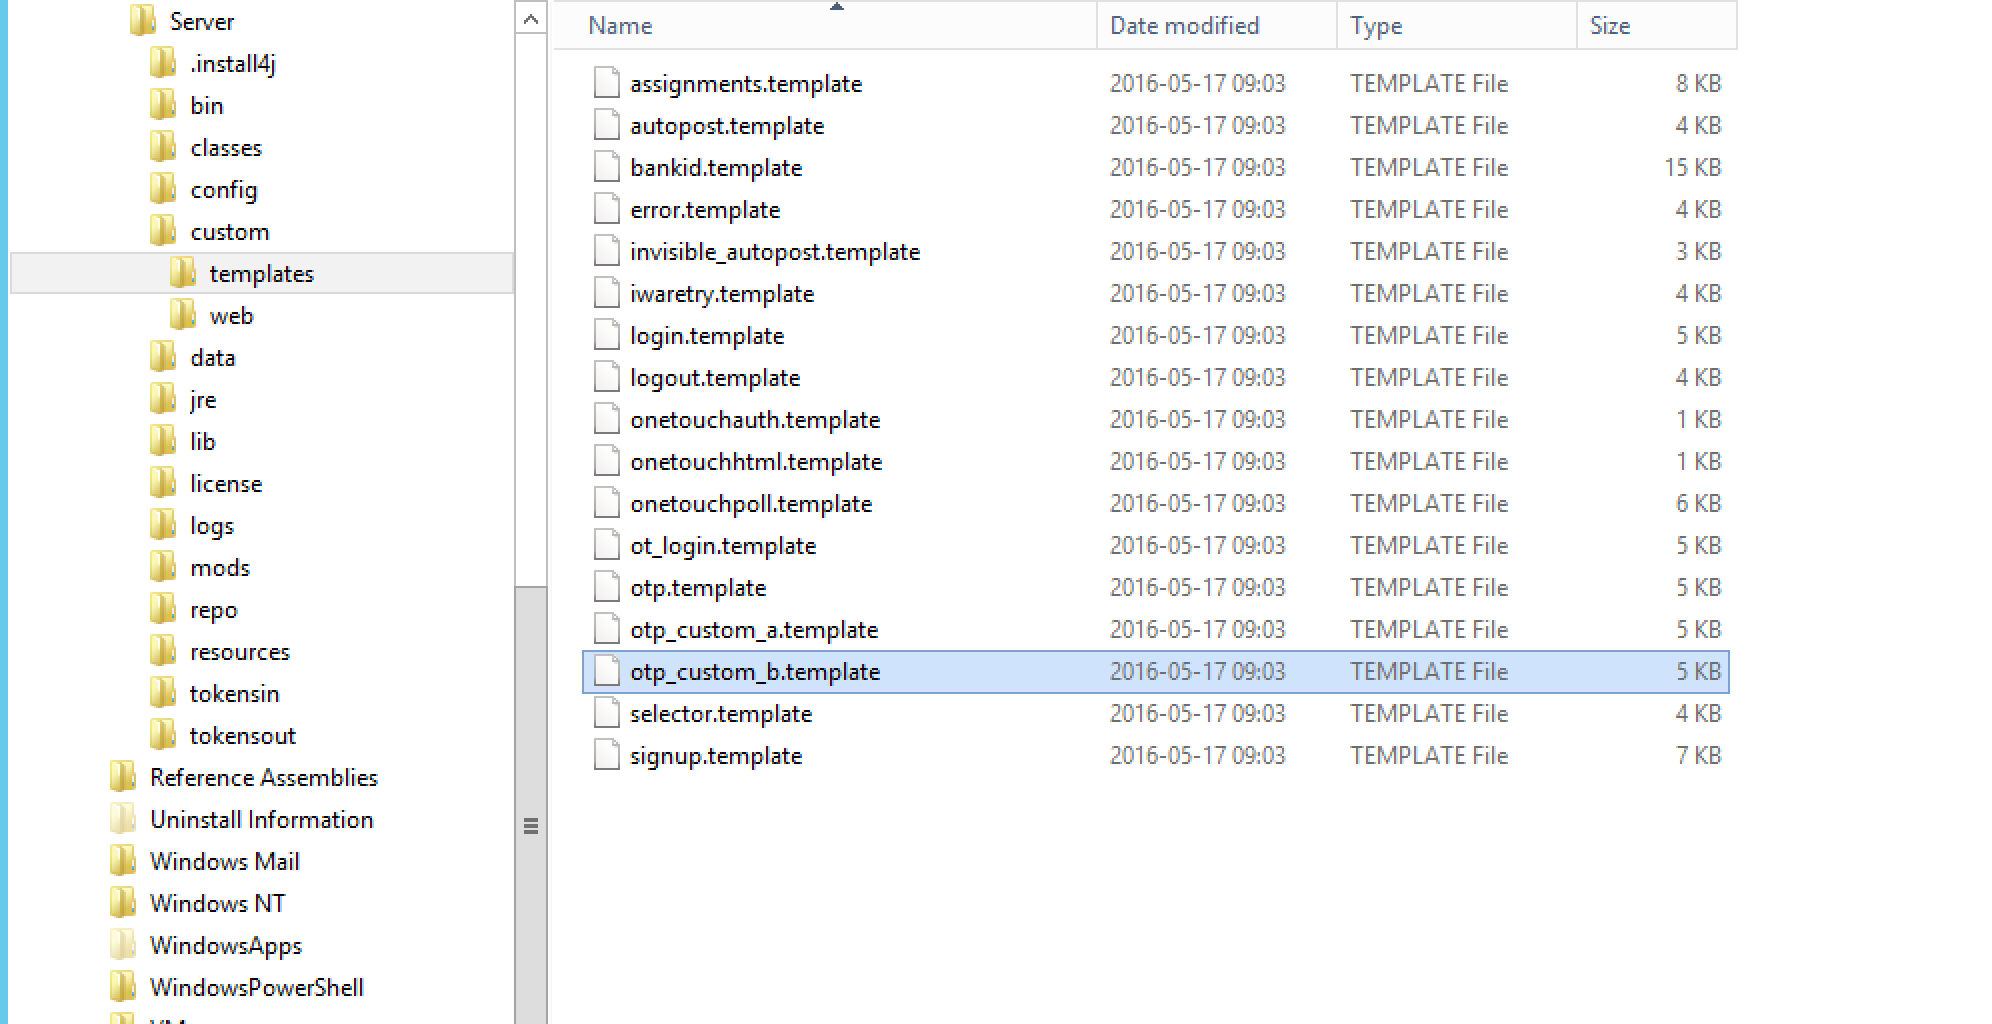
- Example: This folder contains the template files. We have two custom files called otp_custom_a.template and otp_custom_b.template.
Modify template(s)
- Open template file to modify in a text editor of your choice
- Change CSS -> Pls see “Change CSS” below
- Change texts / messages -> Texts are fetched from language files using the keys displayed in the template file (example: {{login.messages.otpinformation.body}}). Pls follow this guide to change/add texts.
Change CSS
- Open template file to modify in a text editor of your choice
- Locate CSS reference, for example <link rel=”stylesheet” href=”/authenticate/res/css/login.css”>
- Change css reference to custom css file, for example <link rel=”stylesheet” href=”/authenticate/res/css/login_custom.css”>(You can also add a new reference to a custom css file)
- Save template file.
- Copy all files and folders in <phenix_server_root>/mods/com.phenixidentity~auth-http~1.5.0/web/
- Paste all files to <phenix_server_root>/custom/web
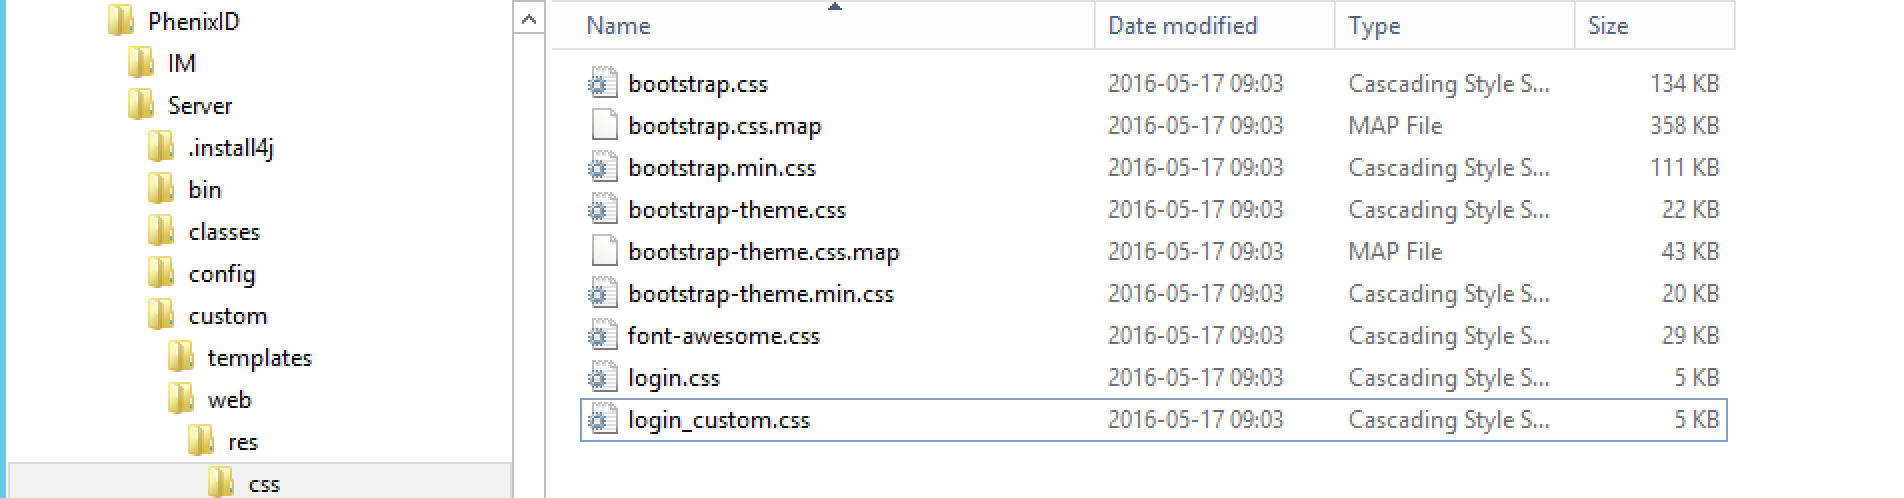
- Open <phenix_server_root>/custom/web/res/css/
- Copy login.css and paste it to the same folder.
- Rename the copy to login_custom.css
- Open login_custom.css and perform necessary modifications. Save and close when ready.
Point to custom folders for web and templates
- Open <phenix_server_root>/config/boot.json
- Locate auth-http module
- Add templates_root and web_root
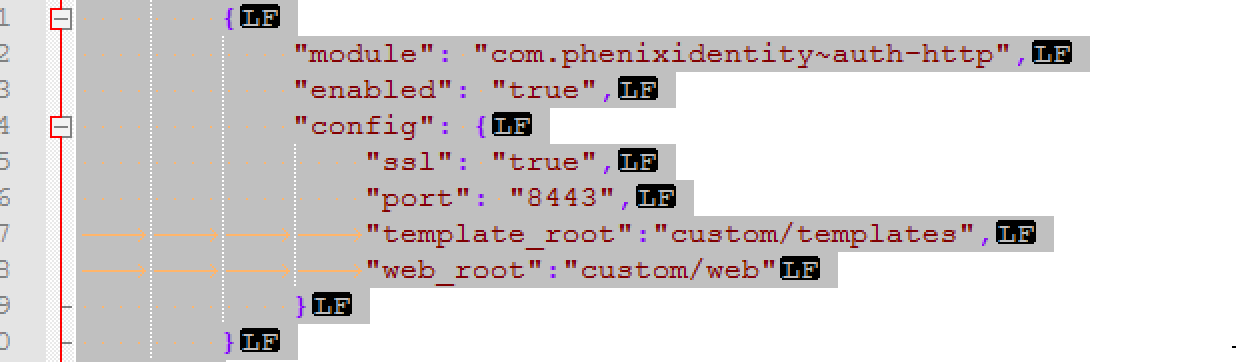
- Restart server
Use customized template
Open the Configuration of the HTTP Authenticator. Point to the customized template. Pls view this document to see how to set customized template for your authenticator type.
Example:
{
        "id": "unpwotptoken",
        "alias": "unpwotptoken",
        "name": "PostUidPasswordAndOTP",
        "displayName": "Username, password and OTP",
        "configuration": {
            "userValidationPipeID": "uidpwdotpToken",
            "otpValidationPipeID": "ValidateSentOtpPipeToken",
            "otp" : "otp_custom_a.template"
        }
    }


Save the changes.
Verify template change
- Open a web browser
- Browse to https://<server>/authenticate/<authenticator_alias>
- Verify GUI – it should display the customized GUI
Upgrade
Follow these steps when upgrading:
- Make a backup copy of the customized files in the templates and web folder
- After the installation, remove all files from the templates and web folder. (If templates and web folder are missing then create them again in the phenix_server_root directory.
- Copy all files from <phenix_server_root>/mods/com.phenixidentity~auth-http~<version>/templates/ to <phenix_server_root>/custom/templates/
- Copy all files from <phenix_server_root>/mods/com.phenixidentity~auth-http~<version>/web/ to <phenix_server_root>/custom/web/
- Copy the customized files to the web and templates folder
- Restart server
- NB! If the templates shipped with the product changed, the customization needs to be reapplied.
DISCLAIMER
Information provided in this document is for your information only. PhenixID makes no explicit or implied claims to the validity of this information. Any trademarks referenced in this document are the property of their respective owners.The origin of this information may be internal or external to PhenixID. PhenixID makes all reasonable efforts to verify this information.
PhenixID - support.phenixid.se