Fact
- PhenixID Identity Provisioning, called Provisioning
- Platform: Any supported
System Requirements
Account in Google Apps
Situation
Set up service account and credentials to use provisioning actions in PIP.
Solution
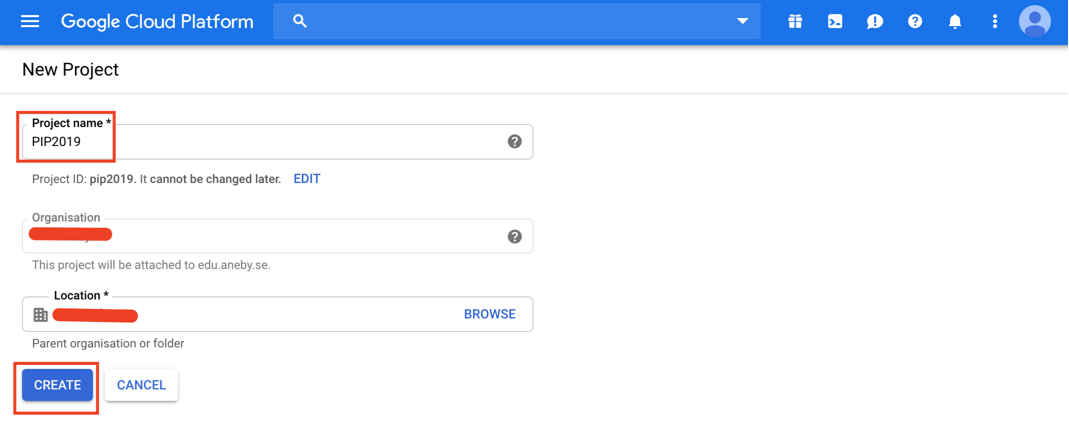
Create a Google Cloud Project
- Go to https://console.cloud.google.com/home
- Click the Create project button
- Enter a project name and click Create
- Refresh the page and you should now see your project
Enable the Admin SDK API for your project
- Go to https://console.cloud.google.com
- Make sure the appropriate project is selected. You should be on the Dashboard page for your project.
- Open the navigation menu and navigate to APIs & Services → Library.
- Search for and select the Admin SDK service.

- Click the Enable button near the top.

Create and Configure a Service Account
- Go to https://console.cloud.google.com
- Make sure the appropriate project is selected. You should be on the Dashboard page for your project.
- Open the navigation menu and navigate to APIs & Services → Credentials.
- Click the Create credentials button and select Service account key.

- Select New service account from the Service account dropdown menu.
- Name the service account PhenixID Identity Provisioning. For the role, select Project and then Owner. Ensure that P12 is the selected Key type. Upon clicking Create, a P12 file will be downloaded; this is important for later so keep a note of where you have downloaded it.

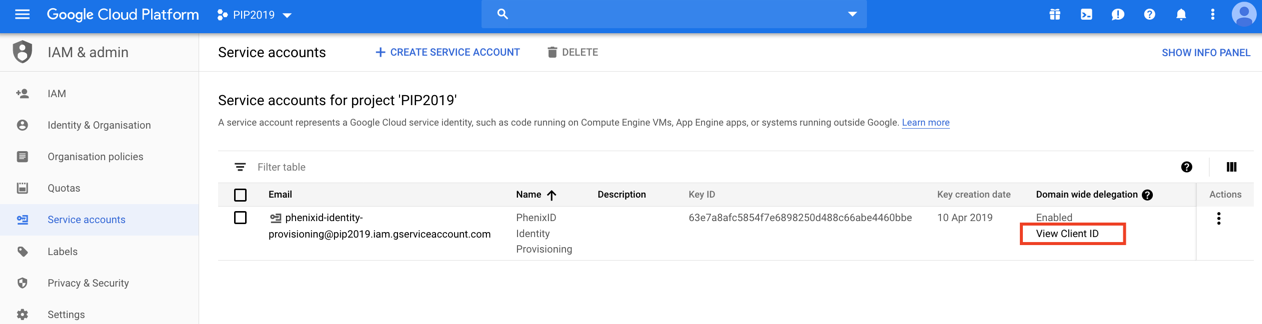
- You should now see your newly created service account listed. Click on Manage service accounts (on the right-hand side).

- Select the options button next to your service account, and select Edit.

- Check the box “Enable G Suite Domain-wide Delegation”, enter anything for “Product name for the consent screen” and click Save.

- Click View Client ID and you’ll see the Client ID on screen. You will need the Client ID to configure security within G Suite. Highlight the Client ID and copy it to your clipboard.

Configure G Suite Security
- Go to https://admin.google.com
- Open the navigation menu and navigate to Security → Settings.
- Select the API reference option and make sure Enable API access is checked.

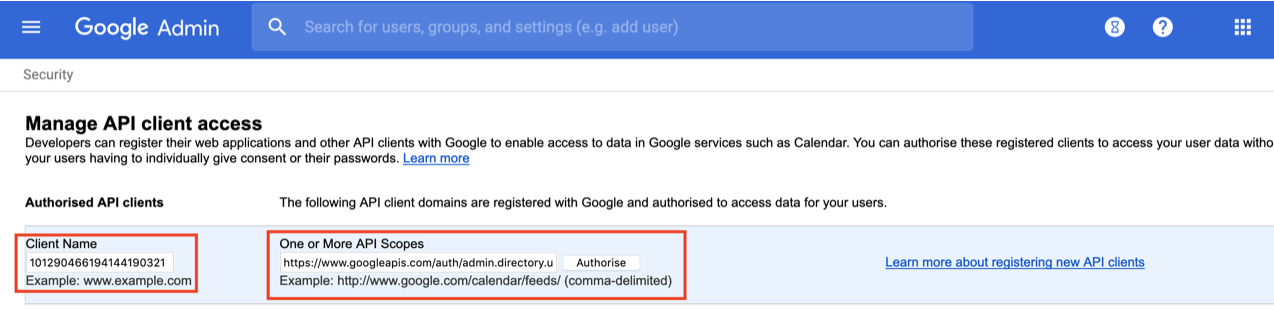
- Back in the list of options, select the Advanced settings options and then the Manage API client access link.

- For Client Name, paste the Client ID of the service account that you created in the previous steps. For API Scopes, paste the following values to grant read-only access to users and groups:
https://www.googleapis.com/auth/admin.directory.user,https://www.googleapis.com/auth/admin.directory.userschema,https://www.googleapis.com/auth/admin.directory.group,https://www.googleapis.com/auth/admin.directory.orgunit,https://www.googleapis.com/auth/admin.directory.rolemanagement
- You should now see your service account listed as an authorized client of G Suite.

Configure PhenixID Identity Provisioning
- You now have all prerequisites to be able to use the Google Apps Actions as described in PSD1171 and PSD1157.
- In this example use these settings:
Google Domain: my.google.domain
Google Administration Username: admin@my.google.domain
Google Service Account Email Address: phenixid-identity-provisioning@pip2019.iam.gserviceaccount.com
Google Private Key File Path: Path to the p12-file previously saved.
DISCLAIMER
Information provided in this document is for your information only. PhenixID makes no explicit or implied claims to the validity of this information. Any trademarks referenced in this document are the property of their respective owners.The origin of this information may be internal or external to PhenixID. PhenixID makes all reasonable efforts to verify this information.
PhenixID - support.phenixid.se