Summary
This document will guide you through the steps to enable MyApps.
System Requirements
- PhenixID Server installed
Overview
PhenixID MyApps is a web portal which displays the applications an authenticated user may access. Example:
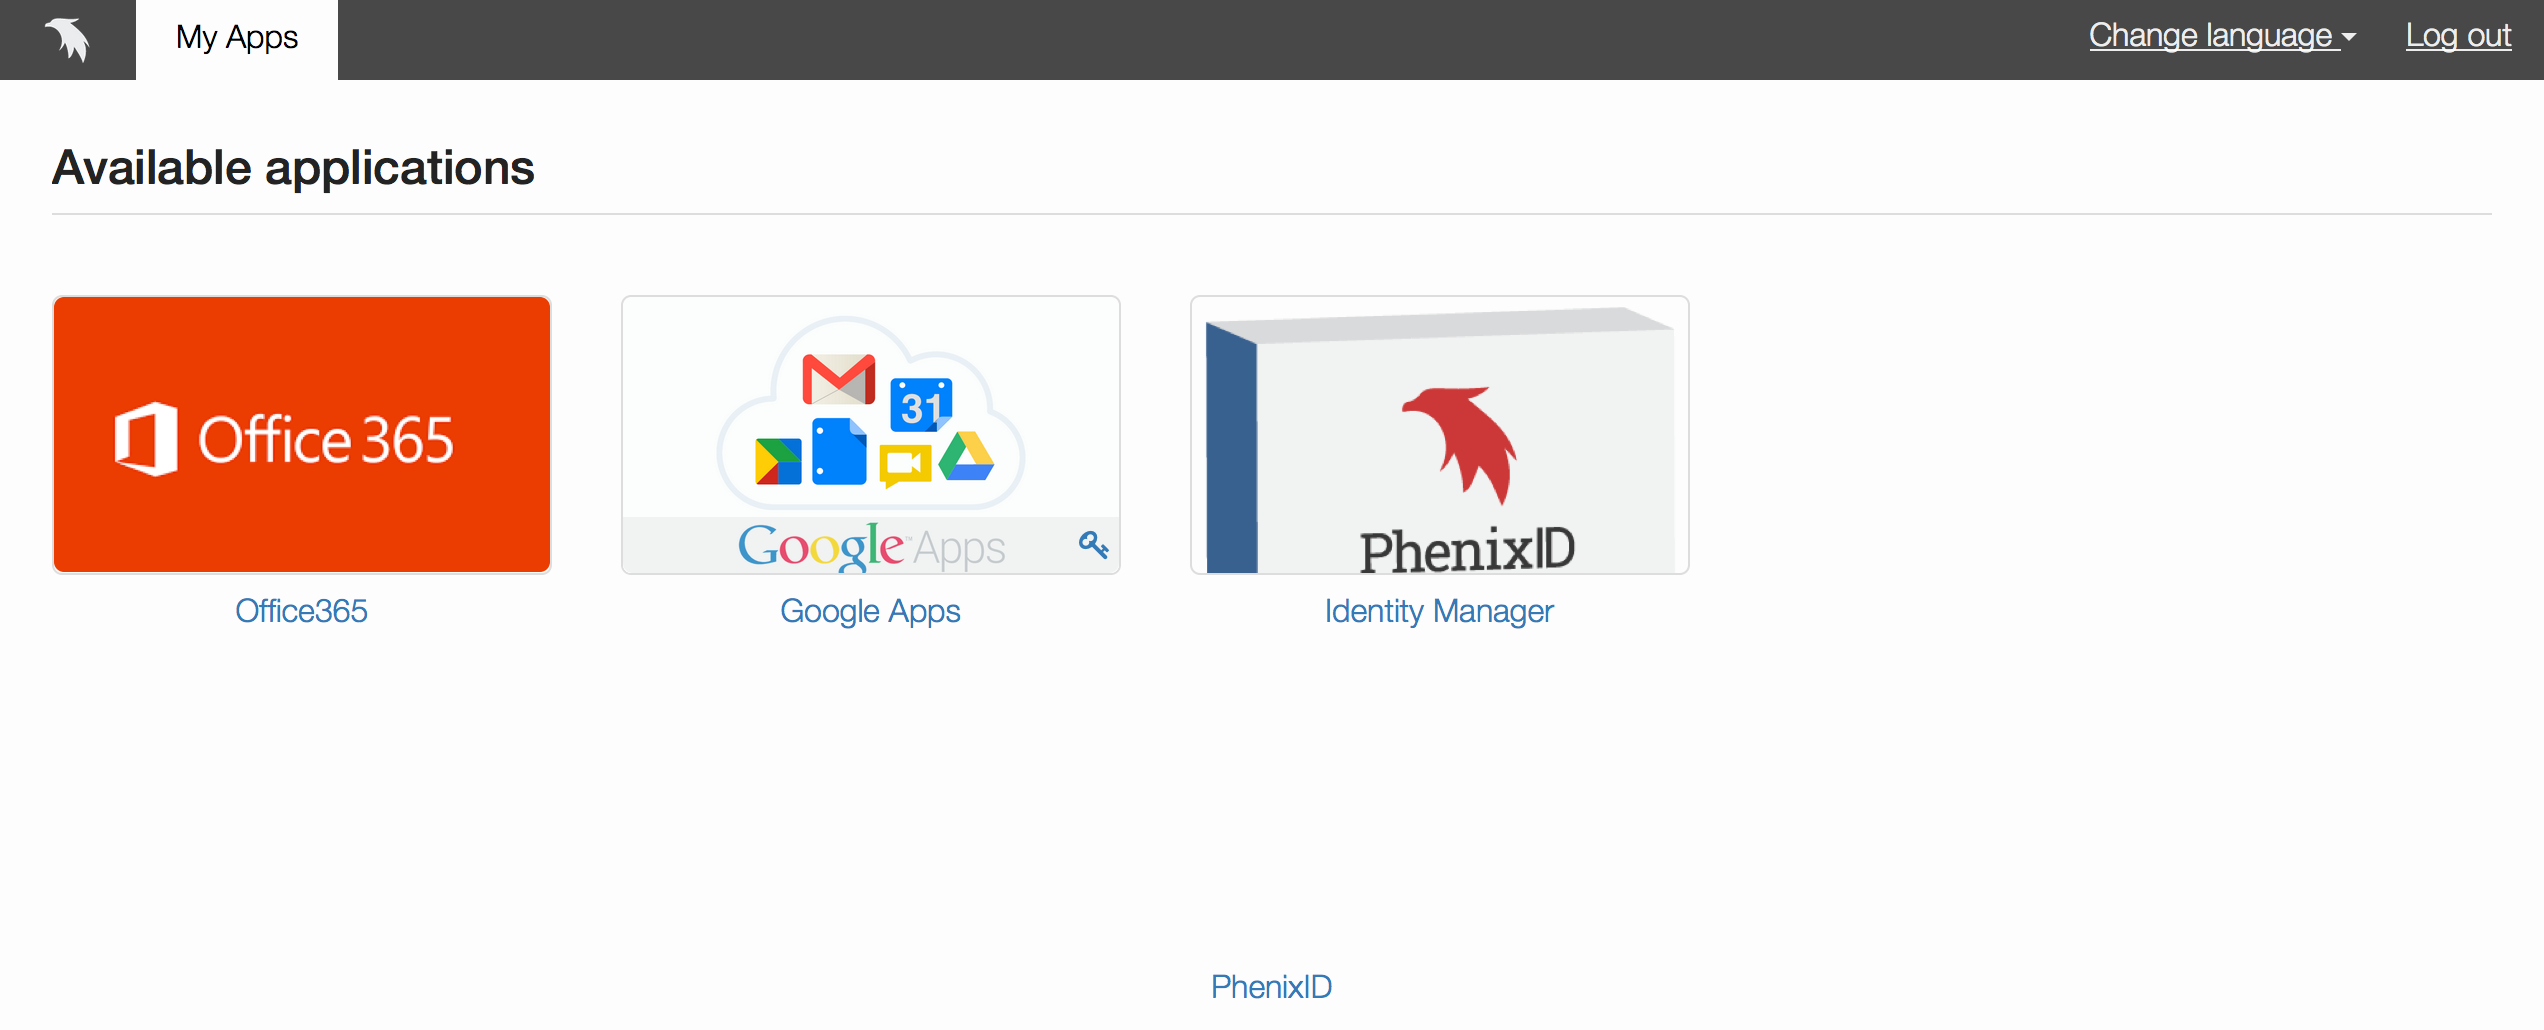
If the user clicks on one of the applications, the user will be single-signed-on to the application if the authentication method used to login to MyApps was strong enough. If not, the user will be prompted for a stronger authentication method. In the case of an initial username-password login to MyApps, the stronger authentication method could require an additional one-time password. This process is also known as step-up authentication.
How to setup SSO for the applications is not part of this step-by-step guide.
More information about MyApps can be found here PhenixID MyApps.
Technical flow for MyApps:
- User logs in to MyApps
- MyApps sends the userid to a configured pipe
- Pipe performs application lookup from any supported data store (ldap, sql, text file, web service..) using userid as key
- The applications returned from the lookup (represented as one item per application) are returned to MyApps. Every application must have a set of properties, see Application overview below.
Instruction
Application overview
Every application to be displayed must have these properties:
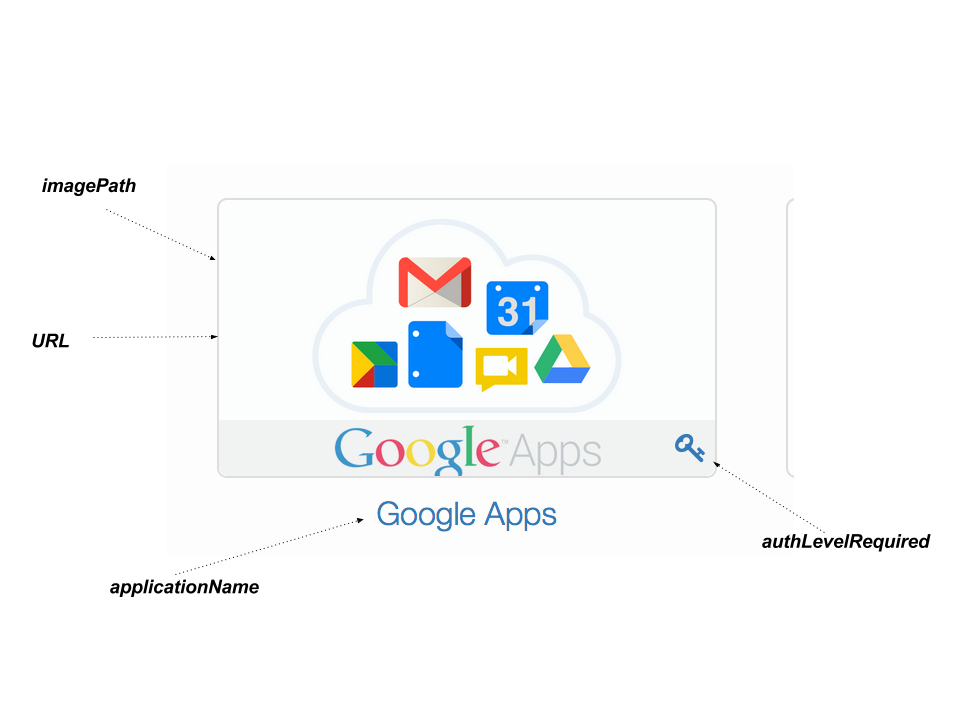
Explanation of parameters:
- applicationName – the display name of the application
- URL – The url launched on click
- imagePath – Path to the image file to be displayed. The path is relative from <phenixid_server_installation_path>/mods/com.phenixidentity~phenix-prism-myapps~<version>/web/
- authLevelRequired – This parameter controls whether the key (indicating that stronger authentication is needed) is to be displayed or not.
authLevelRequired = 1 -> no key displayed
authLevelRequired >1 -> key displayed
Login to PhenixID Administration Portal
Open a browser and go to https://PhenixidServerIP:8443/config/.
Use e.g. the default administrator user called phenixid to login.
Open Advanced tab
Go to the tab Advanced to add the configuration below.
Enable MyApps module
Version 1.5
Locate System Nodes. Click >.
Click on the node you would like to edit. If only one note, click > to the right of 1.
Click on the pen to the right “modules”.
Add this to enable MyApps. Make sure to enter the correct version of the module to be configured.
A corresponding authenticator and pipe will be added in later step.
{
         "module": "com.phenixidentity~phenix-prism~<version_replace_this>",
         "enabled": "true",
         "config": {
             "base_url": "/myapps",
             "auth_redirect_url": "/myapps/authenticate/myapps",
             "ssl": "true",
             "prism_modules": [
                 {
                     "name": "com.phenixidentity~phenix-prism-myapps~<version_replace_this>",
                     "enabled": "true",
                     "config": {
                         "display_name": "My Apps",
                         "base_uri": "myapps",
                         "myappsLookUpPipe": "getMyApplications"
                     }
                 }
             ]
         }
     }
When done, press Stage changes and then Commit changes.
Version 2.x
Locate “Modules” and click the pencil to add configuration.
Add the configuration below to enable MyApps.
A corresponding authenticator and pipe will be added in later step.
{
         "name": "com.phenixidentity~phenix-prism",
         "enabled": "true",
         "config": {
              "base_url": "/myapps",
              "auth_redirect_url": "/myapps/authenticate/myapps",
              "http_configuration_ref": "da5095a3-95ce-485b-b6ae-41be99bed01b",
              "ssl": "true",
              "module_refs": "myappsprismmodule"
 },
          "id": "5dc37f6e-0581-4ce6-8d37-7b7e322b691c"
 },
 {
          "name": "com.phenixidentity~phenix-prism-myapps",
          "enabled": "false",
          "config": {
              "display_name": "My Apps",
              "base_uri": "myapps",
              "http_configuration_ref": "da5095a3-95ce-485b-b6ae-41be99bed01b",
              "myappsLookUpPipe": "getMyApplications"
 },
          "id": "myappsprismmodule"
 }
NOTE: In the example above the parameter http_configuration_ref has been added because the default port and protocol is not used for Myapps. So when using a different port and if the setting for SSL has been changed from default, please use this parameter and set the value to the HTTP configuration that should be used.
When done, press Stage changes and then Commit changes.
After the changes has been applied, the module will have a line for the id.
Copy that id and go to “System nodes”.
Press the pencil to add configuration.
Add the id for MyApps module to the parameter “module_refs” using a comma (,) as delimiter.
When done, press Stage changes and then Commit changes.
The MyApps module should now be loaded.
Version 3.x
In version 3.x support for link bouncing has been added. When enabled, application links will point back to MyApps and when clicked, will redirect browser to the original application URL. Before redirection, a pipe will be called with the ID of application (in parameter: ‘appl_id’). This pipe can perform user authorization and access logging if desired and must return an item representing the application containing containing at least one property (URL) containing the application url. If item contains property requires_role, redirect will only be performed if the current user is in the required role.
New MyApps module configuration properties:
- bounce (true/false): Flag controlling if link bounce should be used or not
- itemPipe: Id of pipe handling the bounce click and returning the application URL
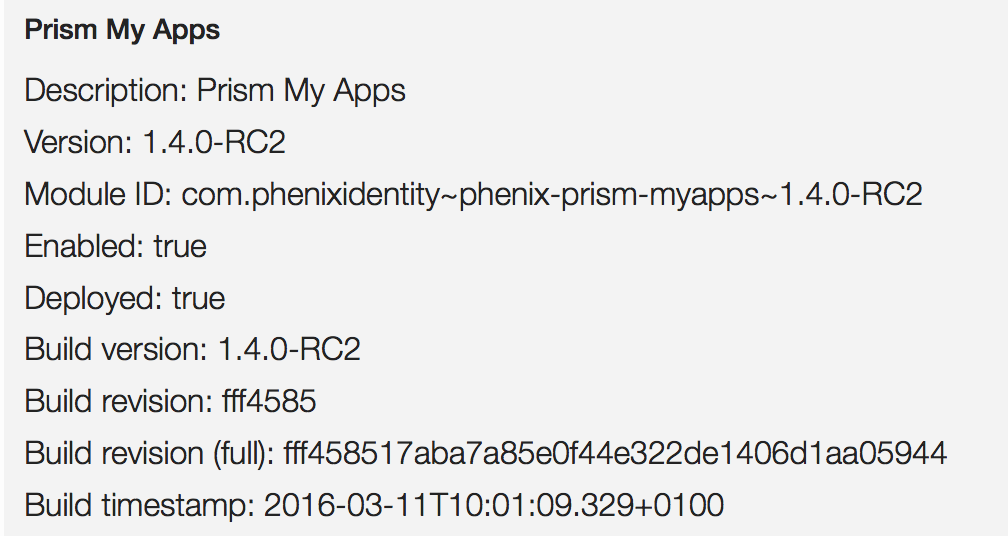
Verify that module was loaded
- Click Start tab
- Click on the node name below “Nodes”
- Click on modules
- Verify that the MyApps module was loaded. Example:
Configure authenticator for MyApps
Open the Configuration tab.
Click >Authentication – HTTP
Add authenticator. This can be any type of internal authenticator. Alias must be set to "myapps" and successURL must be set to "/myapps/" (this was defined in the MyApps module configuration. Change to corresponding values if necessary).
 Configuration example (username and password authentication. Corresponding authentication validation pipe not included):
 {
 "alias": "myapps",
 "name": "PostUidAndPassword",
 "configuration": {
 "successURL": "/myapps/",
 "allowLanguageChange": "true",
 "translationKey": "login.messages.information.body.myapps",
 "headingtranslationKey": "login.messages.information.header.myapps",
 "pipeID": "pipeUnPw"
 },
 "id": "myapps"
 }
When done, press Stage changes and then Commit changes.
Configure pipe
Locate “Pipes” and click the Pen.
Add a pipe named getMyApplications. (This was defined in the MyApps module configuration. Change to corresponding values if necessary). This pipe must fetch the applications to be displayed as items.
Example pipe (in this example, application data is stored on group objects in LDAP, ldap attributes returned are then renamed to fit application object model.)
 {
 "id": "getMyApplications",
 "valves": [
 {
 "name": "LDAPSearchValve",
 "config": {
 "connection_ref": "1c11a624-9133-4b2f-bba0-4e7658977135",
 "base_dn": "ou=People,dc=bjorken,dc=local",
 "scope": "SUB",
 "size_limit": "0",
 "filter_template": "uid={{request.username}}"
 }
 },
 {
 "name": "PropertyAddValve",
 "config": {
 "name": "type",
 "value": "user"
 }
 },
 {
 "name": "LDAPSearchValve",
 "config": {
 "connection_ref": "1c11a624-9133-4b2f-bba0-4e7658977135",
 "base_dn": "ou=Applications,ou=Groups,dc=bjorken,dc=local",
 "scope": "SUB",
 "size_limit": "0",
 "allow_multiple": "true",
 "filter_template": "uniqueMember={{item.id}}",
 "attributes": "businessCategory,cn,description,o"
 }
 },
 {
 "name": "PropertyAddValve",
 "config": {
 "name": "type",
 "value": "application",
 "item_include_expr": "item.containsProperty('type')==false"
 }
 },
 {
 "name": "PropertyRenameValve",
 "config": {
 "source": "businessCategory",
 "dest": "URL",
 "item_include_expr": "item.getPropertyValue('type').equals('application')"
 }
 },
 {
 "name": "PropertyRenameValve",
 "config": {
 "source": "cn",
 "dest": "applicationName",
 "item_include_expr": "item.getPropertyValue('type').equals('application')"
 }
 },
 {
 "name": "PropertyRenameValve",
 "config": {
 "source": "o",
 "dest": "authLevelRequired",
 "item_include_expr": "item.getPropertyValue('type').equals('application')"
 }
 },
 {
 "name": "PropertyRenameValve",
 "config": {
 "source": "description",
 "dest": "imagePath",
 "item_include_expr": "item.getPropertyValue('type').equals('application')"
 }
 },
 {
 "name": "ItemRemoveValve",
 "config": {
 "item_include_expr": "item.getPropertyValue('type').equals('user')"
 }
 },
 {
 "name": "PropertyRemoveValve",
 "config": {
 "name": "type"
 }
 }
 ]
 }
When done, press Stage changes and then Commit changes.
Verify MyApps
- Login to https://phenixidserver:<port>/myapps/
- Verify that MyApps is displayed
- Verify server.log file for pipe execution. The pipe in the above example returns this data:
Pipe ‘getMyApplications’ response: {“success”:true,”items”:[{“id”:”cn=Office365,ou=Applications,ou=Groups,dc=bjorken,dc=local”,”properties”:{“authLevelRequired”:[“1″],”imagePath”:[“images/0365.png”],”URL”:[“https://www.outlook.com/owa/office365demo.phenixid.net”],”applicationName”:[“Office365”]}},{“id”:”cn=Google Apps,ou=Applications,ou=Groups,dc=bjorken,dc=local”,”properties”:{“authLevelRequired”:[“2″],”imagePath”:[“images/google-apps-logo.png”],”URL”:[“https://drive.google.com/a/demo.se”],”applicationName”:[“Google Apps”]}},{“id”:”cn=Identity Manager,ou=Applications,ou=Groups,dc=bjorken,dc=local”,”properties”:{“authLevelRequired”:[“1″],”imagePath”:[“images/im.png”],”URL”:[“https://im.phenixid.se”],”applicationName”:[“Identity Manager”]}}],”error_message”:””,”error_detail_message”:””}
API
MyApps is provided as an API for external user portals, such as an intranet, that would like to display the application list to the user. To enable the API, all you need to do is to enable the getMyApplications pipe for HTTP. Please follow this guide. The client (API consumer) must include the username in the request to the pipe.
Flow:
- User authenticates using PAS
- User is redirected to external user portal with SAML assertion
- External user portal consumes assertion and logs in user
- External user portal calls MyApps API. Current user’s username is included in the request.
- MyApps API returns items (see step 3 below Verify MyApps)
- External user portal creates web page based on data in 5
- External user portal web page is presented to the user.
DISCLAIMER
Information provided in this document is for your information only. PhenixID makes no explicit or implied claims to the validity of this information. Any trademarks referenced in this document are the property of their respective owners.The origin of this information may be internal or external to PhenixID. PhenixID makes all reasonable efforts to verify this information.
PhenixID - support.phenixid.se