Prereq
- Windows 2019 or later
- Microsoft Azure AD tenant
- Powershell 5.1 or later
- Latest version of PowerShellGet
- .Net Framework 4.7.2 or later
Overview
This PSD teaches you to use a certificate created by you to authenticate to your Azure AD tenant to be able to create and manage user or group objects.
We at PhenixID use this when for example PIP passes data to a powershell script to create an Azure AD user. Since PIP will be executing the script and pass attributes to the script you need the Powershell script to include the authentication. Probably the most secure and best way to do this is by certificate auth.
In short what you need to do:
- Make sure you have an Azure AD tenant that you are administrator over.
- Create an APP for your Azure AD tenant
- Create a certificate
- Create and add a certificate to your Windows server
- Add the public key to the Azure AD APP
- Add correct permission to you APP
- Add parameters to the powershell script to use certificate authentication to the Azure APP and Azure Active Directory
Azure AD Tenant configuration
You need an Azure AD tenant that you have administrative rights to.
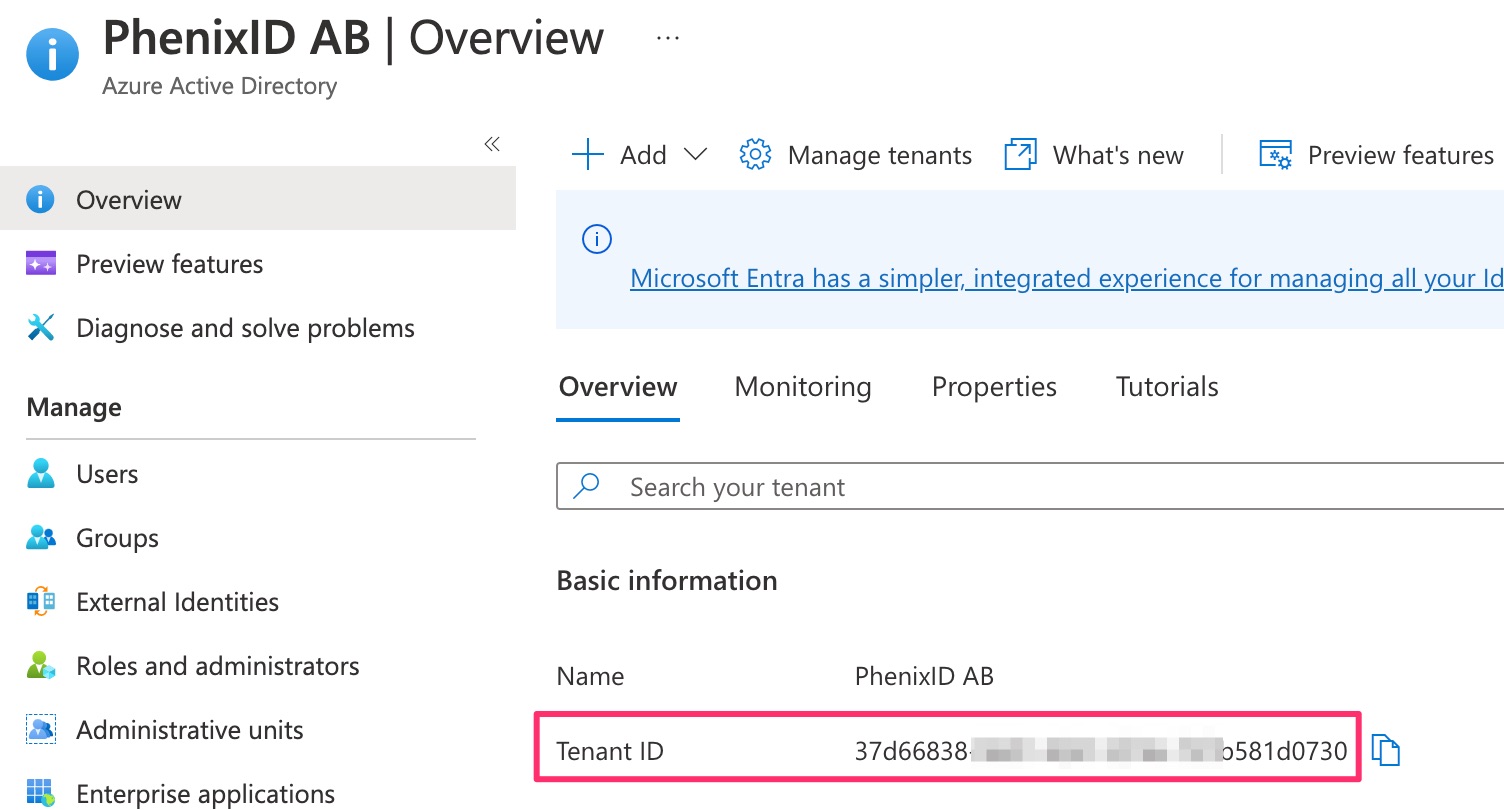
Make a note of your Tenant ID
Make a note of the Tenant ID of your Azure AD. It will be added to the powershell script later. See screenshot below.
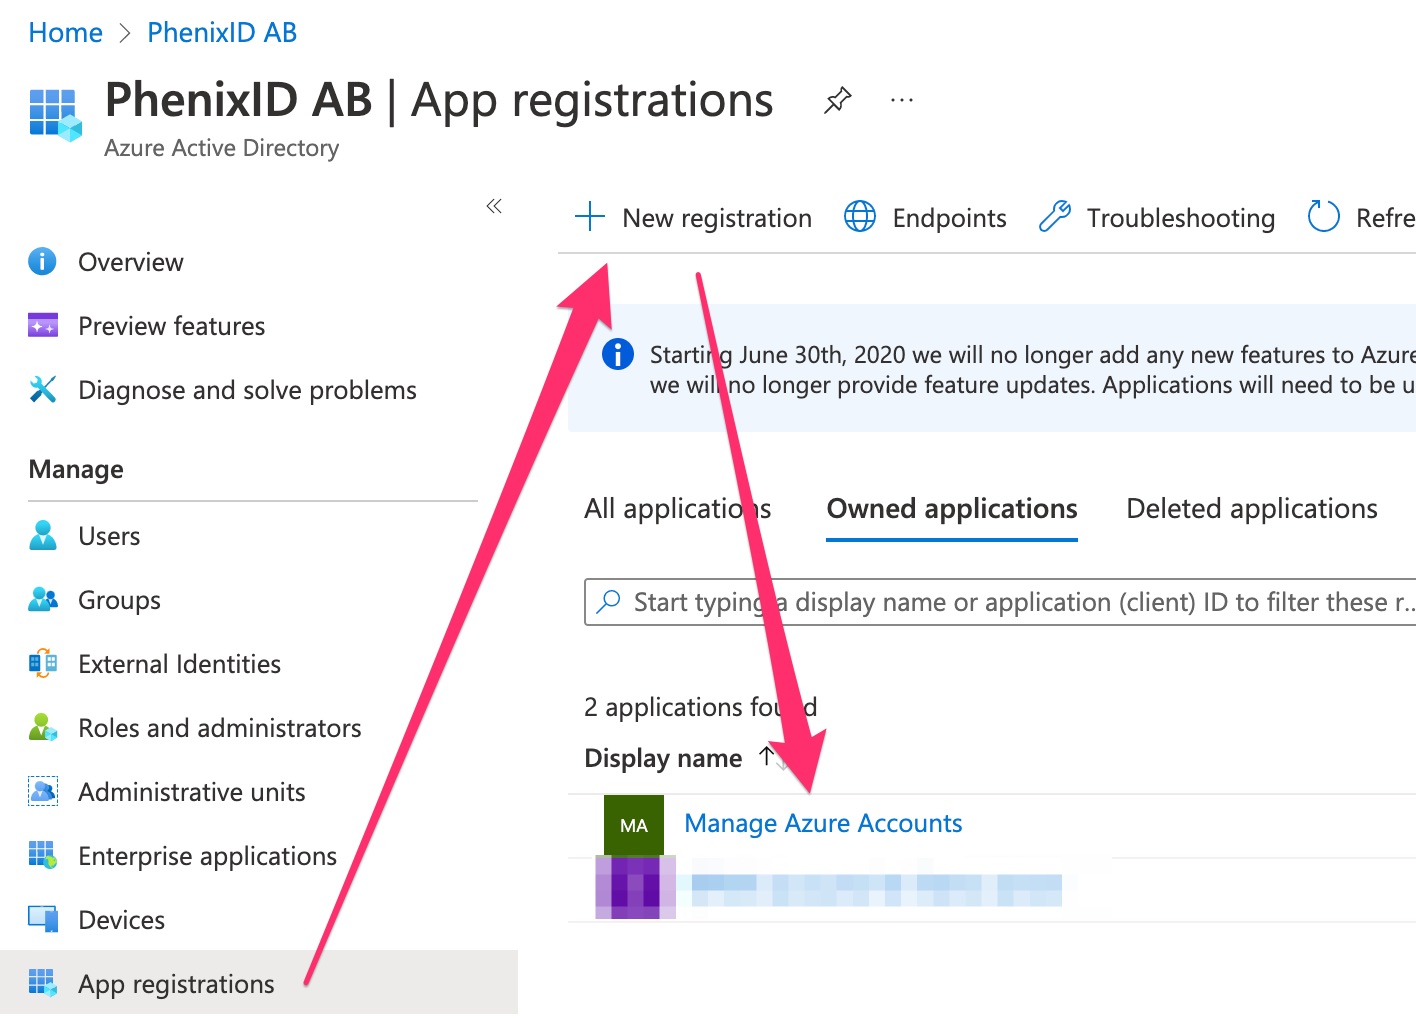
Register an APP for your Azure AD
For this example I have created an app called Manage Azure Accounts
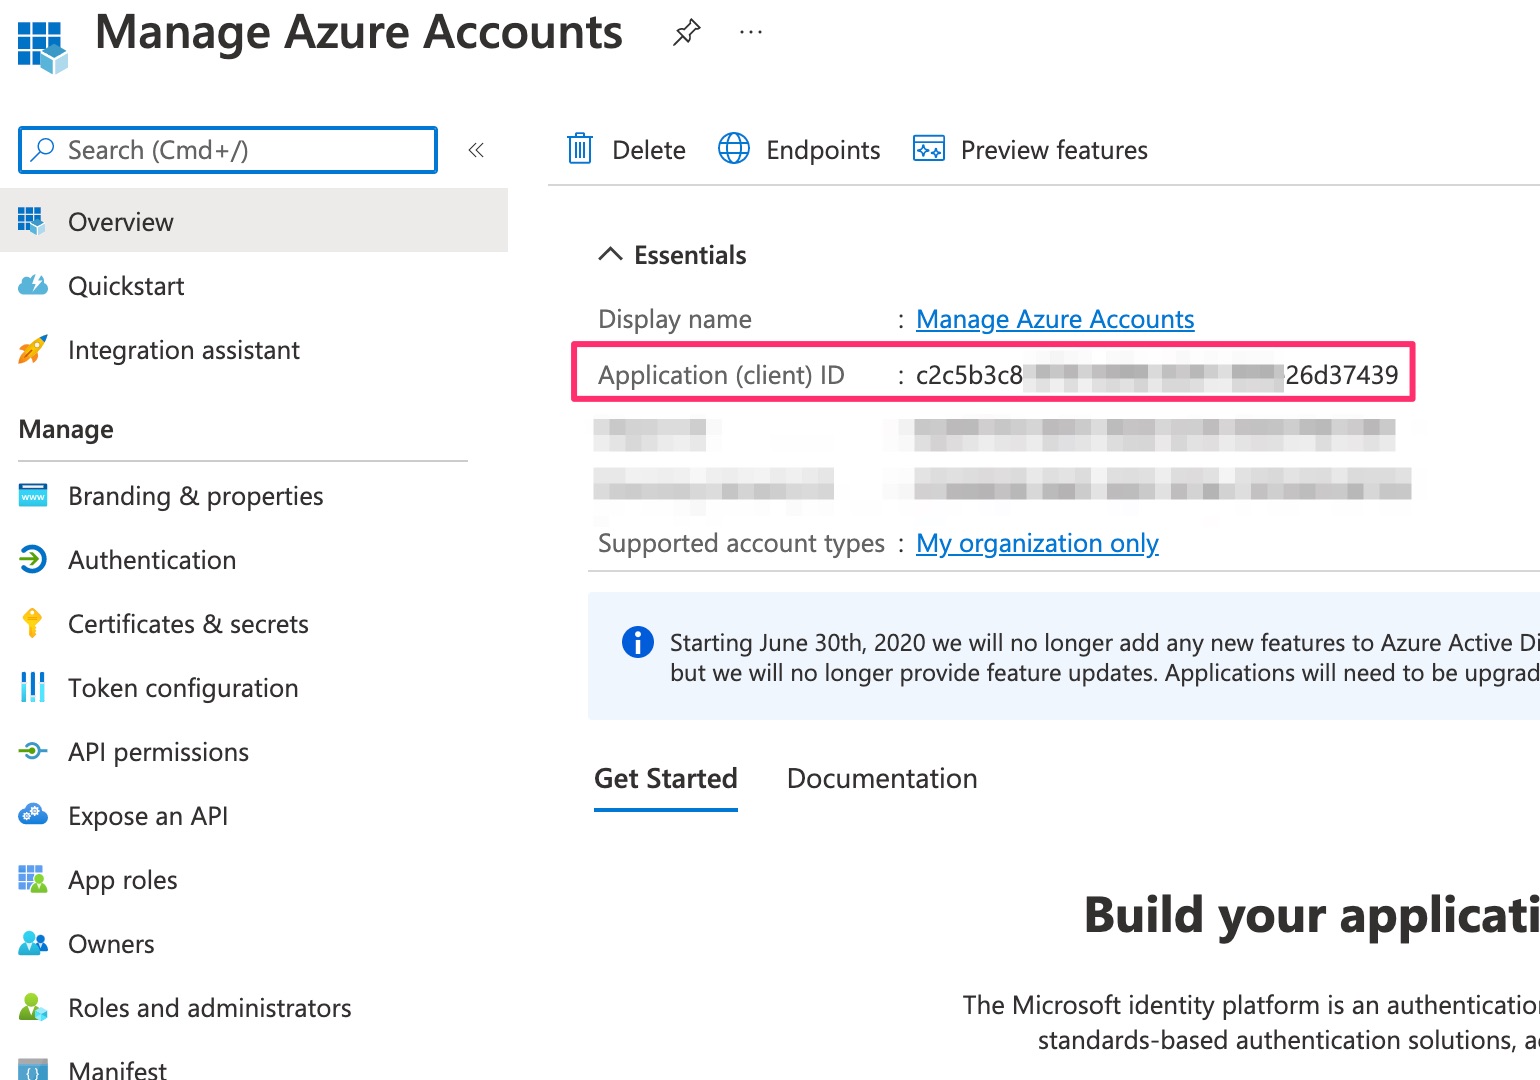
Make a note of your APP ID
Below is where you will find your APP ID, in my case for app Manage Azure Accounts
Create a certificate used to authenticate to Azure AD
I will create a self signed certificate. In a production you might like to have a certificate generated/bought by you organisation. However, regardless of how the certificate is created it will be used to for authentication.
Make a note of the expire date of the certificate and add it to your maintenance plan.
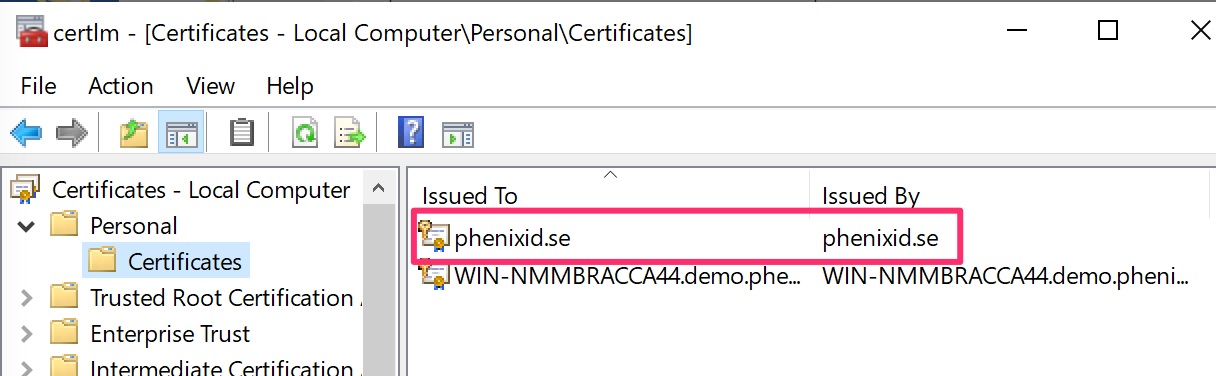
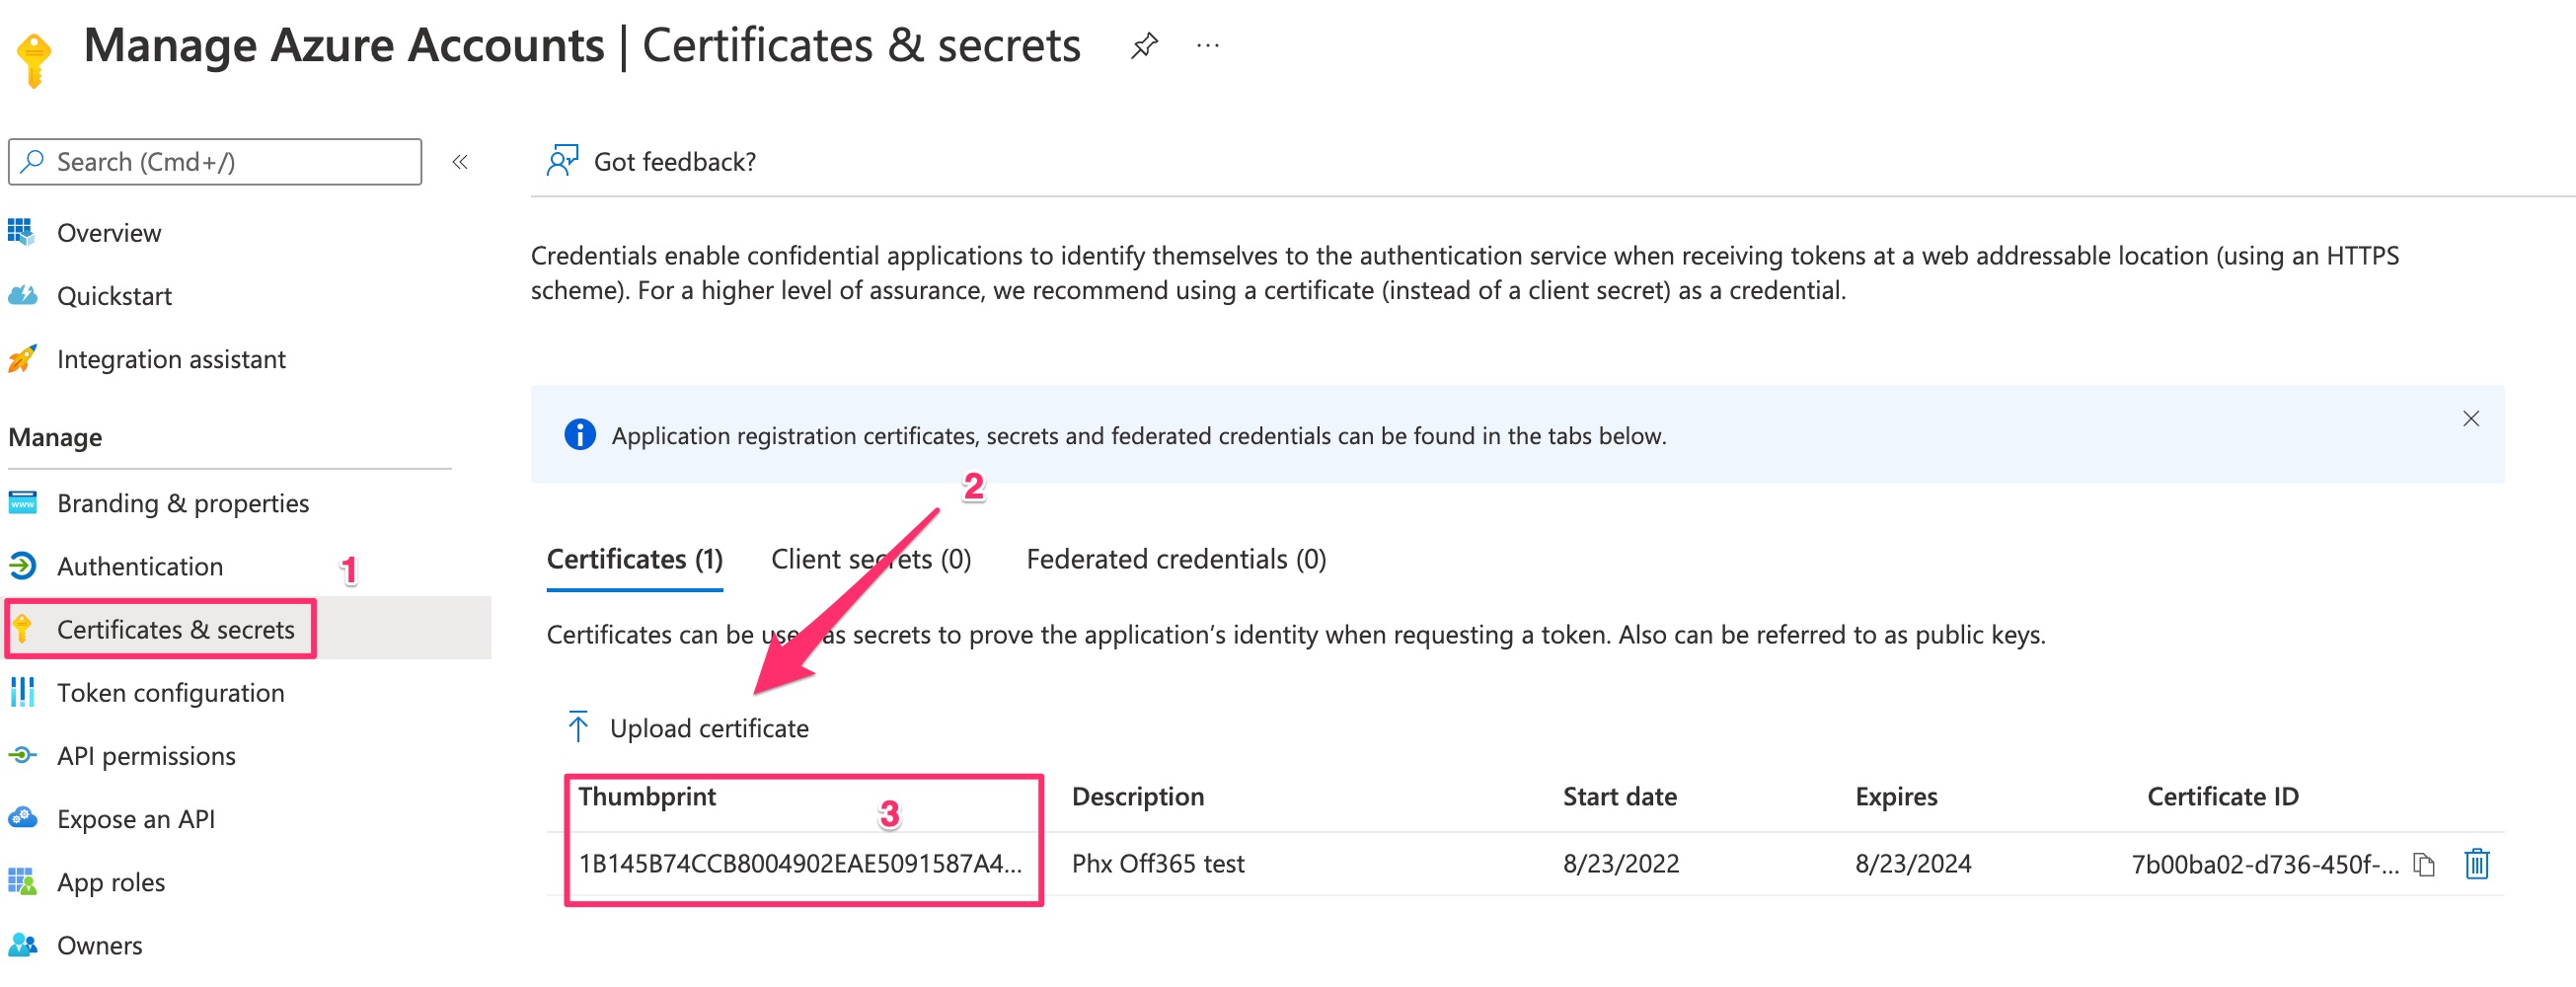
Add the certificate to your Windows server
The certificate should be stored on the server where the script is executed, the PIP server.
There are many ways to create and add a self signed certificate to your Windows server. I will use powershell, see below.
Create an PS1-file and add information below. Change to match your environment and liking.
# Create a self signed cert and add to local user certificate store and a public key on the desktop
$CertParam = @{
'KeyAlgorithm'      = 'RSA'
'KeyLength'         = 2048
'KeyExportPolicy'   = 'NonExportable'
'DnsName'           = 'yourdomain.local'
'FriendlyName'      = 'Manage Azure Accounts'
'CertStoreLocation' = 'Cert:\LocalMachine\My\'
'NotAfter'          = (Get-Date).AddYears(2) }
# Creating self signed cert with parameters from above.
$Cert = New-SelfSignedCertificate @CertParam
# Export and add the certificate to your desktop
Export-Certificate -Cert $Cert -FilePath $Home\Desktop\ManageAzureUser.cer
Above script should now be available in the local certificate store and on your desktop.
Add the public key to the Azure AD APP
Login to your Azure Tenant. Use the public key and add it to your Azure app created above. (the public key was added to the desktop using the script above)
Make a note of the Thumbprint. It will be used in the Powershell script.
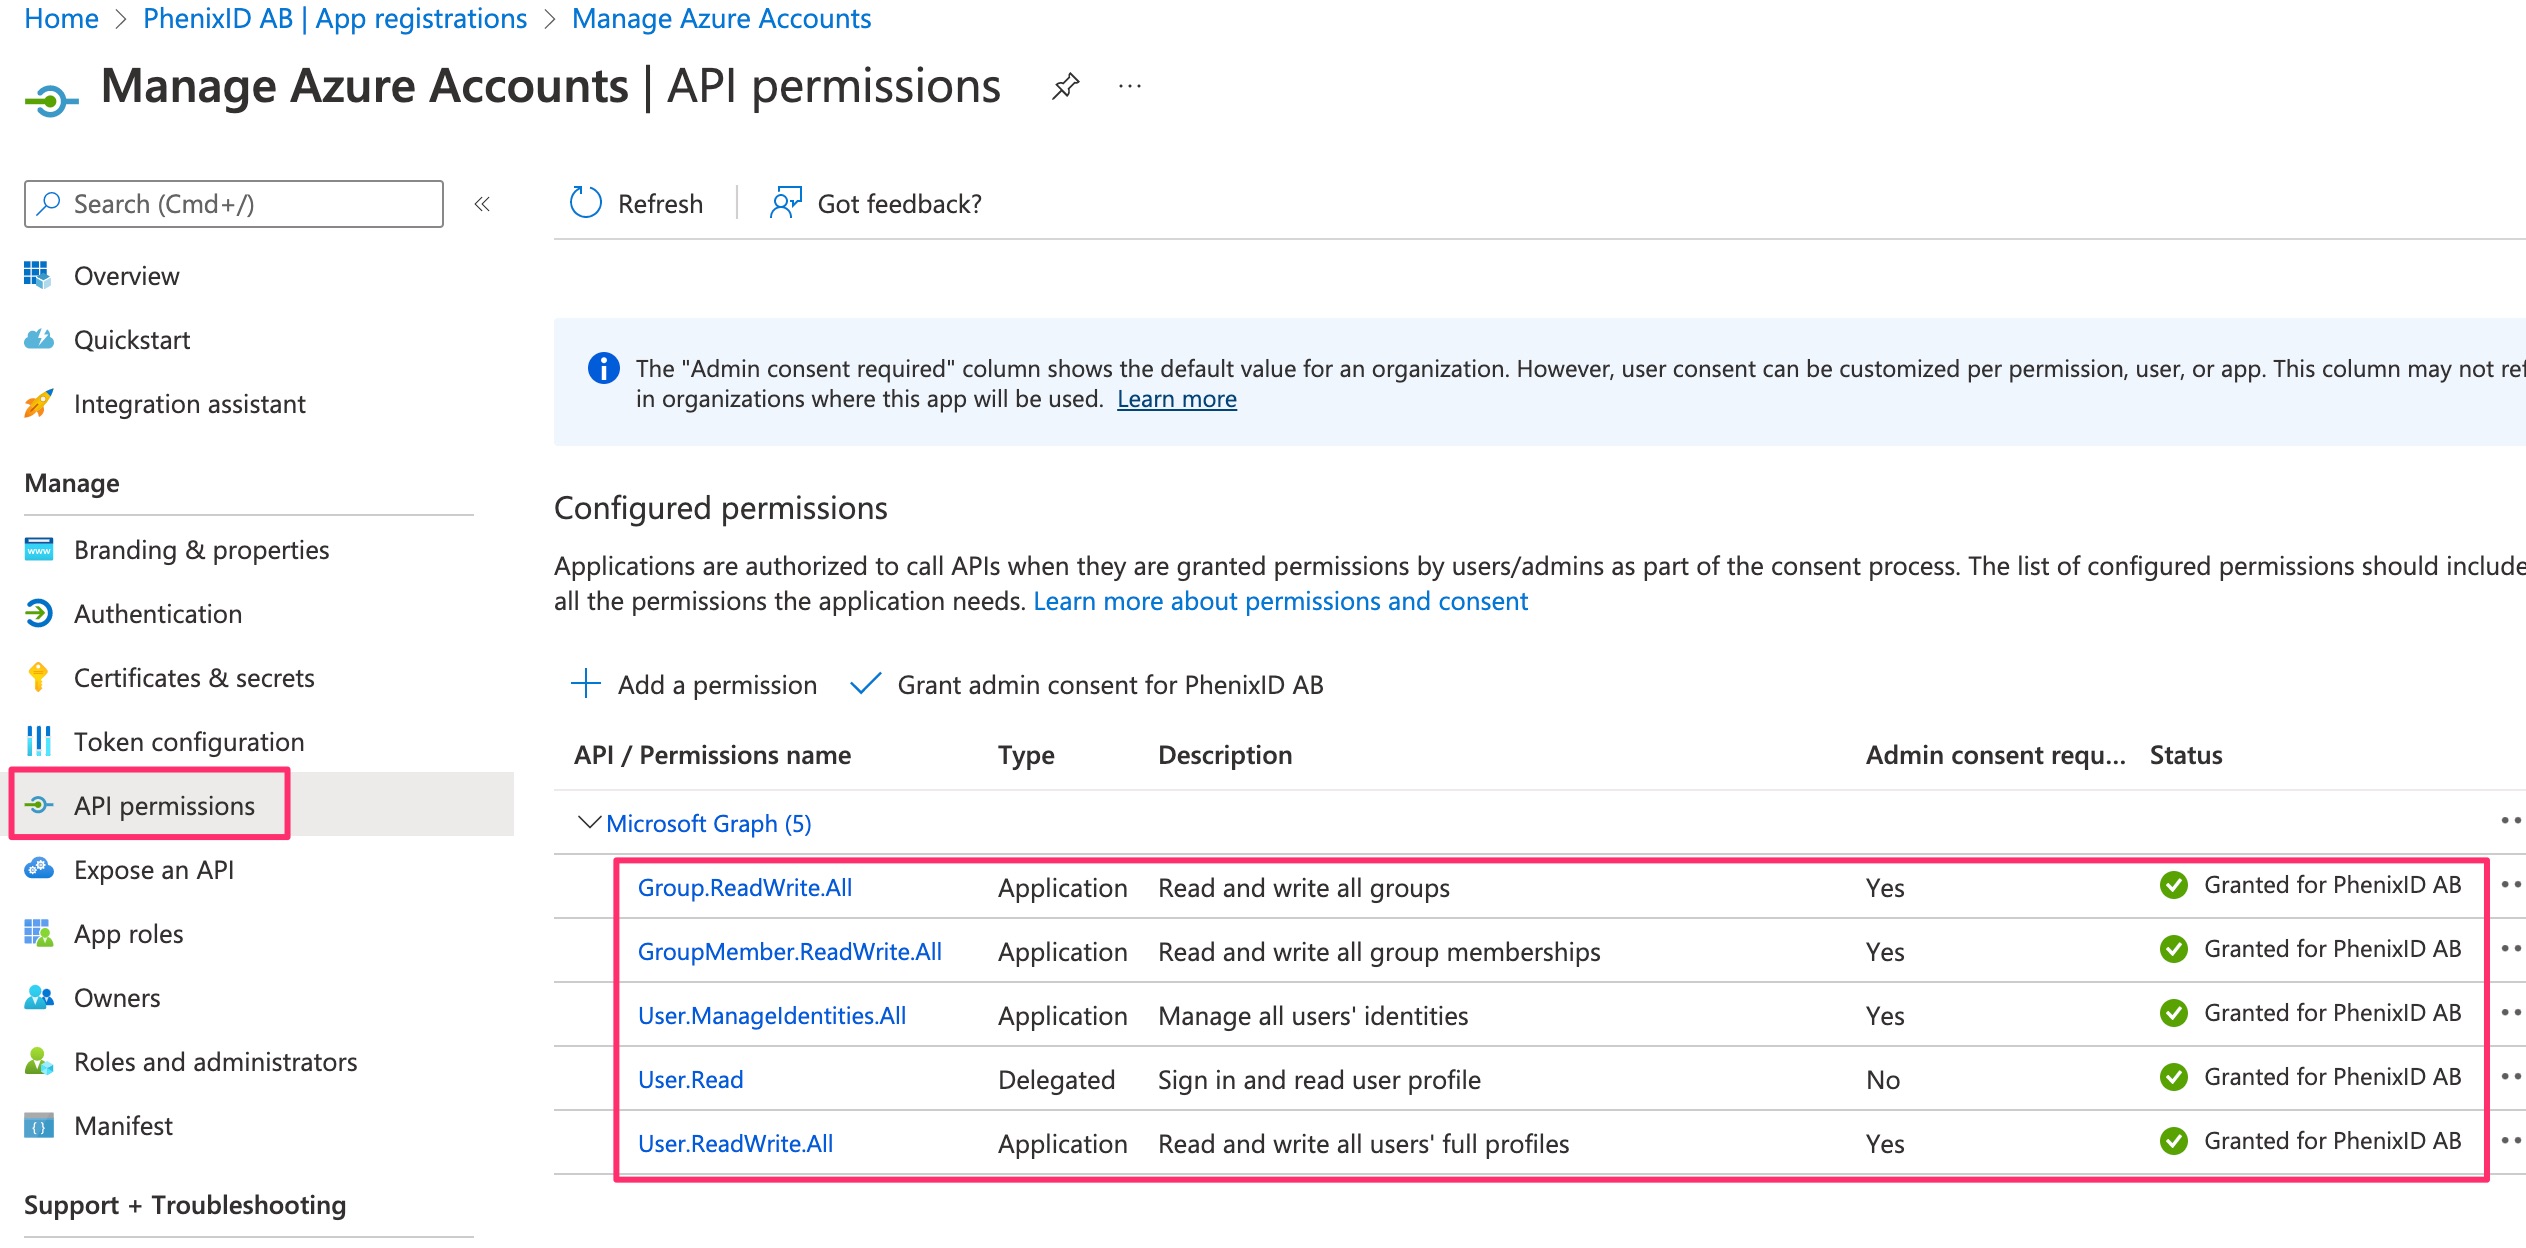
Configure permissions for your APP
The created APP needs to be configured with correct permission for its purpose. Add permissions av screenshot below.
Configure your powershell script
Add the section below to your powershell script and when script is executed it will login to your Azure Tenant app using a certificate. It will also import the Microsoft Graph API module.
# Data to connect to correct Azure tenant, app and using certificate on this machine
# Change AppId, TenantId and ThumbprintId of the certificate to map your environment
$AppId = "your_app_id"
$TenantId = "your_tenant_id"
$Certificate = Get-ChildItem Cert:\LocalMachine\My\your_thumbprint_id
# Authenticate to Microsoft GraphAPI
Connect-Graph -TenantId $TenantId -AppId $AppId -Certificate $Certificate
# Import Microsoft Graph module
Import-Module Microsoft.Graph.Users
#
DISCLAIMER
Information provided in this document is for your information only. PhenixID makes no explicit or implied claims to the validity of this information. Any trademarks referenced in this document are the property of their respective owners.The origin of this information may be internal or external to PhenixID. PhenixID makes all reasonable efforts to verify this information.
PhenixID - support.phenixid.se