IM Developer Guide – Control Filter
About this guide
This document gives an overview of the installation of PhenixID Identity Manager. Additional information is found on PhenixID web site or through PhenixID support.
Summary
This document explains Control Filter in PhenixID Identity Manager. It is assumed reader is familiar with both Identity Manager and Identity Manager Configurator. The document is a part of a collection of documents explaining how to extend and customize Identity Manager. In addition there is also Javadoc and sample code.
Mentioning of abstract base class assumes these are used when developing custom code.
First time readers are recommended to read overview document, IM Developer Overview.
Definition
A Control Filter is linked to an attribute control in an Identity Manager form.
It can for instance format data for a more friendly presentation or validate data before saving it.
A Control Filter has no knowledge of other components residing in the form and can therefore only affect the attribute control it is linked to.
Developing Control Filter
A Control Filter is a Java class. Required source level is version 8. A Control Filter must implement: se.nordicedge.interfaces.ExternalFilter
When developing Control Filter it is recommended that the abstract base class: se.nordicedge.misc.tab.filter.BaseExternalFilter is extended. By doing so, one gets the basic access to variables and instances of classes most used in Control Filter.
A Control Filter has only one method. This method is the one called by IM and must be the one providing the logic.
There are six extension points for a Control Filter. This meaning that the Control Filter may be executed at different times when editing an object. Extension points are also called trigger types when developing Control Filter. Trigger types are more explained under “Trigger types”.
The method developed to do custom logic in a Control Filter may have one of eight signatures:
public String(String inData)
public String(String inData, Vector<String> params)
public String[](String[] inData)
public String[](String[] inData, Vector<String> params)
public byte[](byte[] inData)
public byte[](byte[] inData, Vector<String> params)
public Vector<byte[]>(Vector<byte[]> inData)
public Vector<byte[]>(Vector<byte[]> inData, Vector<String> params)
Which signature to choose depends on what syntax the attribute control has. This is more explained under “Configuration”.
A rule of thumb is that the return type must be the same as the the type of the first parameter in the signature.
Parameter inData is the current value of the attribute control.
The return value is the value the attribute control will have after filter logic is executed.
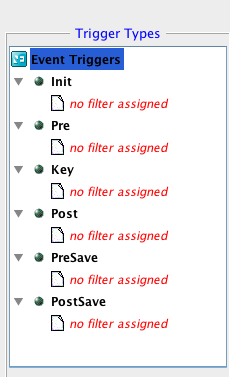
Trigger Types
A Control Filter has six extension points, trigger types. Depending on what kind of logic that is provided, one of the six trigger types must be selected when configuring.
In short the types are:
- Init, executes before the form is showed to the administrator
- Pre, executes just before the attribute control gets focus
- Post, executes just after attribute control loses focus
- Key, executes when attribute control has focus and a key is pressed
- Presave, executes just before any data is saved. This will only execute if data in attribute control is changed
- Postsave, executes just after any data is saved
Message to Administrator
By calling setErrorMessage from Control Filter one can notify administrator. This will create a message dialog whit custom message in.
Stop Execution
In presave trigger type it is possible to stop IM from proceeding with saving data. This is done by returning parameter DO_NOT_SAVE in presave. Combining this with setErrorMessage Control Filter can notify administrator what actions are necessary to take before trying to save data.
Configuration
Linking a Control Filter to an attribute control is done with IM Configurator. The actual java class file must be located in the class path for both the Identity Manager and Identity Manager Configurator since class path is not shared between the two.
Start the Configurator and open the form that has the attribute control which should get the Control Filter logic in the form designer.
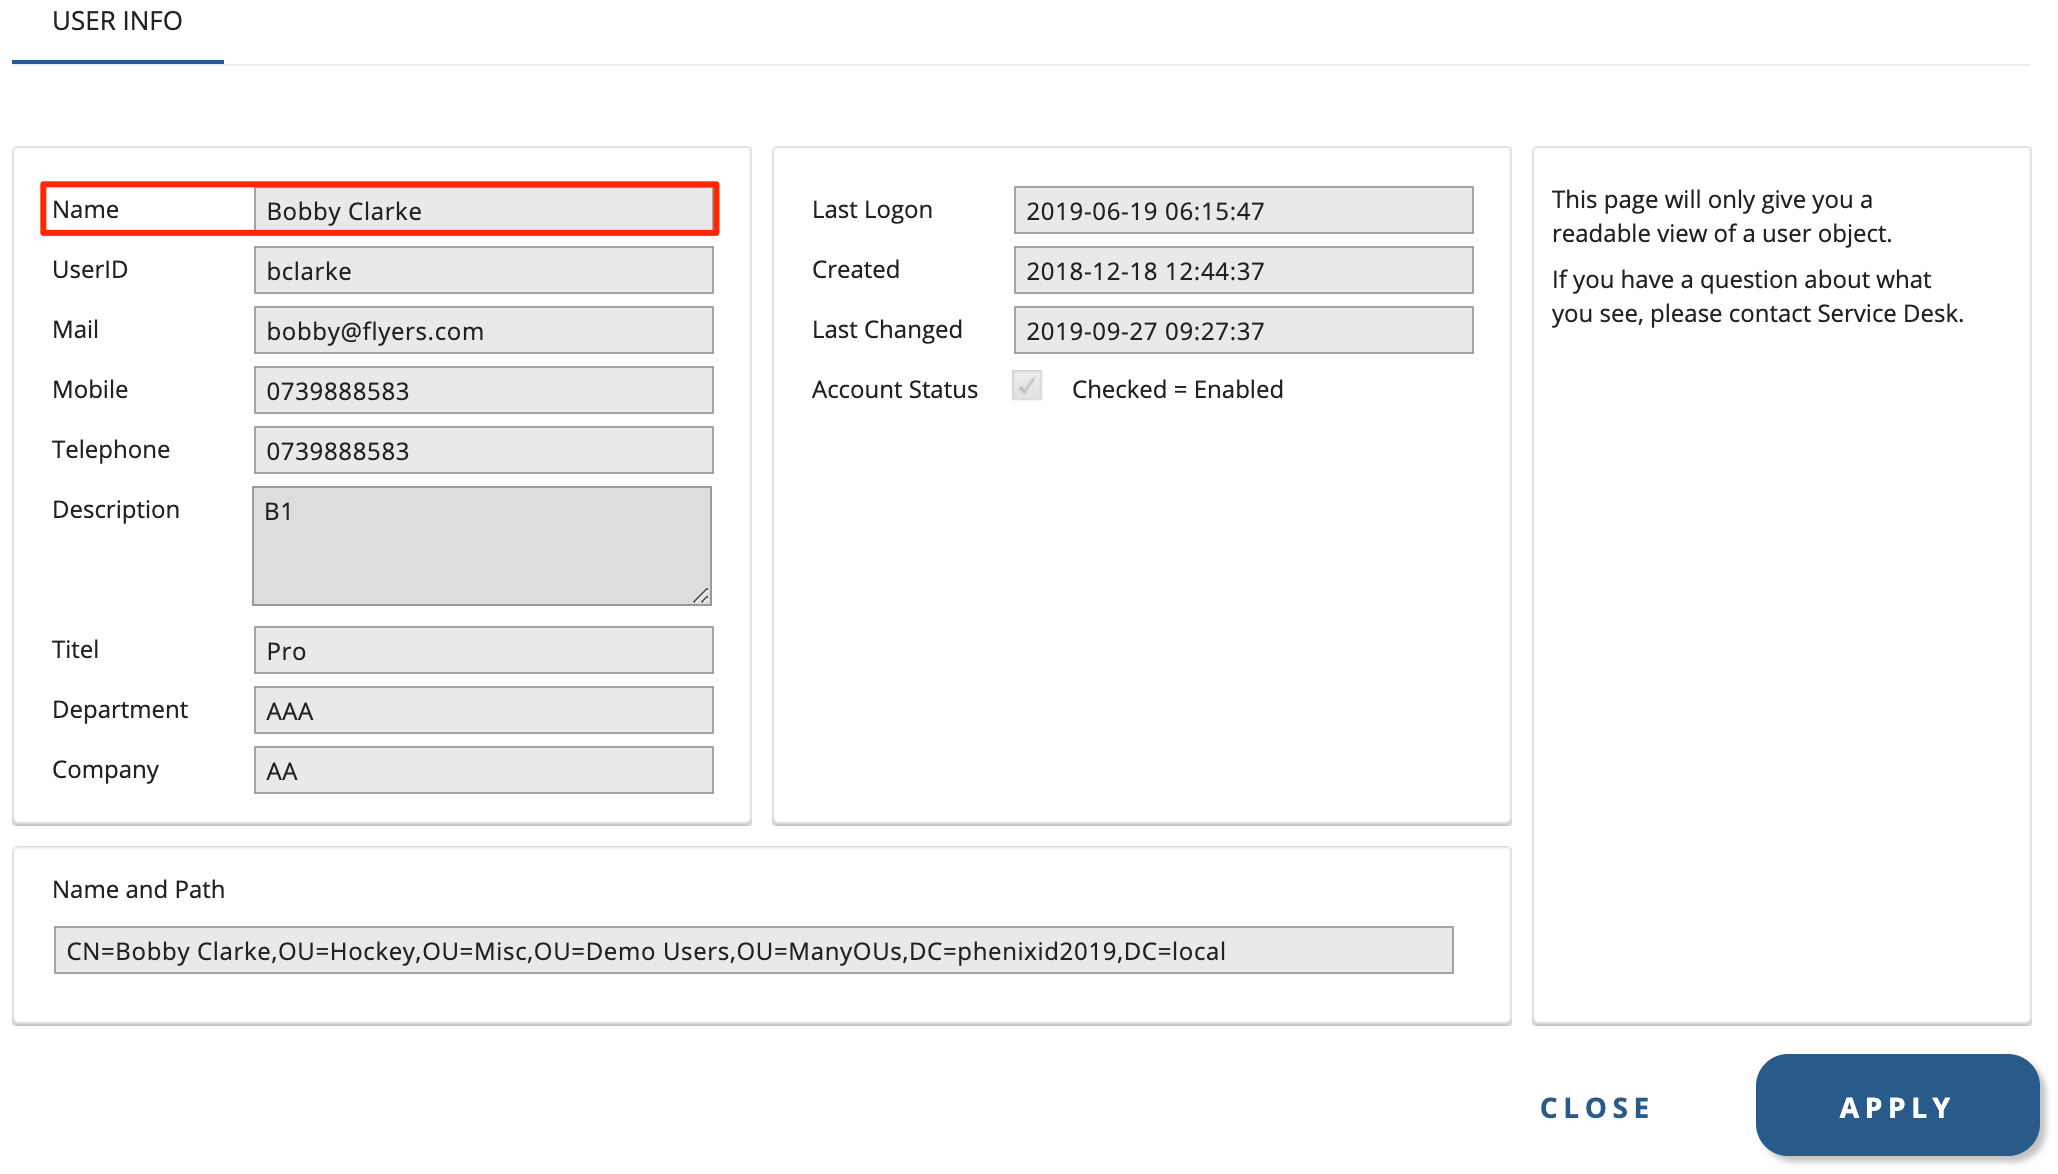
Shown below is how this is done for attribute control givenName:

Since givenName is single value the syntax String is used. This means that the signature for Control Filter must be either:
- public String(String inData)
- public String(String inData,Vector params) – if parameters are sent to the filter.
For multivalued attribute controls, choose String list. IM will then call methods with signature:
- public String[](String[] inData)
- public String(String[] inData,Vector params) – if parameters are sent to the filter.
Binary format should be used when data in attribute control contain binary data. Most common is photo. IM will then call methods with signature:
- public byte[](byte[] inData)
- public byte[](byte[] inData,Vector params) – if parameters are sent to the filter.
For multivalued binary attributes, choose Binary list. The format should be used when data in attribute control contain multivalued binary data. Most common is certificates. IM will then call methods with signature:
- public Vector<byte[]>(Vector<byte[]> inData)
- publicVector<byte[]>(Vector<byte[]> inData,Vector params) – if parameters are sent to the filter.
Click “External Filter” and select a trigger type suitable for your Control Filter:
When selecting a trigger type the right pane of the configuration panel updates:
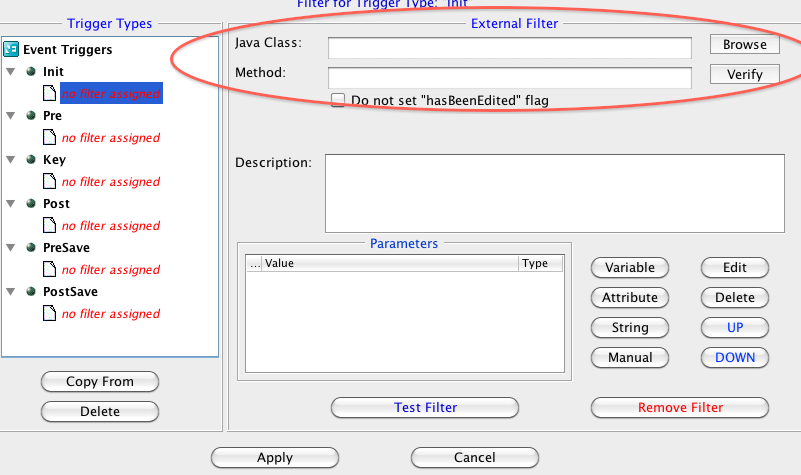
For init, presave and postsave a java class name and method name is required. This can either be typed in or selected by browsing.
If typing, make sure full package name and class name is spelled correctly.
DO NOT use “.class” suffix in name.
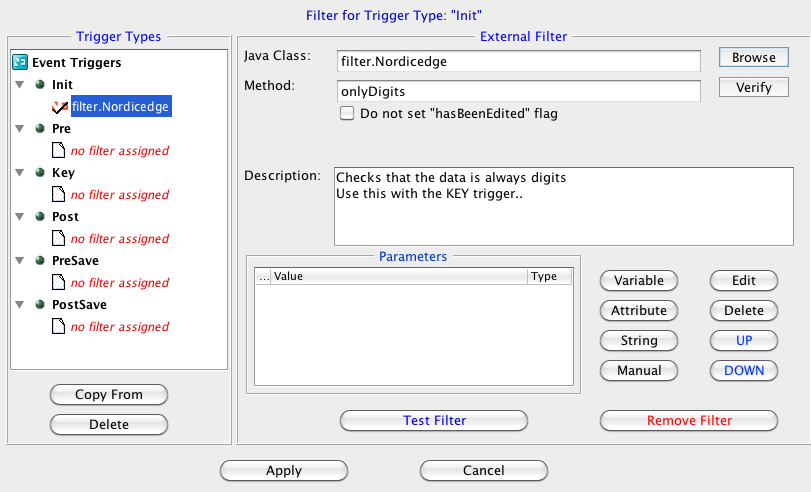
A filter configured for Init trigger type could look like this:
For trigger types pre, post and key the configuration pane looks a bit different:
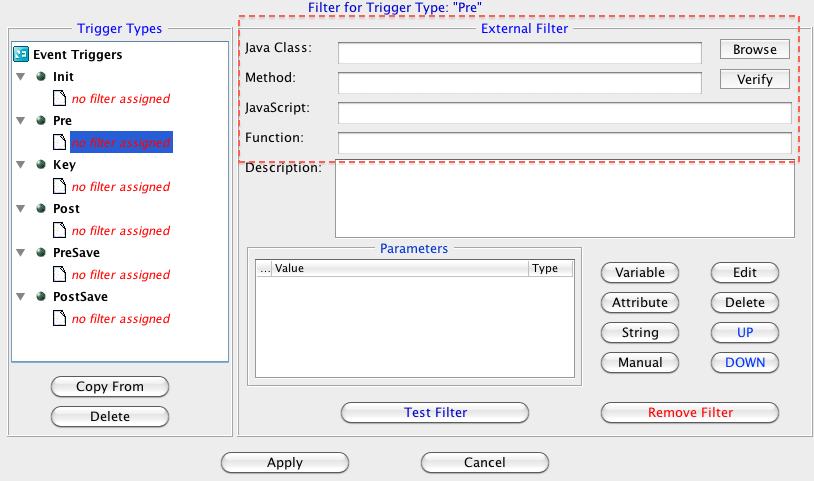
It is possible to enter custom logic both as java class, just as for previous example, and as a javascript. If the control is anything other than a regular text box, a javascript is required.
Configuration may then look like this:

Remember to place “myCustomJavascript.js” under “customer/extension/web/js” directory.
The function, formatGivenName, will be called by IM just before an administrator sets focus on the field representing givenName.
The signature for the formatGivenName should be formatGivenName(htmlObject,params…),
where htmlObject is the DOM object for the attribute control.
For regular textbox the configuration is the same as described in configuration for init trigger type (leave javascript part empty). This meaning the JAVA class provided will be executed.