Summary
This document will guide you through the steps to enable multi-factor authentication and Single-Sign On for AWS Cognito.
System Requirements
- PhenixID Authentication Server 2.8.1 or higher
- Keystore file (p12) to sign tokens
- Amazon Cognito administrator account
- Reverse proxy http server (such as Apache) set up in front of PhenixID Authentication Services
Instruction
Overview
This document will guide you through the steps to enable multi-factor authentication and Single-Sign on for AWS Cognito.
PhenixID Server acting as OpenID Connect Provider (OP)
- Setup PhenixID Authentication Services as an OpenIDConnect Provider (OP) with Authorization Code Flow. Use this documentation guide to set it up. Configure the token endpoint to return both id_token and access_token to the RP.
- Add UserInfo endpoint using this guide.
* Configure the pipe to extract the access_token from the authorization header (Bearer token).
* Configure the userinfo endpoint to return these claims:
– name
– family_name
– sub
– email
– preferred_username
Example pipe configuration:{ "id": "userinfo", "valves": [ { "name": "ItemCreateValve", "config": { "dest_id": "userinfo_props" } }, { "name": "PropertyAddValve", "config": { "name": "authorization", "value": "{{request.Authorization}}" } }, { "name": "PropertyReplaceValve", "config": { "source": "authorization", "dest": "access_token", "token": "Bearer ", "replacement": "" } }, { "name": "SessionResolveValve", "config": { "alias": "{{item.access_token}}", "require_session": "true", "require_auth_session": "false" } }, { "name": "PropertyFromSessionToItem", "config": { "source": "sn" } }, { "name": "PropertyFromSessionToItem", "config": { "source": "givenName" } }, { "name": "PropertyFromSessionToItem", "config": { "source": "email" } }, { "name": "PropertyAddValve", "config": { "name": "sub", "value": "{{session.user_id}}" } }, { "name": "PropertyCopyValve", "config": { "source": "sub", "dest": "preferred_username" } }, { "name": "PropertyCopyValve", "config": { "source": "givenName", "dest": "given_name" } }, { "name": "PropertyCopyValve", "config": { "source": "sn", "dest": "family_name" } }, { "name": "PropertyAddValve", "config": { "name": "name", "value": "{{item.givenName}} {{item.sn}}" } }, { "name": "PropertyRemoveValve", "config": { "name": "access_token,authorization,givenName,sn" } } ], "created": "2017-11-13T09:53:46.595Z" } - Open Configuration Manager
- Click on Advanced->Modules
- Fetch the tenant value you are using from the authentication-api module. Example:

- Go to your http reverse proxy server configuration and add the tenant value as a request header when calls are made to the token and userinfo endpoints. Example for Apache httpd:
<Location /api/authentication/userinfo>
RequestHeader set tenant "myTenant"
</Location>
<Location /api/authentication/collectJWT> RequestHeader set tenant "myTenant" </Location> - Extract the public certificate from the keystore used to sign jwt token. Save it in PEM format.
- Construct JWKS json string for the extracted certificate, using this guide.
- Take the resulting jwks json string and save it to a textfile named “keys”. Place the textfile on your http reverse proxy server in the folder /oidc/<tenant_name> to be publicly accessible from any web browser.
Configure the file to be content-type=application/json.
Example (tenant name is t1):
https://integration.phenixid.se/oidc/t1/keys - Fetch the kid value from the jwks json string.
- Open Configuration Manager
- Advanced->Pipes-><id of your token endpoint pipe>
- Find GenerateJWTTokenValve
- Add kid as a parameter to the valve. Example:
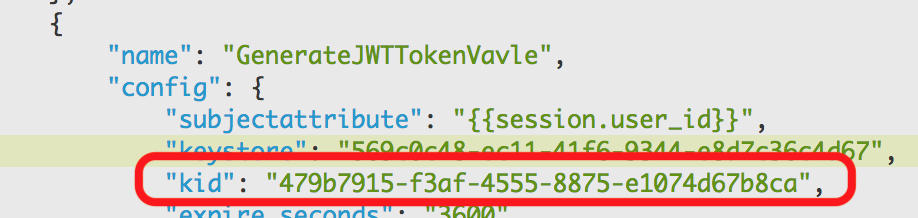
- Click Stage Changes and Commit changes
- Construct OIDC .well-known discovery json data using this guide. Pick the jwks url from step 9 and set it as jwks_uri.
- Save the resulting json to a file named openid-configuration.
- Place the file on the http reverse proxy server.
Place it in the folder oidc/<tenant>/.well-known to be publicly accessible from any web browser.
Configure the file to be content-type=application/json.
Example (tenant name is t1):
https://integration.phenixid.se/oidc/t1/.well-known/openid-configuration
Configure AWS Cognito
- Login to AWS Cognito as an administrator (for your domain)
- Add external Identity Provider of type “OIDC”
- Add required information. Values can be found in the .well-known (see above). client_id and client_password must be given to you by the PhenixID administrator.
Example: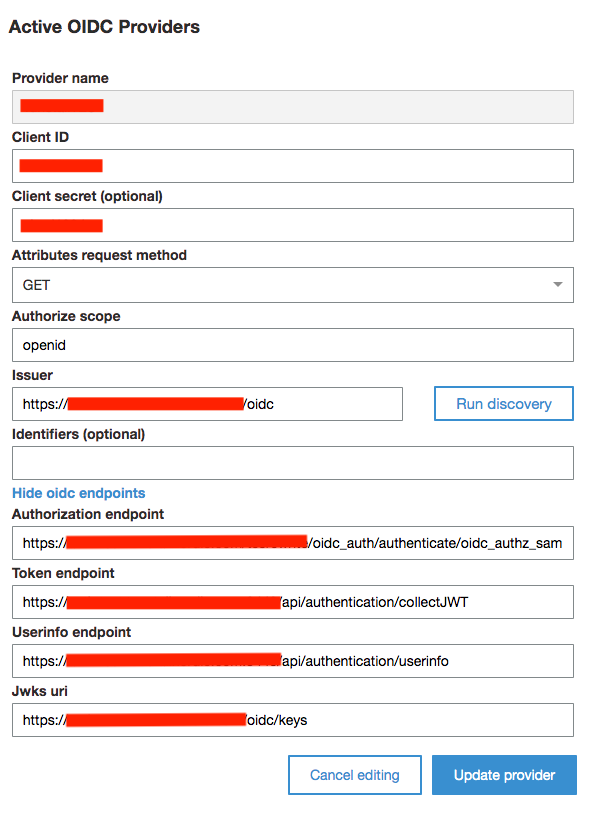
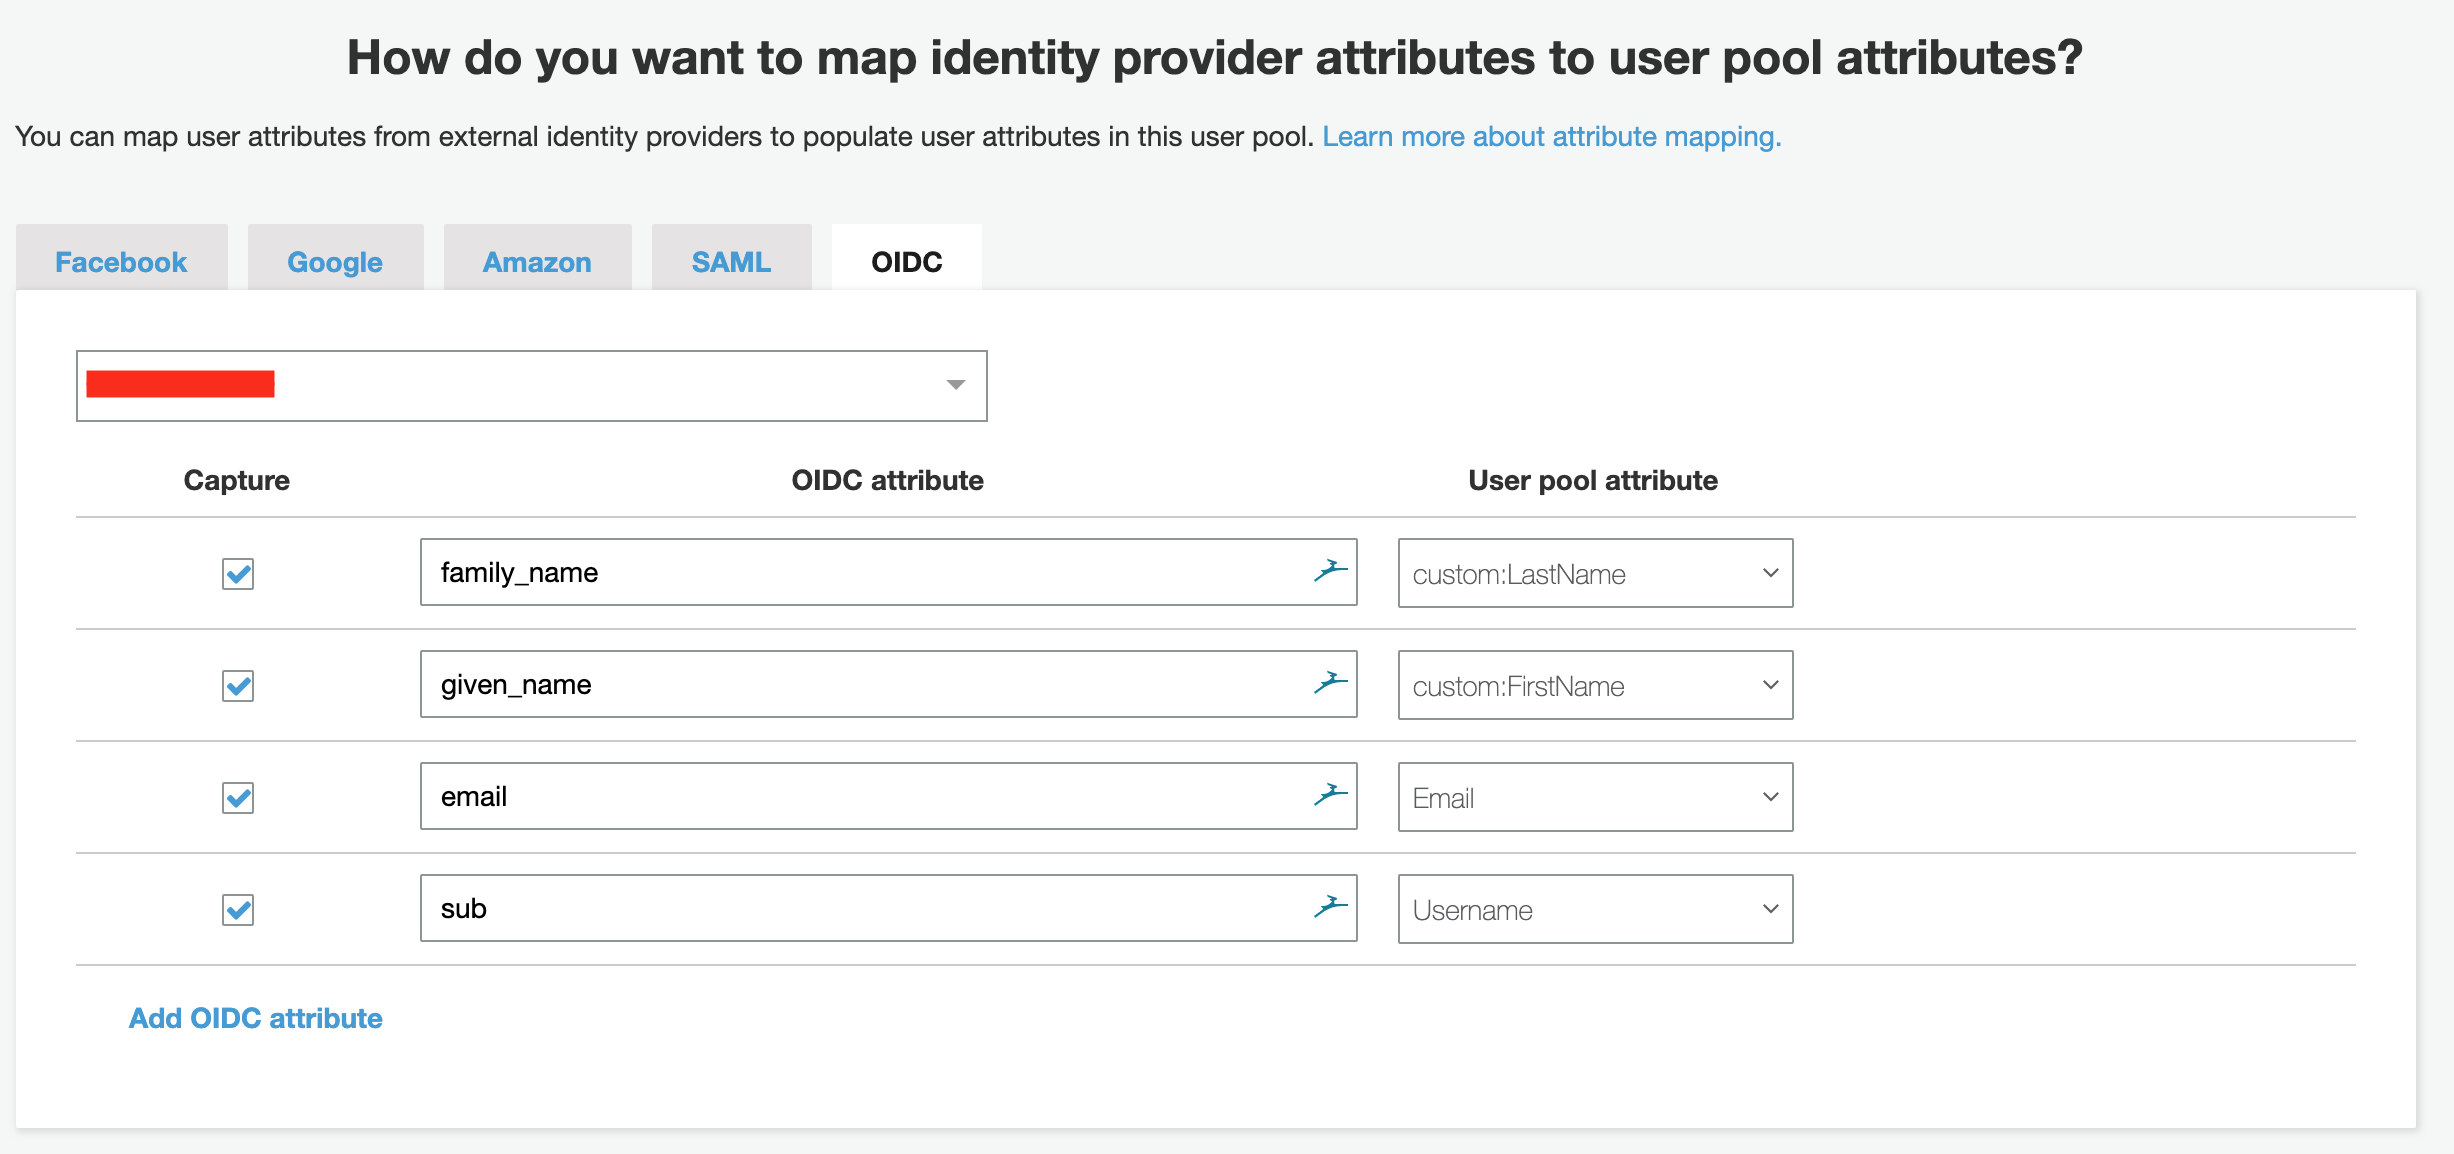
- Add attribute mapping to your newly added OIDC provider.
DISCLAIMER
Information provided in this document is for your information only. PhenixID makes no explicit or implied claims to the validity of this information. Any trademarks referenced in this document are the property of their respective owners.The origin of this information may be internal or external to PhenixID. PhenixID makes all reasonable efforts to verify this information.
PhenixID - support.phenixid.se