Summary
This document will guide you through the steps to enable multi-factor authentication and SSO for Citrix Cloud.
System Requirements
- PhenixID Authentication Services 4.0 or higher
- Citrix Cloud administrative rights.
- Citrix Cloud connectivity to Active Directory (LDAP or cloud connector)
- PhenixID Authentication Services connectivity to Active Directory (LDAP)
Instruction
Configure PhenixID Authentication Services as Identity Provider
- Setup PhenixID Authentication Services as a SAML IdP using one of the Federation scenarios described here. (If the desired authentication method is not provided by a scenario, use the documentation for the SAML authenticator here)
- Go to Scenarios->Federation-><YOUR_IDP>->Execution Flow
- Make the following adjustments:
- Fetch these attributes from Active Directory:
userPrincipalName,givenName,sn,mail,objectSid,objectGUID
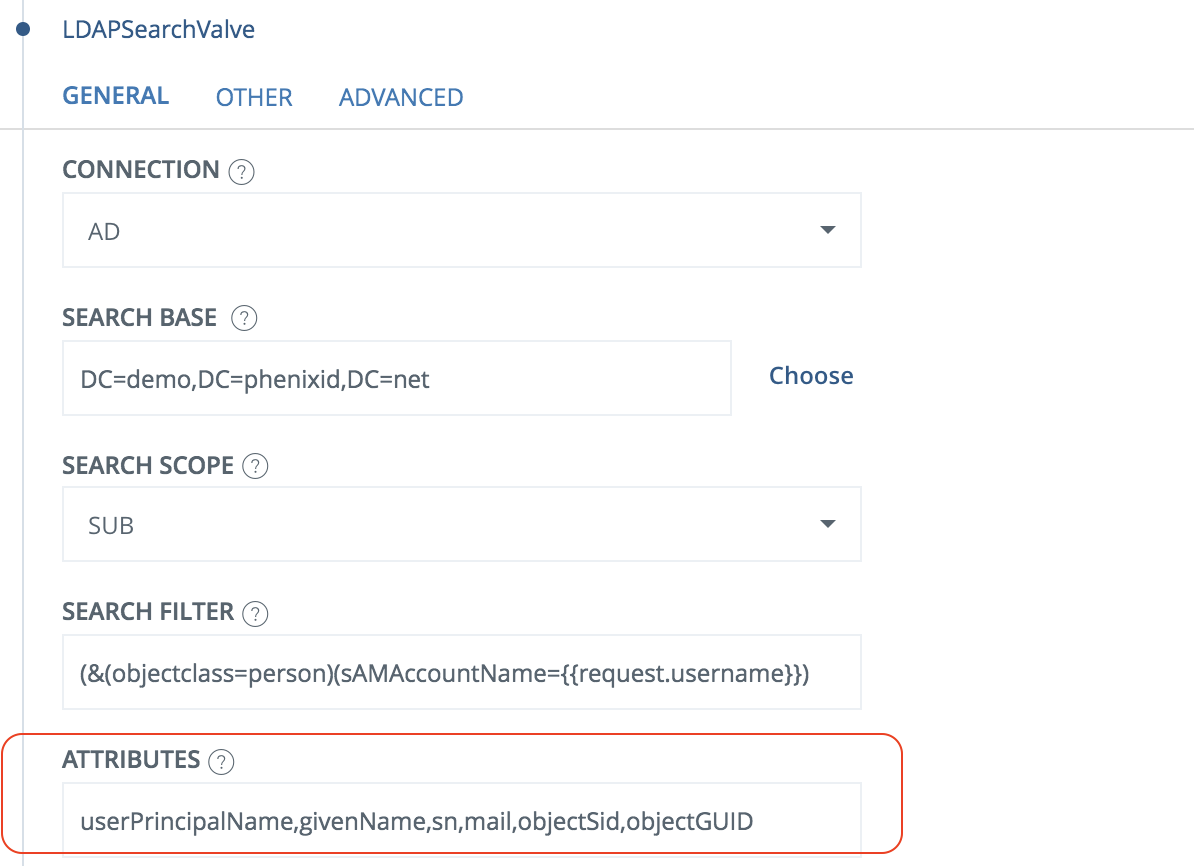
- Add these attributes as binary attributes:
objectSid,objectGUID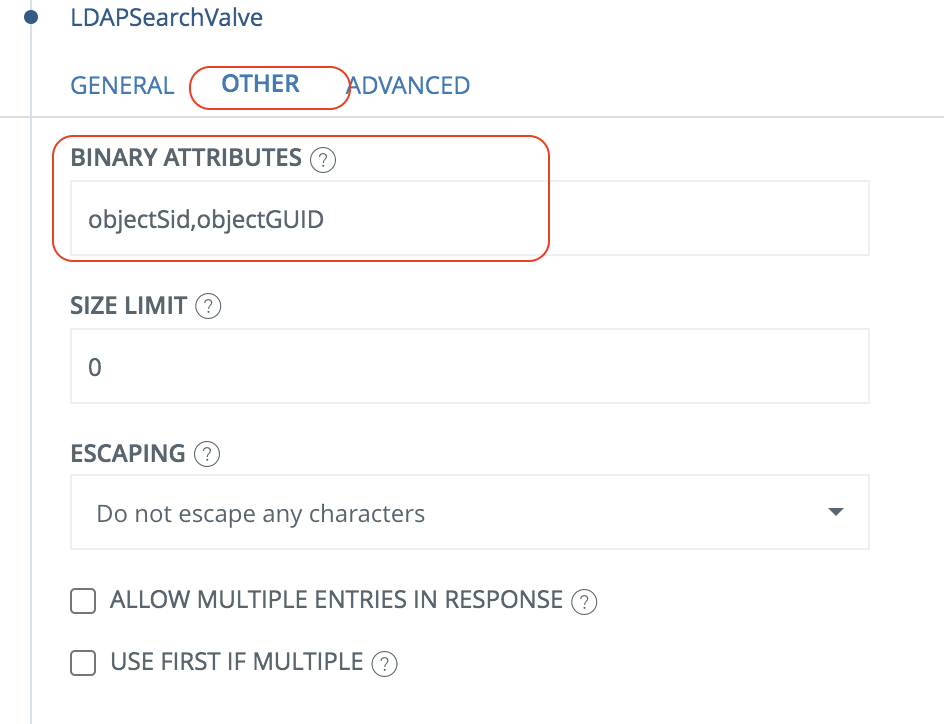
- Click Add valve. Enter PropertySIDBinaryToStringValve. Add these parameters:
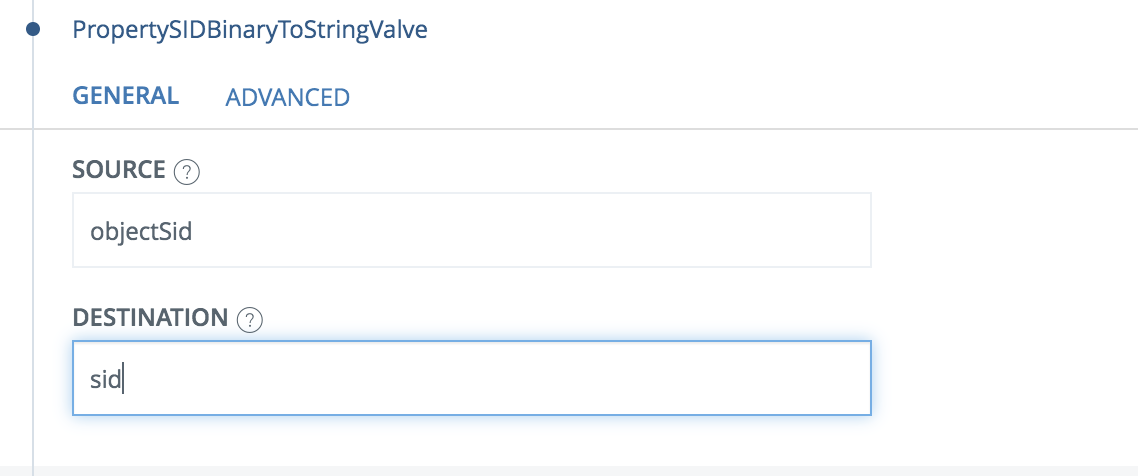
- Move the newly added valve to be executed after LDAPSearchValve.
- Click Add valve. Enter PropertyGUIDBinaryToStringValve. Add these parameters:
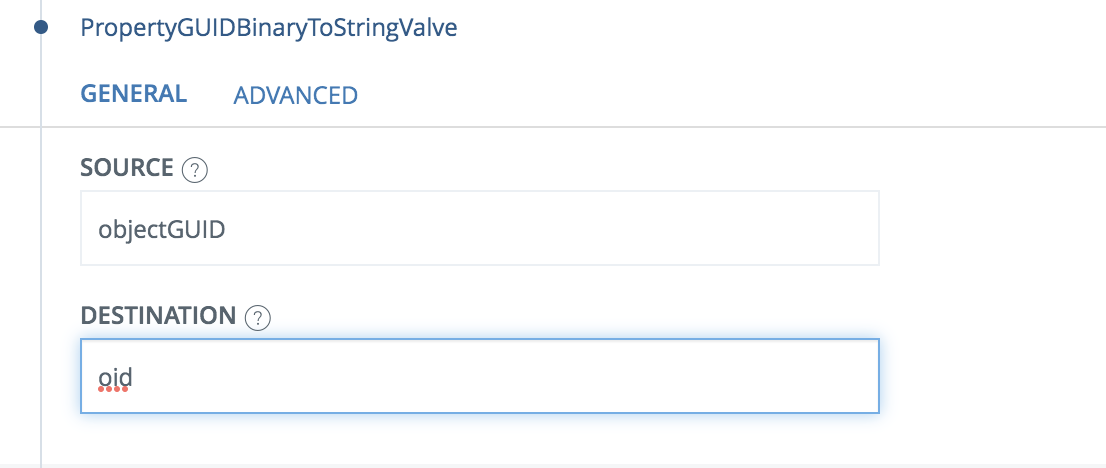
- Move the newly added valve to be executed after LDAPSearchValve.
- Click AssertionProvider
- Set NameID Attribute = userPrincipalName
- Set additional attributes = userPrincipalName,mail,givenName,sn,sid,oid
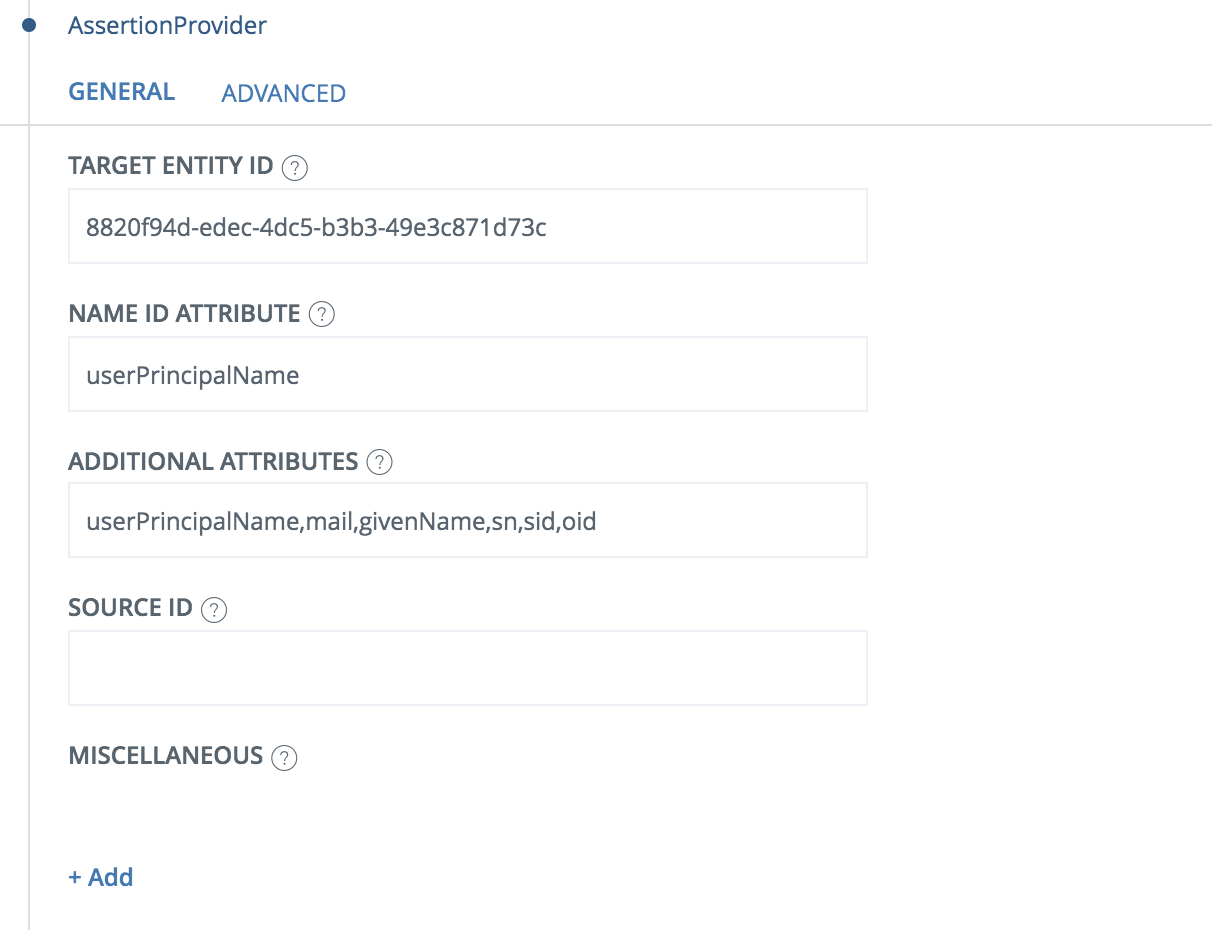
- Fetch these attributes from Active Directory:
- Save.
- Then export your SAML IdP metadata by going to the URL:
https://<YourServerDomainName>/saml/authenticate/<authenticator_alias>?getIDPMeta
and download the metadata to a xml file, idp.xml.
Configure Citrix Cloud
The instruction below is based on the official Citrix documentation. Read the documentation for detailed requirements.
- Follow the steps at https://docs.citrix.com/en-us/citrix-cloud/citrix-cloud-management/identity-access-management/saml-identity.html#configure-the-saml-provider-metadata -> Create a SAML connector application
- Continue with https://docs.citrix.com/en-us/citrix-cloud/citrix-cloud-management/identity-access-management/saml-identity.html#configure-the-saml-provider-metadata -> Add SAML provider metadata to Citrix Cloud :
- Open idp.xml in a text editor
- Copy the entityID value
- Paste the value to the entityID field
- Copy the SingleSignOnService->location value
- Paste the value to the SSO Service URL field
- Select Binding mechanism = POST
- Select SAML Response = Signed response
- Export the IdP SAML Signing certificate to a file by following this instruction.
- Select Upload file and point the the newly created certificate file
- Select Authentication Context = Unspecified / Minimum
- Set Logout URL = https://<idp_domain>/saml/authenticate/logout/
- Set attribute names:
- User Display Name = displayName
- User Given Name = givenName
- User Family Name = sn
- Security identifier = sid
- User Principal Name = userPrincipalName
- Email = mail
- AD Object identifier = oid
- Save the config
- Enable SAML for Workspaces
Add Citrix Cloud as a trusted Service Provider to PhenixID Authentication Services
- Login to configuration manager
- Scenarios->Federation
- SAML Metadata upload
- Enter a name. Click Next
- Add the Citrix Cloud metadata url (currently https://saml.cloud.com/saml/metadata).
(If your PhenixID Authentication Services server is not able to reach external resources, browse to https://saml.cloud.com/saml/metadata on another device and download the metadata to a file. Then upload the file in the SAML Metadata upload scenario).
Test
Browse to your Citrix Cloud instance.
You should be redirected to PhenixID Authentication Services.
Authenticate.
You should be redirected back to Citrix Cloud.
You should now be logged in to Citrix Cloud with the correct permissions.
Debug
Add a SAML message debug tool, such as SAML Tracer, to your web browser.
Enable the SAML message debug tool and perform the authentication again to verify that the SAML message contains all information necessary.
Verify
DISCLAIMER
Information provided in this document is for your information only. PhenixID makes no explicit or implied claims to the validity of this information. Any trademarks referenced in this document are the property of their respective owners.The origin of this information may be internal or external to PhenixID. PhenixID makes all reasonable efforts to verify this information.
PhenixID - support.phenixid.se