Summary
This document will guide you through the steps to provide Single-Sign-On to the Outlook web access (OWA) application using SAML with PhenixID Authentication Services as SAML IdP.
System Requirements
- PhenixID Authentication Services 2.0 or higher
- Microsoft Active Directory
- Active Directory test user with exchange mailbox. userPrincipalName attribute must be set on the test user.
- Test user in LDAP user store. Add attribute on user with corresponding Active Directory userPrincipalName attribute value.
- Microsoft Active Directory Federation Services (ADFS),
- ADFS is only used to translate SAML tickets to WS-Federation tickets (claims)
- Windows Identity Foundation
- Microsoft Exchange 2010 SP2 installed and configured
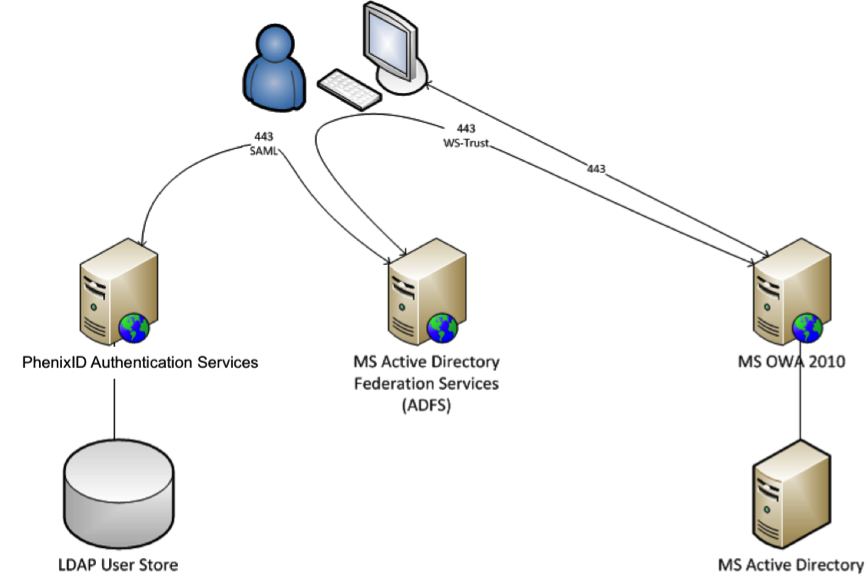
Overview
Instruction
Domains used in this example:
- ADFS domain: https://adfs.phenixid.local
- PhenixID Authentication Services domain: https://phid.phenixid.local:8443
- OWA domain: https://192.168.0.45
- Active directory domain: phenixid.local
- Setup PhenixID Authentication Services as a SAML IdP using one of the Federation scenarios described here. (If the desired authentication method is not provided by a scenario, use the documentation for the SAML authenticator here)
- Configure PhenixID Authentication Services to send userprincipalname as nameID.
- Download SAML IdP Metadata as a file.
- Open ADFS 2.0 Management
- Click “Claim providers”
- Select “Import data about the claims provider from a file”
- Point to downloaded metadata file
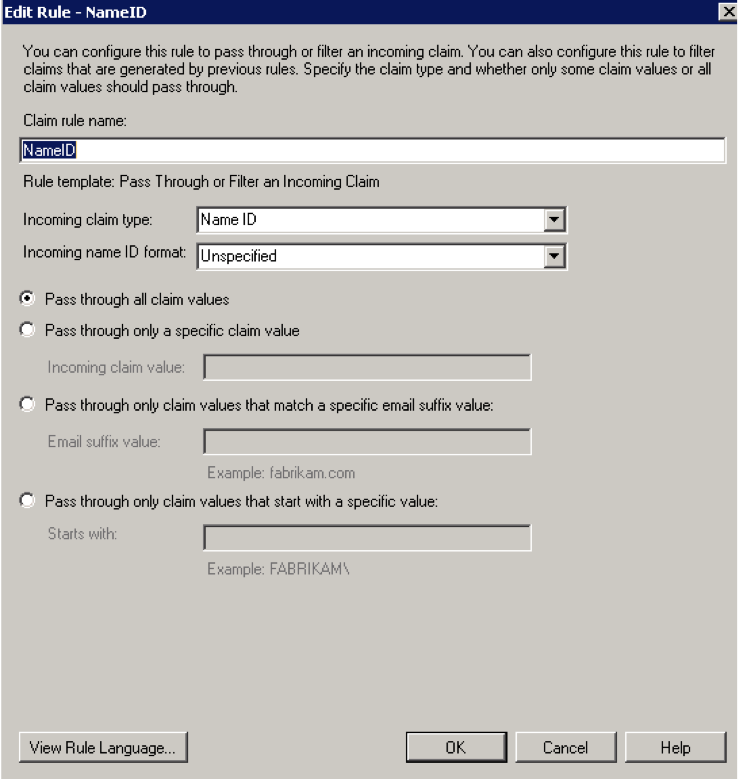
- Add claim rule for Claims provider:
- Click OK.
- Download Windows Identity Foundation (http://www.microsoft.com/en-us/download/details.aspx?id=17331) and install on the MS Exchange server
- Open “C:\Program Files\Windows Identity Foundation\v3.5\c2wtshost.exe.config”
- Unmark “<add value=”NT AUTHORITY\System” />”
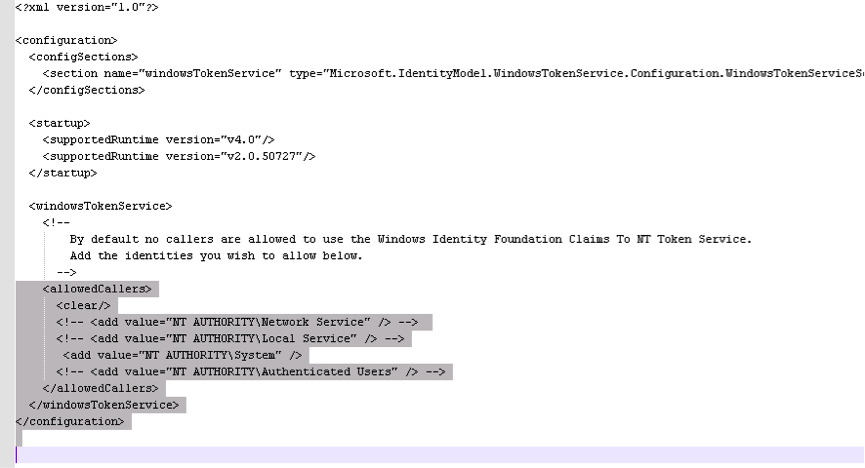
- Save and close the file
- Open “Services” on the MS Exchange server
- Start the service “Claims to Windows token service”
- Open Exchange management console
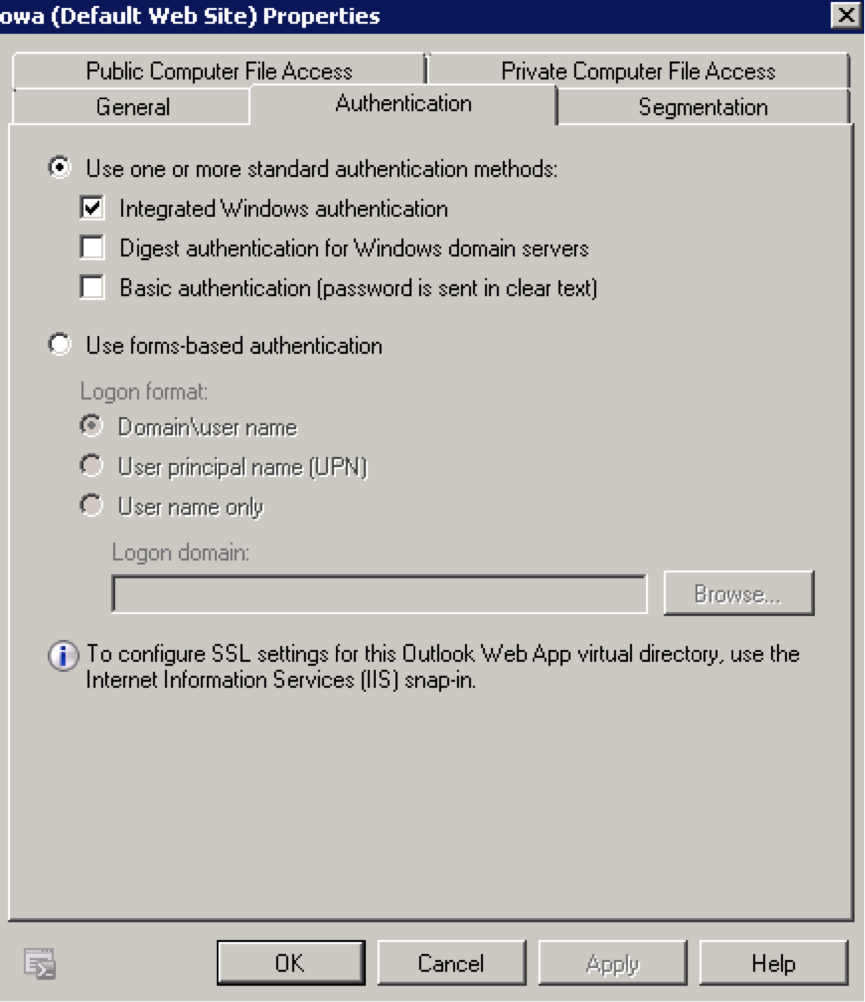
- Go to “Client access”, click “owa (Default web site)” and click “Properties”
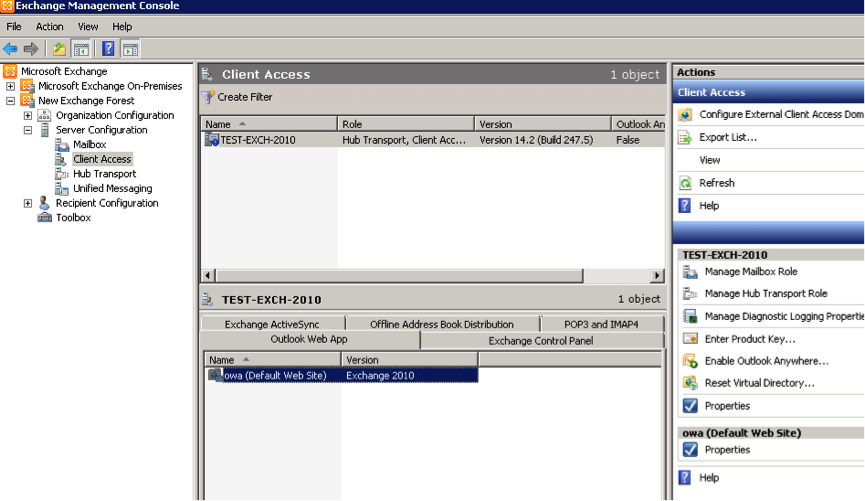
- Click “Authentication” and select “Integrated Windows authentication”
- Download Windows Identity Foundation SDK 3.5 (http://www.microsoft.com/en-us/download/details.aspx?id=4451) and install on the MS Exchange server
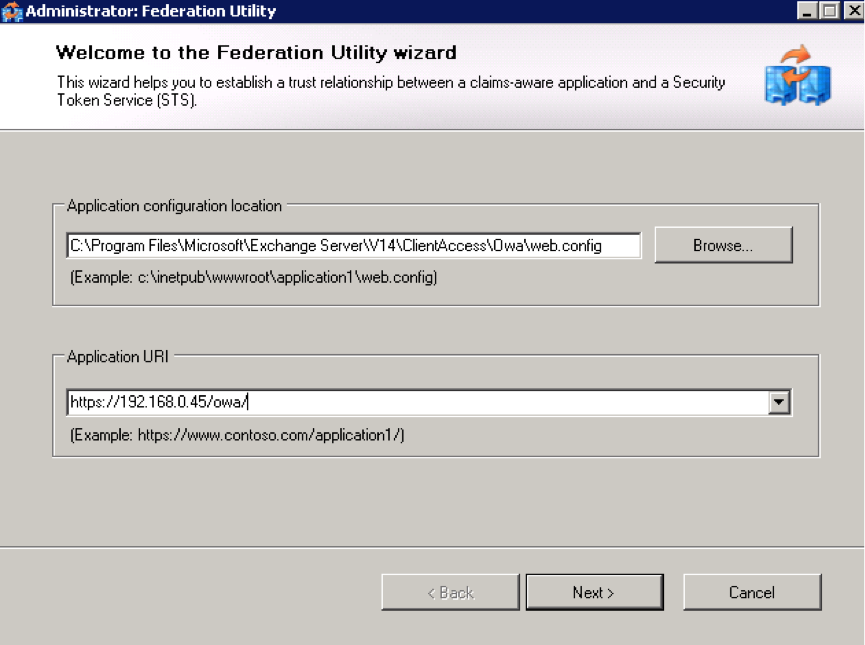
- Run c:\Program Files (x86)\Windows Identity Foundation SDK\v3.5\fedutil.exe
- Point to the OWA web application web.config file. Enter the OWA web application URI
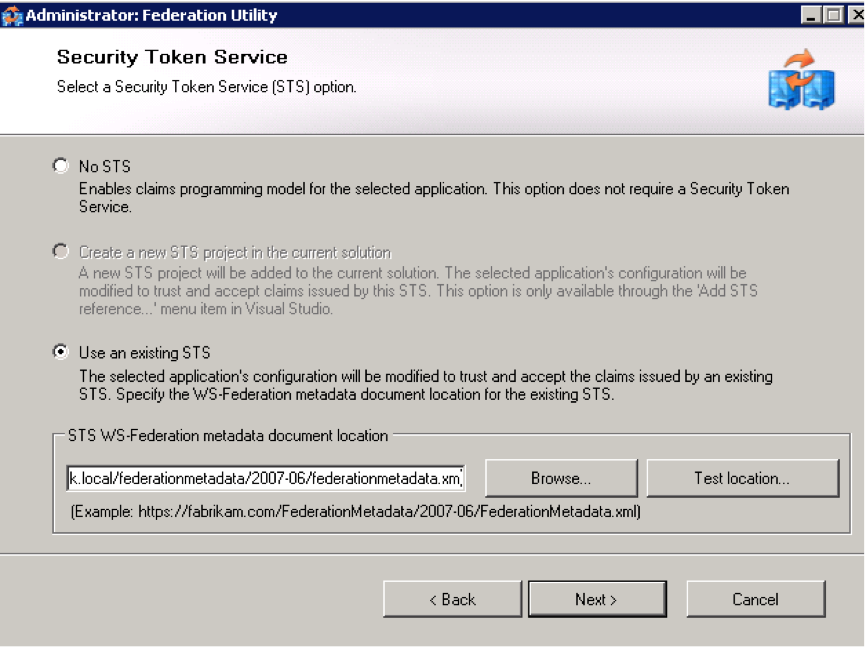
- Select “Use an existing STS”. Enter the federation metadata url to the ADFS server.
(https://<adfs_domain>/FederationMetadata/2007-06/FederationMetadata.xml). In the example below “https://adfs.phenixid.local/FederationMetadata/2007-06/FederationMetadata.xml”.
- Set certificate chain validation according to your environment
- Set encryption value according to your environment.
- Open “C:\Program Files\Microsoft\Exchange Server\V14\Client Access\Owa\web.config”
- Comment out the “<protocolMapping>” tags
- Change WIF modules in configuration –>system.webServer –> modules:
Before<modules>
<add type="Microsoft.Exchange.Clients.Owa.Core.OwaModule, Microsoft.Exchange.Clients.Owa" name="OwaModule" />
<add name="exppw" />
</modules>
After
<modules runAllManagedModulesForAllRequests="true">
<add name="WSFederationAuthenticationModule" type="Microsoft.IdentityModel.Web.WSFederationAuthenticationModule, Microsoft.IdentityModel, Version=3.5.0.0, Culture=neutral, PublicKeyToken=31bf3856ad364e35" preCondition="managedHandler"/>
<add name="SessionAuthenticationModule" type="Microsoft.IdentityModel.Web.SessionAuthenticationModule, Microsoft.IdentityModel, Version=3.5.0.0, Culture=neutral, PublicKeyToken=31bf3856ad364e35" preCondition="managedHandler"/>
<add type="Microsoft.Exchange.Clients.Owa.Core.OwaModule, Microsoft.Exchange.Clients.Owa" name="OwaModule" />
<add name="exppw" />
</modules>
- Force users to be authenticated.
configuration-> system.web –> Change the authorization tag to:<authorization>
<deny users="?"/>
</authorization>
- Enable UPN.
configuration –> system.serviceModel –> bindings –> ws2007FederationHttpBinding –> binding –> security –> message –> claimTypeRequirements. Unmark UPN
<add claimType=”http://schemas.xmlsoap.org/claims/UPN” isOptional=”true” /> - Tell WIF to create a Windows Token instead of passing the SAML token to OWA.
microsoft.identityModel –>service-> Add<securityTokenHandlers>
<add type="Microsoft.IdentityModel.Tokens.Saml11.Saml11SecurityTokenHandler, Microsoft.IdentityModel, Version=3.5.0.0, Culture=neutral, PublicKeyToken=31bf3856ad364e35">
<samlSecurityTokenRequirement mapToWindows="true" useWindowsTokenService="true"/>
</add>
</securityTokenHandlers>
Tell WIF to redirect users to your STS /ADFS:
microsoft.identityModel –>service-> Add<federatedAuthentication>
<wsFederation passiveRedirectEnabled="true" issuer="https://adfs.phenixid.local/adfs/ls/" realm="https://192.168.0.45/owa/" requireHttps="true"/>
<cookieHandler requireSsl="true"/>
</federatedAuthentication>
- Save and close web.config.
- Restart iis on the MS Exchange server by opening a command prompt and enter “iisreset”.
- Copy “C:\Program Files\Microsoft\Exchange Server\V14\ClientAccess\Owa\FederationMetadata\2007-06\FederationMetadata.xml” to your ADFS server.
- Open ADFS 2.0 Management
- Click “Relying party trust”
- Click “Add relying party trust”
- Select “Import data about the relying party from a file”
- Point to the file copied in previous step
- Add the following to Rules:
Pass Through or Filter an Incoming Claim –> UPN
Incoming claim type: UPN
Transform an Incoming Claim –> NameID –> UPN
Incoming claim type: NameID.
Incoming nameid format: unspecified.
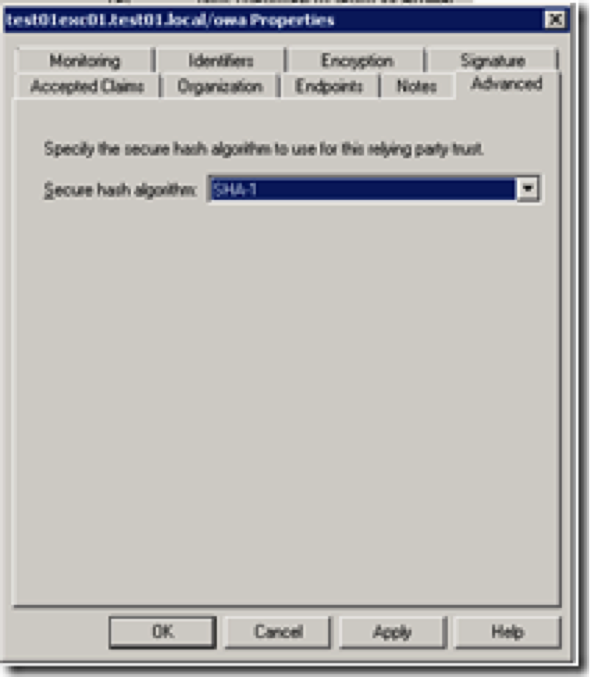
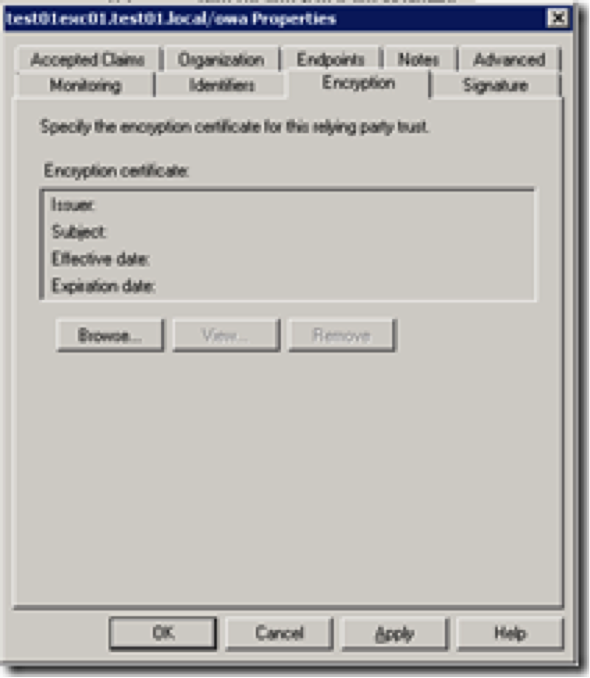
Outgoing claim type: UPN - Open properties for your new relying part and change –> Advanced SHA-1
- Encryption,. remove it ( if the WIF wizard forced you to choose one )
- EndPoints –> Add a WS-Federation endpoint
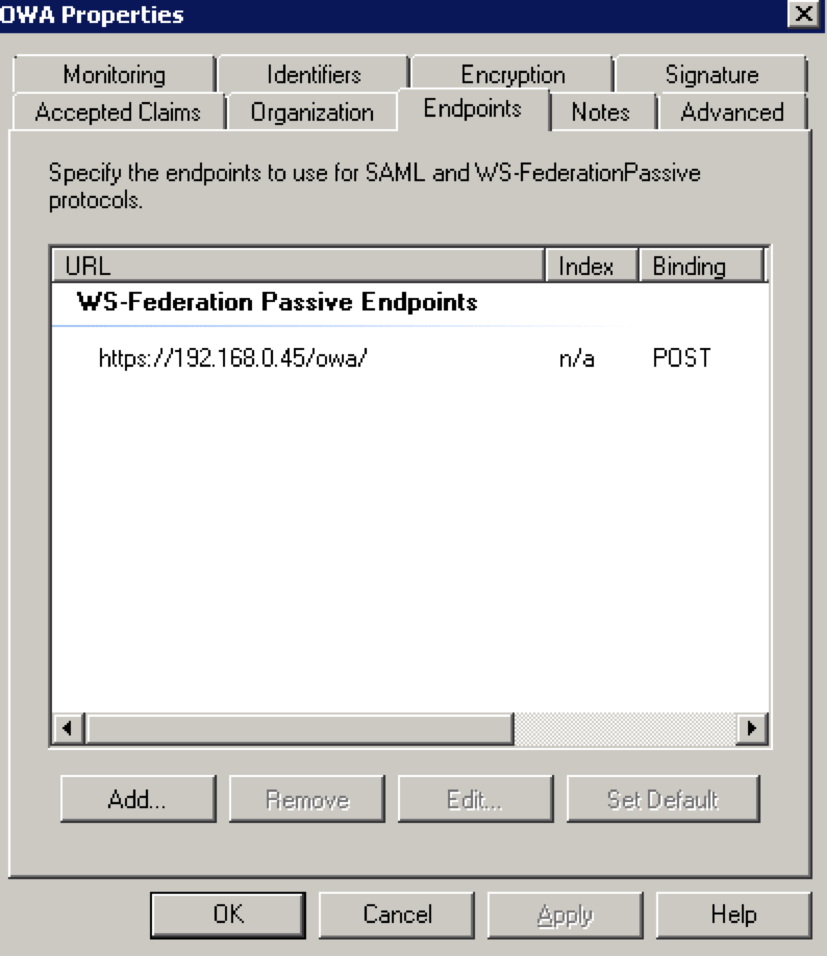
- Done!
- Test by browsing to owa: https://192.168.0.45/owa/
- This should result in a redirect to ADFS web page with selection of organizations (IdPs).
- Select the Claims provider ID added in previous step
- This should result in a redirect to PhenixID Authentication Services authentication page
- Authenticate with test user
- This should result with a redirect to ADFS (no user interaction needed) and then another redirect to OWA. User is logged in!
Example, Idp pipe in PhenixID Server
{
“id”: “pipeunpwrdweb_demo”,
“valves”: [
{
“name”: “LDAPSearchValve”,
“config”: {
“connection_ref”: “MyAD”,
“base_dn”: “DC=demo,DC=phenixid,DC=net”,
“scope”: “SUB”,
“size_limit”: “0”,
“filter_template”: “(&(objectclass=*)(sAMAccountName={{request.username}}))”,
“attributes”: “userPrincipalName”
}
},
{
“name”: “LDAPBindValve”,
“config”: {
“connection_ref”: “MyAD”,
“password_param_name”: “password”,
“skip_if_expr”: “request.authenticatedrequest==’true'”
}
},
{
“name”: “AssertionProvider”,
“config”: {
“targetEntityID”: “PhenixID_IdP_RDWEB_DEMO”,
“nameIDAttribute”: “userPrincipalName”,
“sourceID”: “http://adfs.demo.phenixid.net/adfs/services/trust”,
“misc”: {
“excludeSubjectNotBefore”: “true”
},
“audienceRestriction”: “http://adfs.demo.phenixid.net/adfs/services/trust”
}
}
]
}
Test
- Browse to https://<rd_web_server>/RDWeb/Pages/
- This should result in a redirect to ADFS server
- Select organization on ADFS server
(This step can be removed by configuration, https://authenticationfactor.wordpress.com/2014/06/18/adfs-3-0-playing-with-authentication/ -> Force specific Claims Provider(s) per relying party) - This should result in a redirect to PhenixID Authentication Server
- Authenticate
- If authentication was successful, a redirect to ADFS should occur (with SAML assertion)
- A redirect to RDWeb should occur
Troubleshooting tips
Verify trust between ADFS and PhenixID Authentication Services
- Browse to https://<adfs_server>/adfs/ls/idpinitiatedsignon.aspx
- Click Sign in
- Select organization
- This should result in a redirect to PhenixID Authentication Server
- Authenticate
- If authentication was successful, a redirect to ADFS should occur (with SAML assertion)
- ADFS should present “You are signed in”
The file web.config
There are some changes being made to the file web.config.
If there is something wrong in the file, a 500 message will be dislayed.
To see more information about the issue, please use Microsoft Internet Explorer.
DISCLAIMER
Information provided in this document is for your information only. PhenixID makes no explicit or implied claims to the validity of this information. Any trademarks referenced in this document are the property of their respective owners.The origin of this information may be internal or external to PhenixID. PhenixID makes all reasonable efforts to verify this information.
PhenixID - support.phenixid.se