Summary
This document will guide you through the steps to secure the authentication of Microsoft Remote Desktop Services with PhenixID Server, delivering two-factor authentication using PhenixID One Touch.
System Requirements
- PhenixID Server 3.2 or later installed.
- One Touch authentication enabled:
http://document.phenixid.net/m/87804/l/1081866-one-touch - Information about the user store, such as ip address/server name, port and userid/password for the connection.
- Remote Desktop Services/Network Policy Server configured according to Microsoft recommendations and any specific requirements in your environment.
Instruction
Overview
This document will guide you through the configuration steps to integrate two-factor authentication against Microsoft Remote Desktop Services.
It’s based on a scenario where PhenixID Server will be configured as RADIUS proxy and PhenixID One Touch will be used for the second factor. In this scenario, Active Directory will be used as LDAP user store.
PhenixID Server is platform independent and can be installed on both Linux and Windows. It works with all other LDAP user databases as well, like eDirectory, Sun One, Open LDAP etc.
PhenixID Server configuration for use with RD Gateway/NPS
The RADIUS Proxy module in PhenixID, will be used in this configuration.
Start by following this document, to add proxy functionality to the installation:
http://document.phenixid.net/m/90910/l/1146949-how-to-setup-phenixid-mfa-server-as-a-ms-chapv2-proxy
In our example the proxy configuration will listen for incoming traffic from RD Gateway/NPS on port 1818 and port 1814 will be used to communicate back to NPS (ip 192.168.1.46):
{
      "id": "mschap-radius-connection",
      "description": "Proxy connection",
      "config" : {
        "port": "1818",
        "server_host": "192.168.1.46",
        "server_port": "1814"
      }
}
Remote Desktop Services/Network Policy Server configuration
Start by setting up RD Gateway for 2FA, according to Microsoft recommendations and any specific requirements in your environment.
Configure the NPS to listen on the port set in PhenixID Server proxy: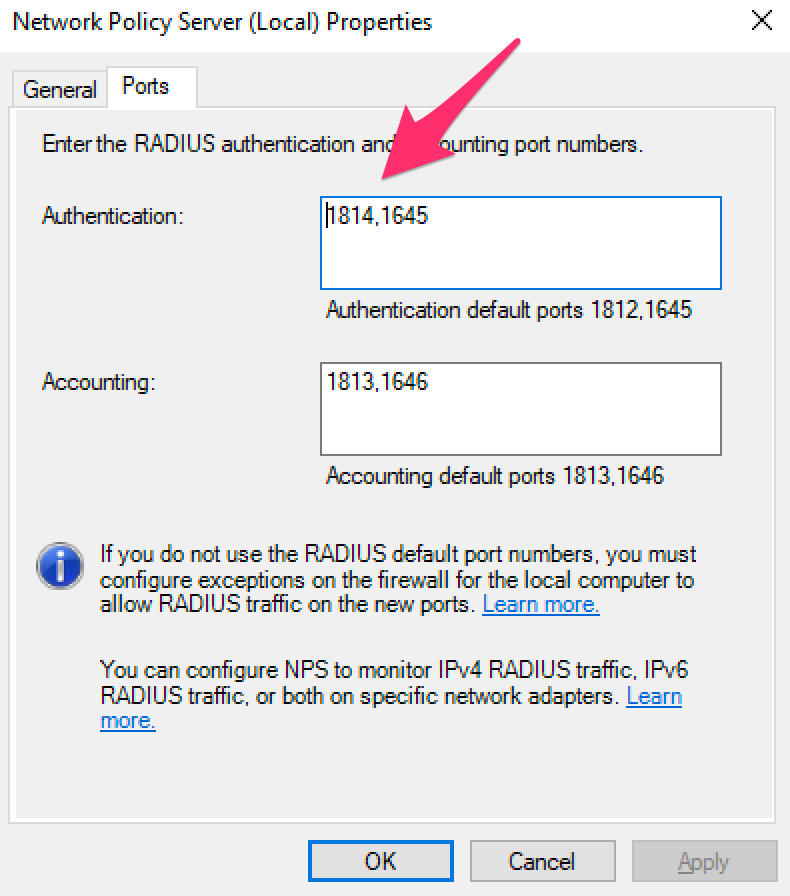
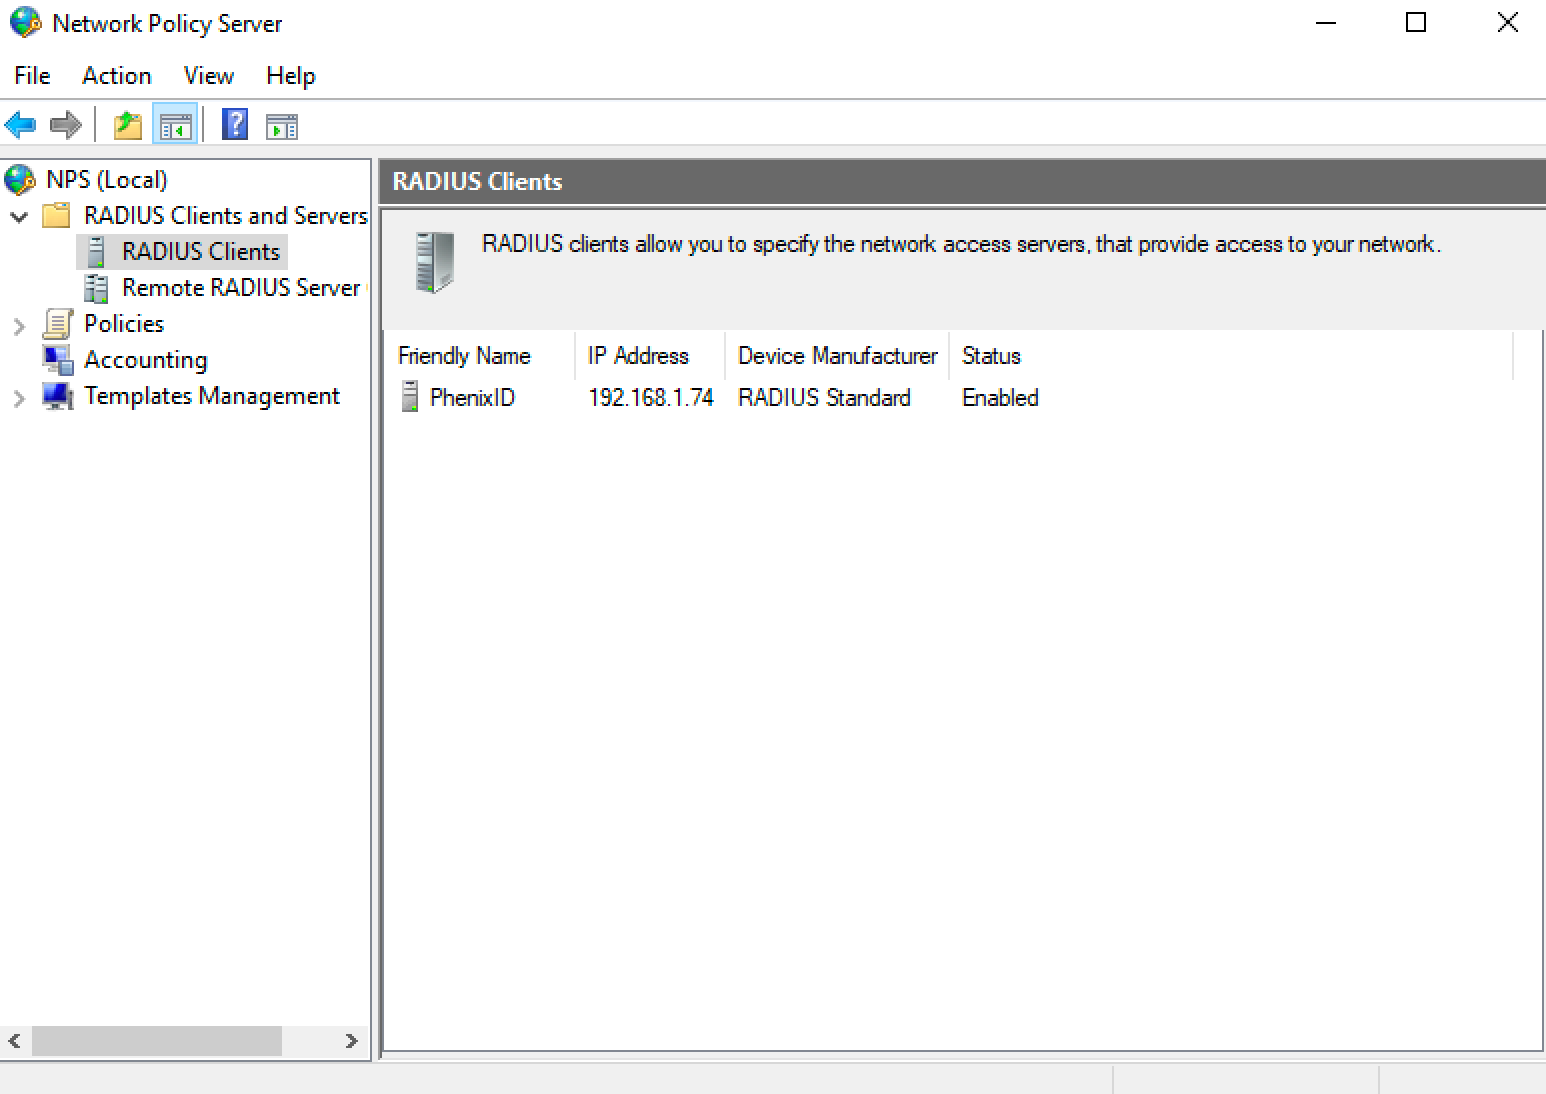
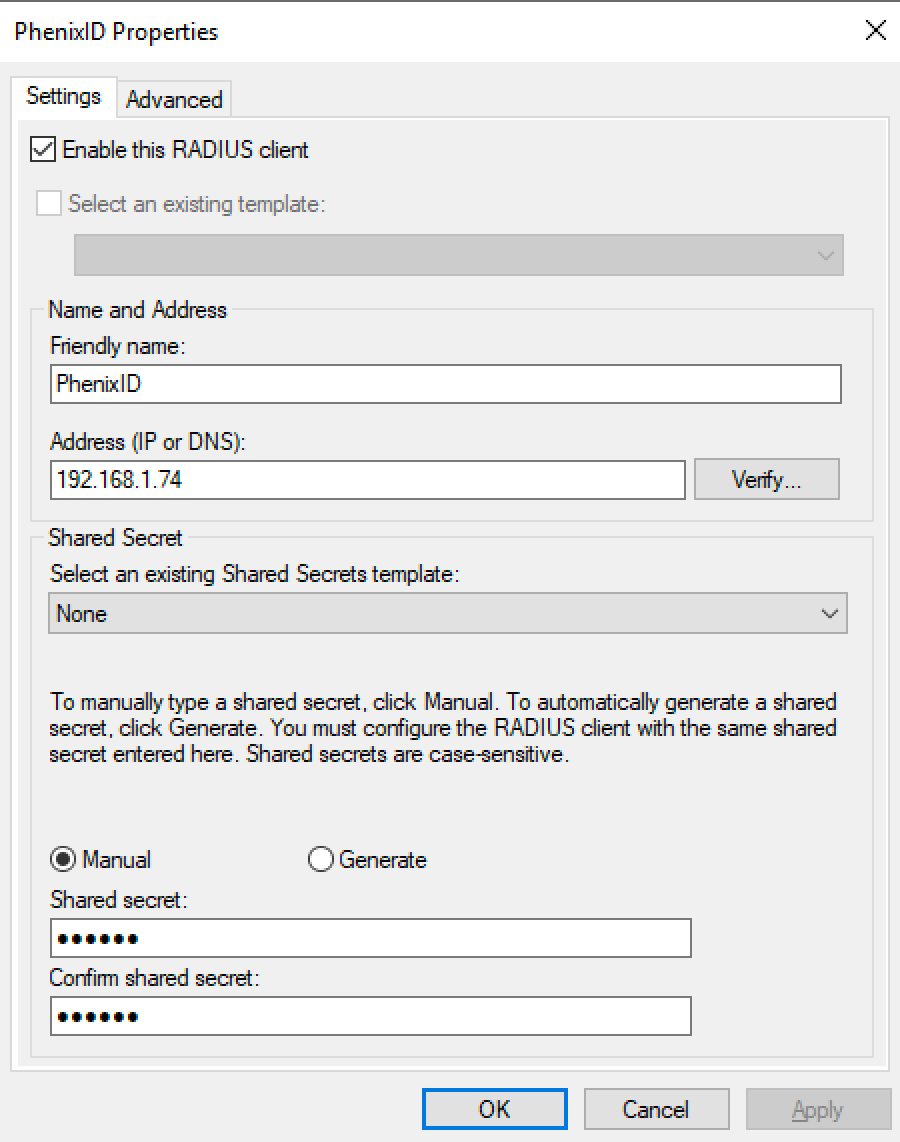
NPS also needs to have the PhenixID Server as a RADIUS client, since traffic
will come back to NPS, after verification of the second factor:
Set the PhenixID Server to the “Remote RADIUS Server Group”:
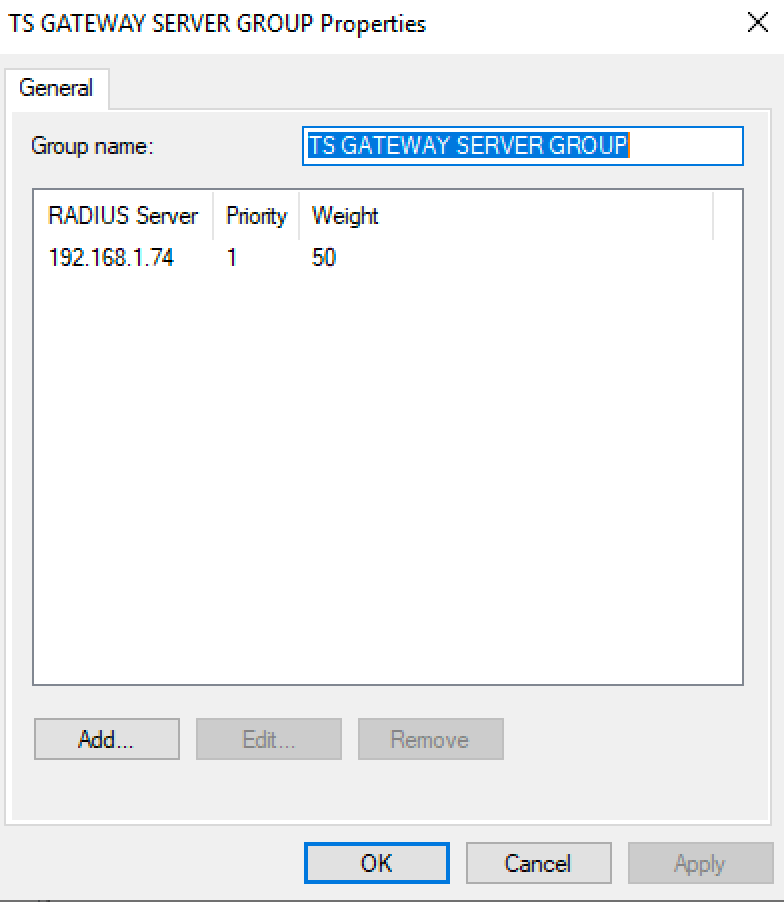
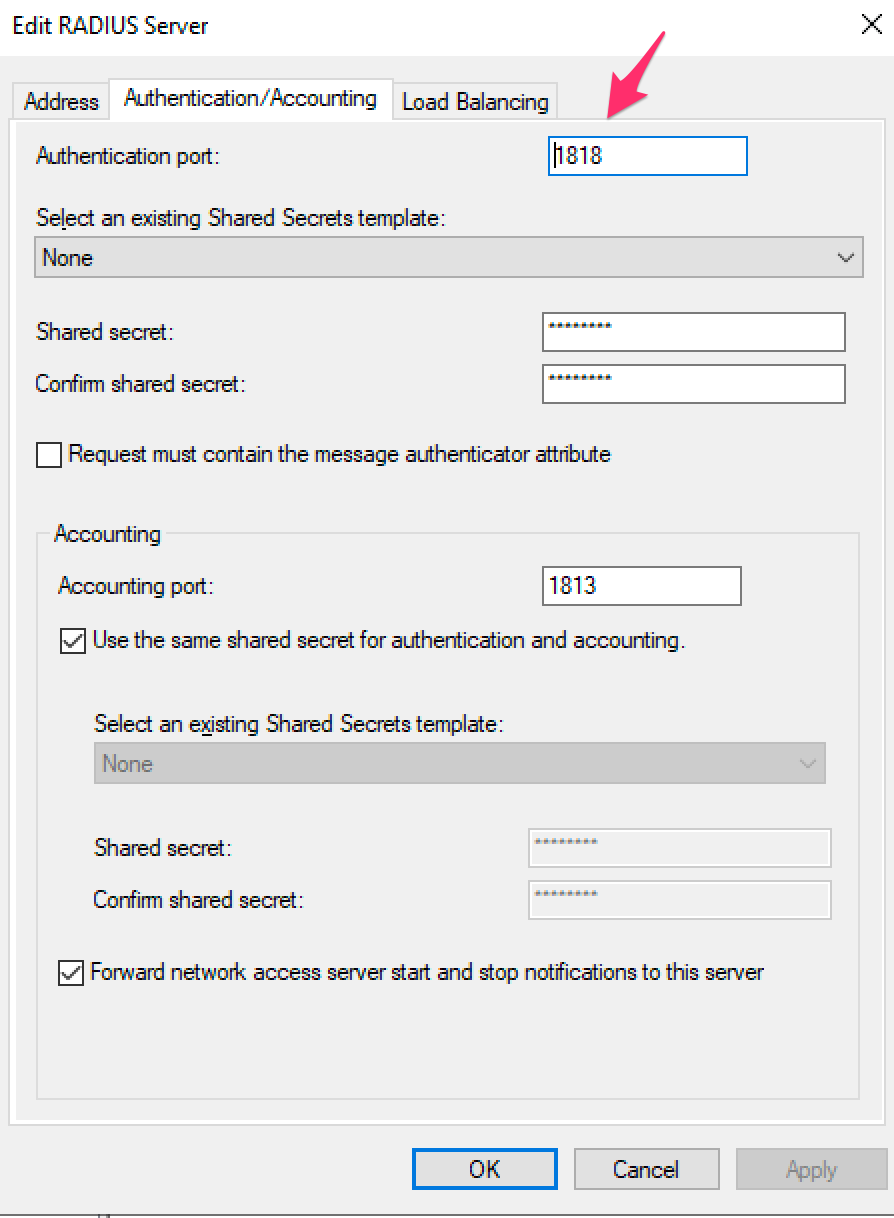
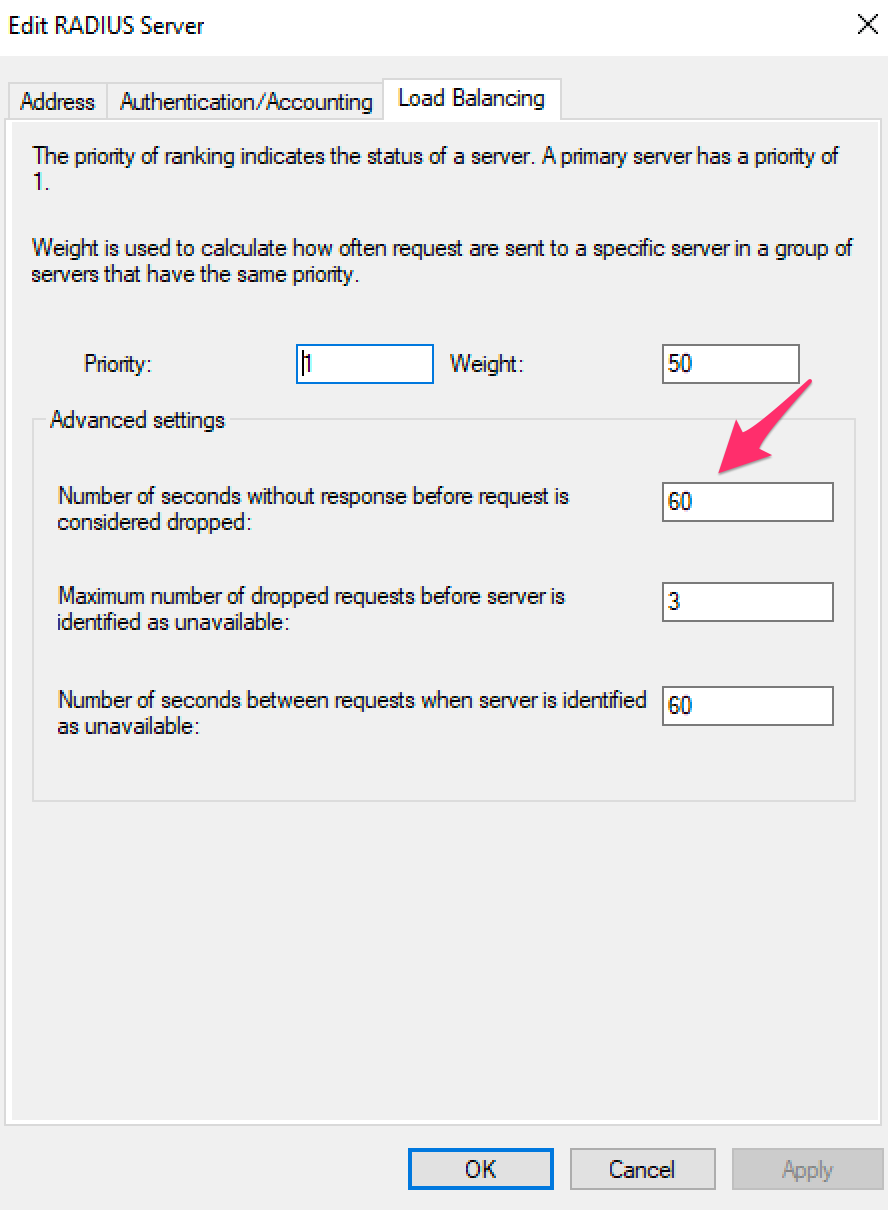
Making sure to set the correct outgoing port, as well as increasing the value for the timeout.
Since we are now adding a second factor, we need to make sure that end users have the time needed to complete the login.
Port and timeout settings:
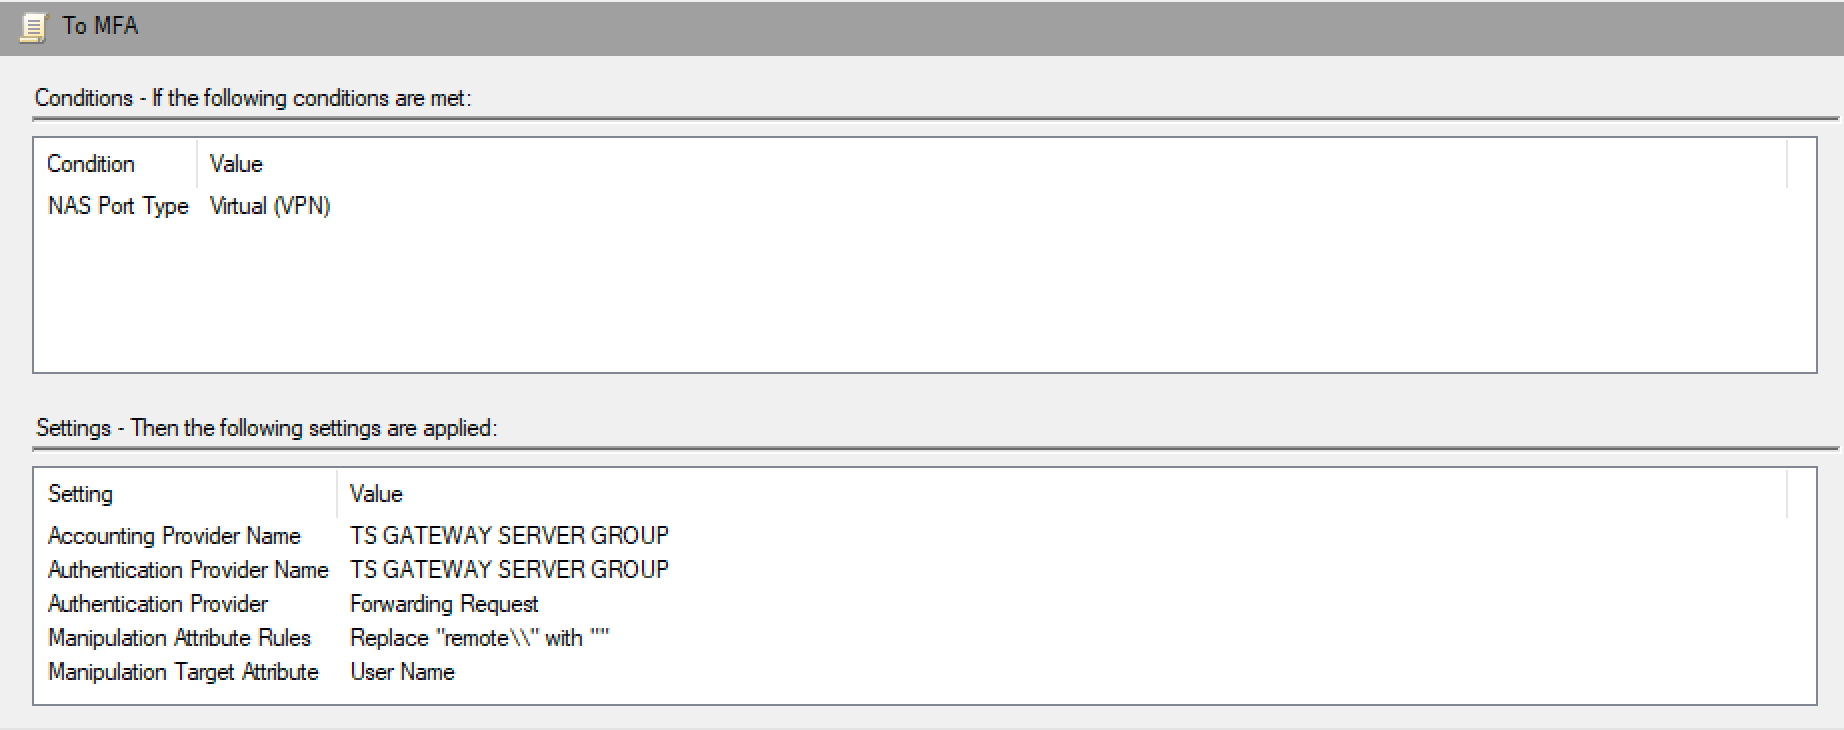
Now configure the “Connection Request Policies”.
Two policies are required, one from PhenixID Server and one to PhenixID Server.
The one used from MFA, must be above the policy to MFA.
Example of order and policies:

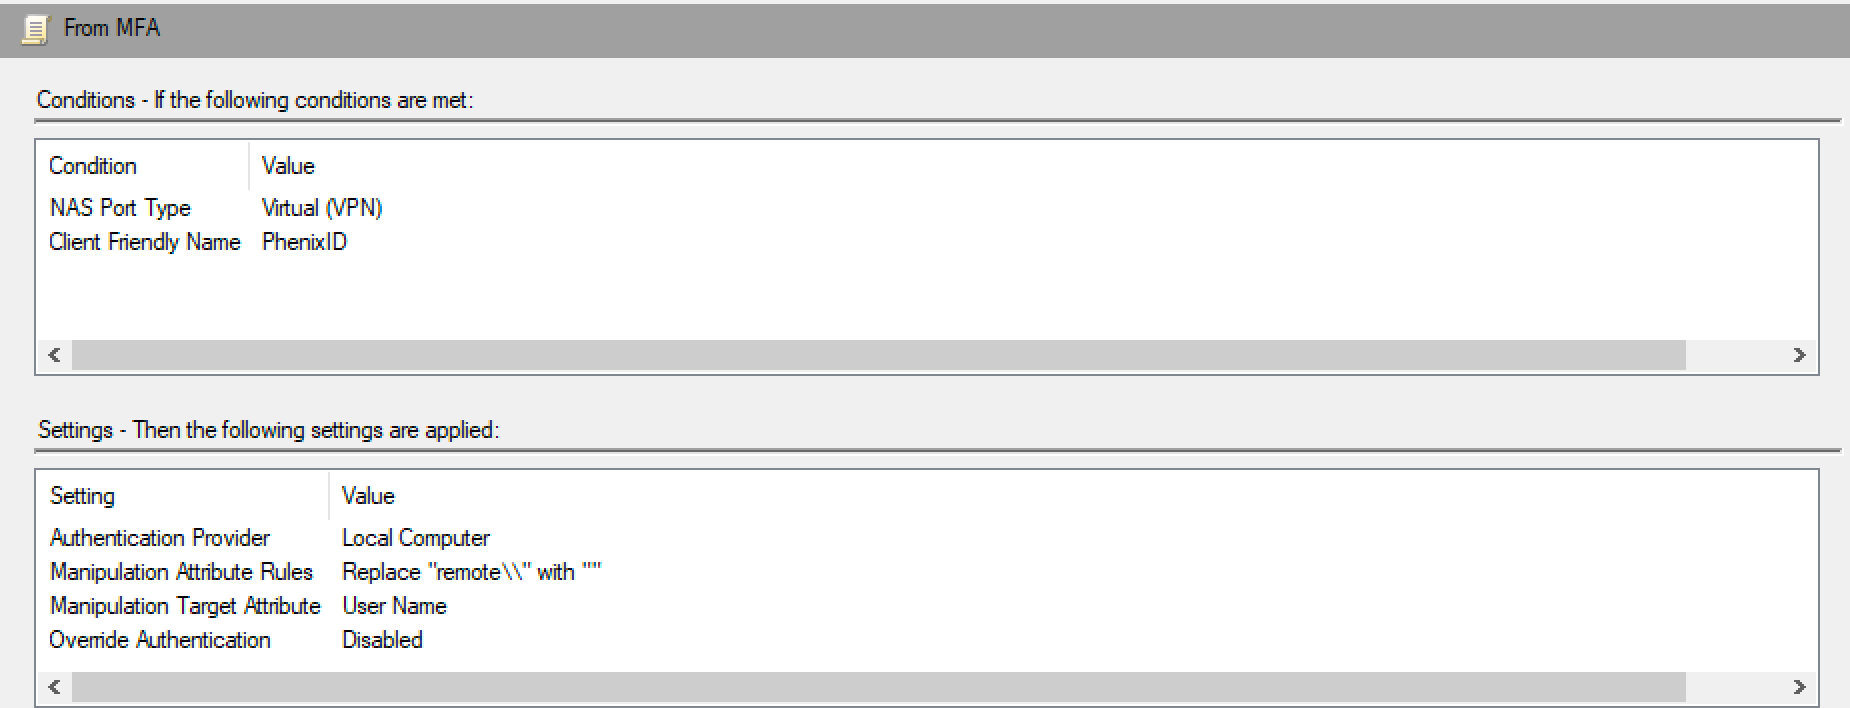
The condition ”Client Friendly Name” specifies the name of the RADIUS client set earlier.
Values for “Accounting Provider name” and “Authentication Provider Name”, should be set to the “Remote RADIUS Server Group” configured earlier.
The “Manipulation Attribute Rules” are set to remove the domain name, so that only the username itself is sent to PhenixID Server for validation.
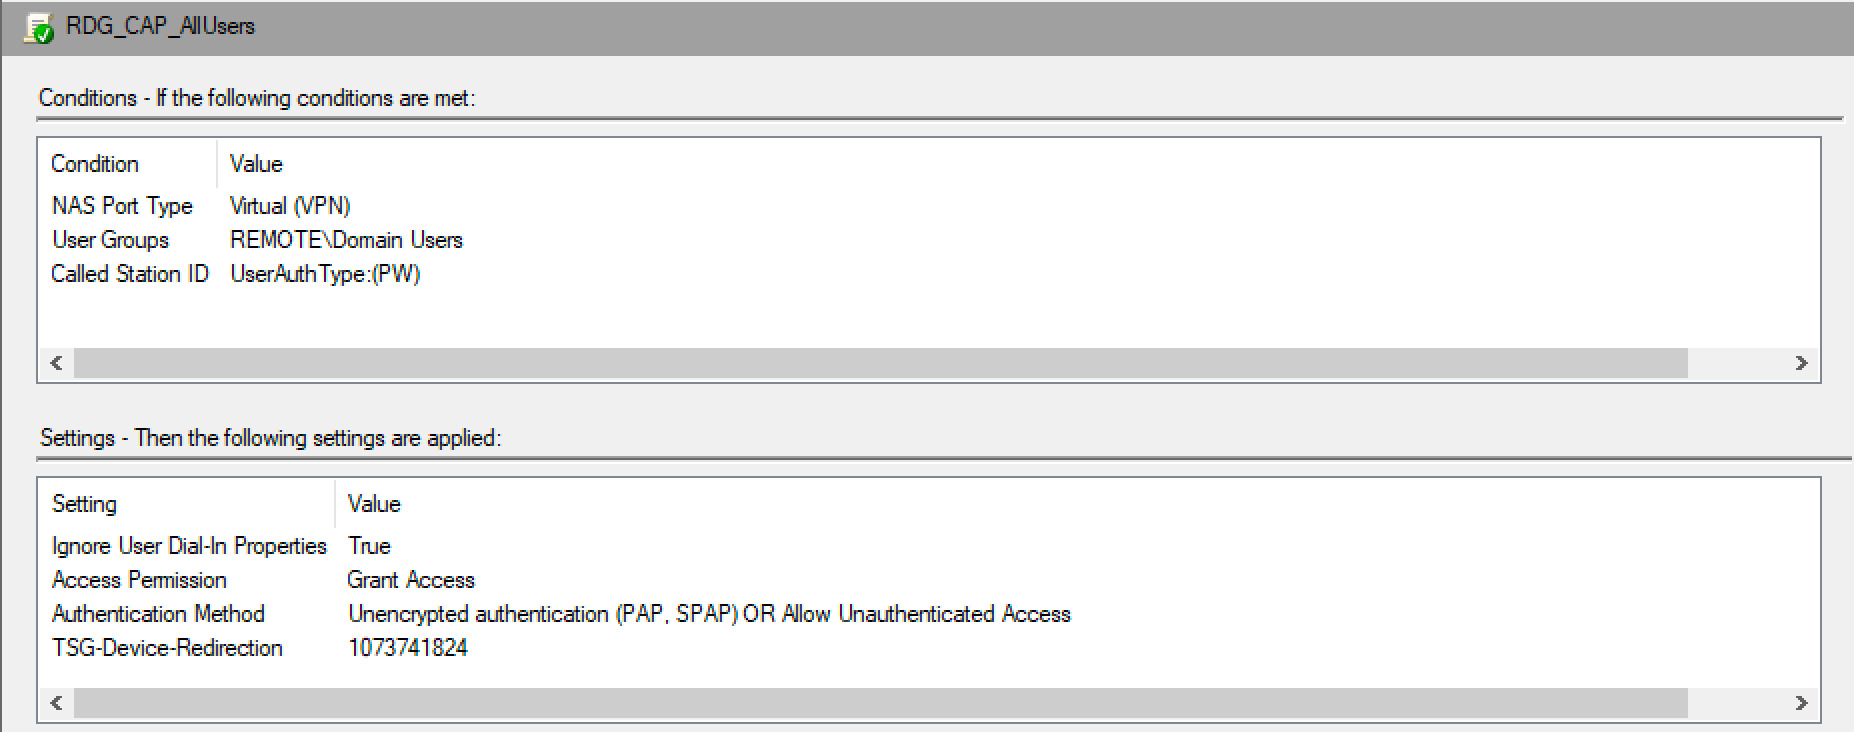
Last step is to set the “Network Policy”, like this example:
Now login to RDWeb and click on an application. It will start after the assignment in One Touch has been approved.
Troubleshooting
Log file for PhenixID Server is server.log located in /logs.
On the Windows side, investigate Event Viewer/Windows Logs/Security
DISCLAIMER
Information provided in this document is for your information only. PhenixID makes no explicit or implied claims to the validity of this information. Any trademarks referenced in this document are the property of their respective owners.The origin of this information may be internal or external to PhenixID. PhenixID makes all reasonable efforts to verify this information.
PhenixID - support.phenixid.se