Summary
This document will guide you through the steps to secure the authentication of your SonicWall solution with PhenixID Server, delivering two-factor authentication via SMS to your device.
System Requirements
- PhenixID Server installed
- The Scenario will make use of RADIUS, so we need to know the port and shared secret configured on the application being secured with PhenixID Server two-factor authentication.
Instruction
Overview
This document will guide you through the configuration steps to integrate PhenixID two-factor authentication against SonicWall.
Configure PhenixID Server for RADIUS and 2FA
We will use one of the scenarios included in the PhenixID configuration portal, so open a browser and navigate to (by default):
https://<server>:8443/config/
Login with the configured username and password.
In this example we will use LDAP as the user store and sms as delivery method for the otp.
Other scenarios, such as SMTP and Pocket Pass, can also be used.
More information can be found here:
https://document.phenixid.net/
When logged in to the portal, go to Scenarios/RADIUS:
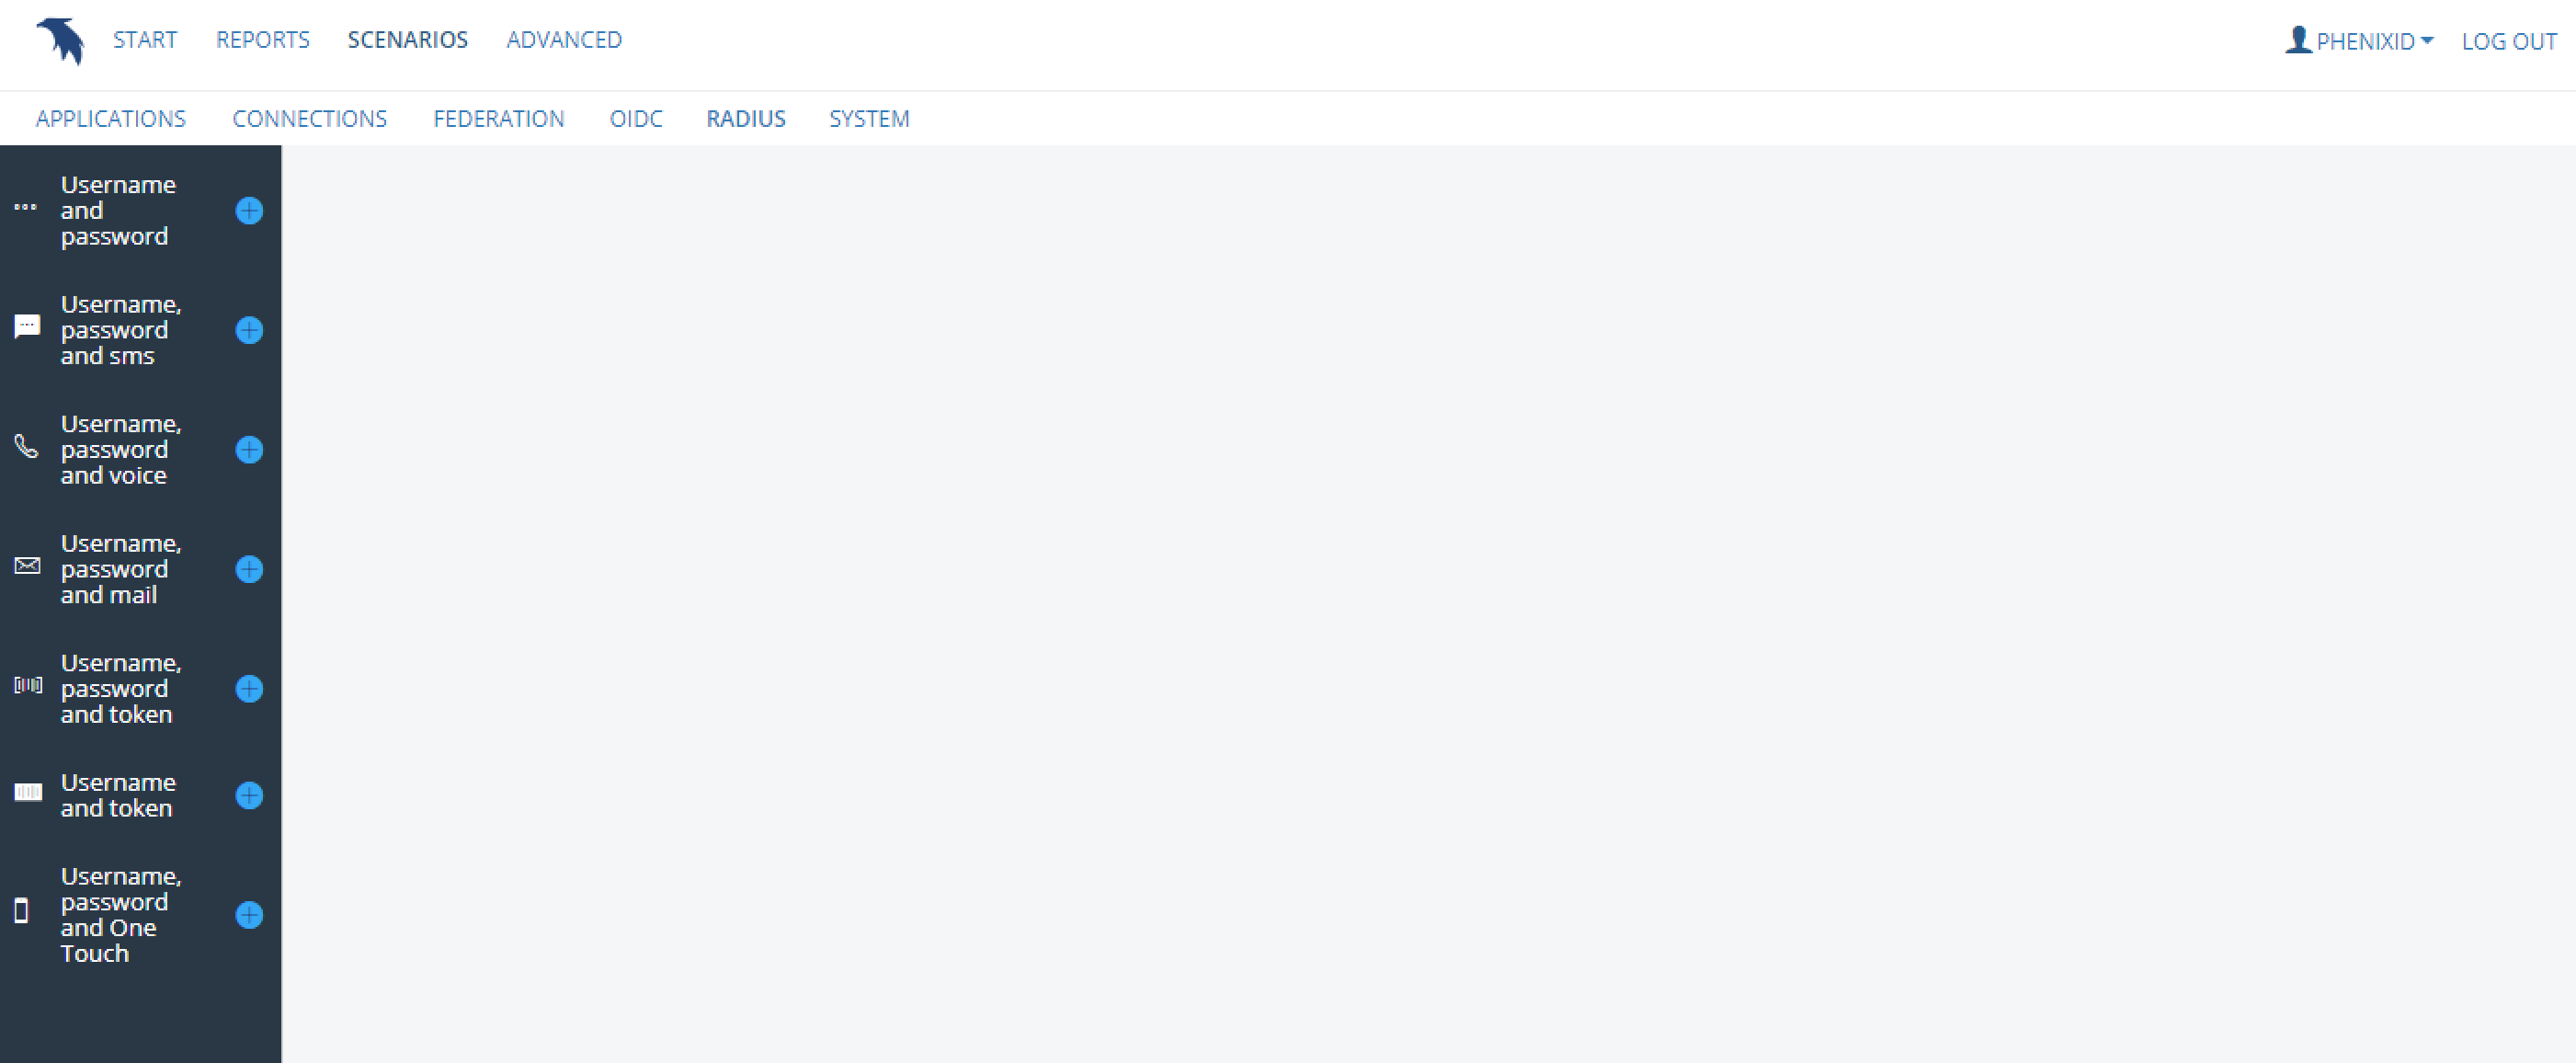
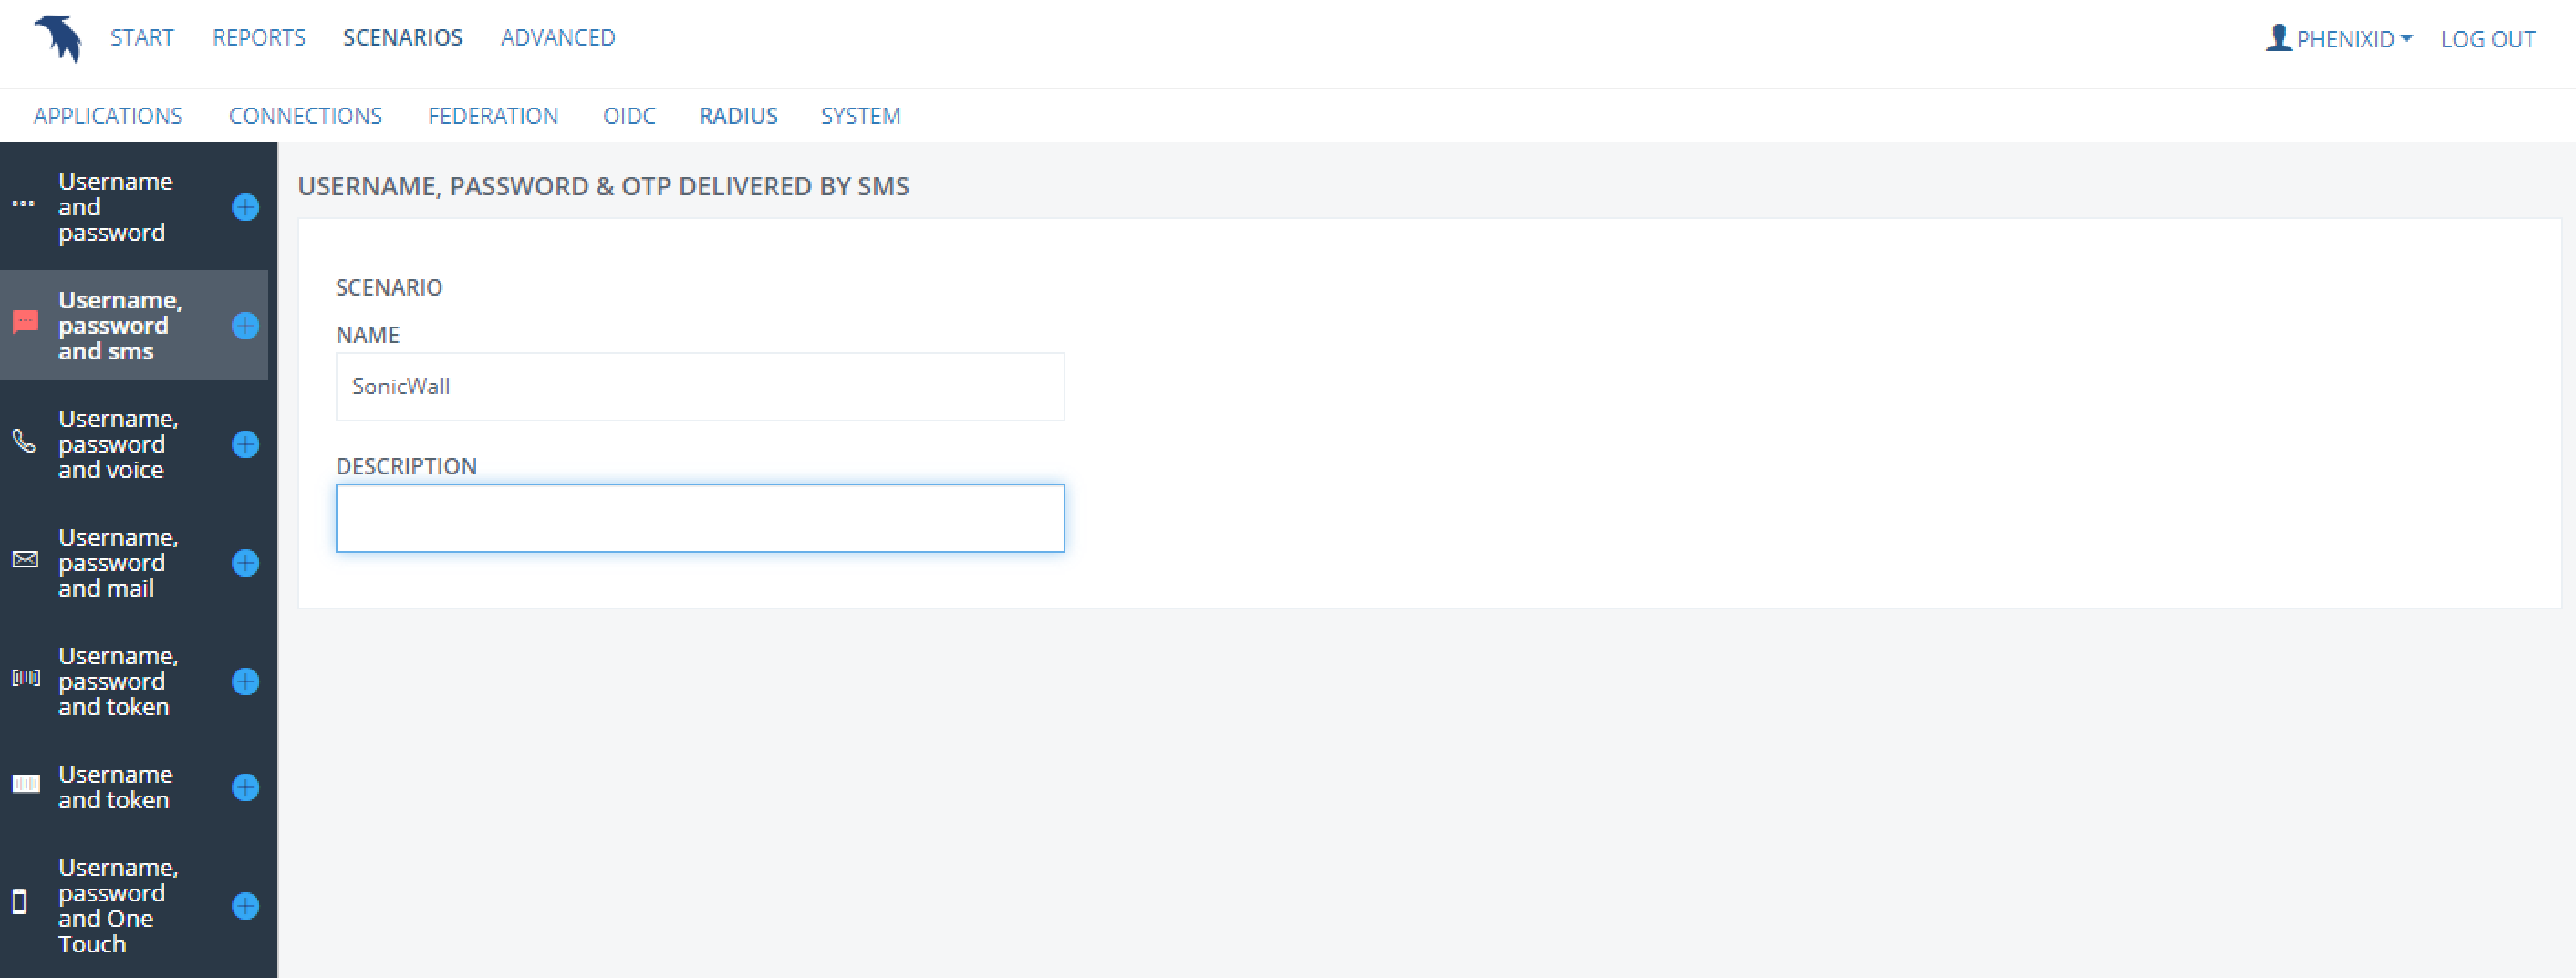
Click the plus sign next to “Username, password and sms”, set a descriptive name for the Scenario:
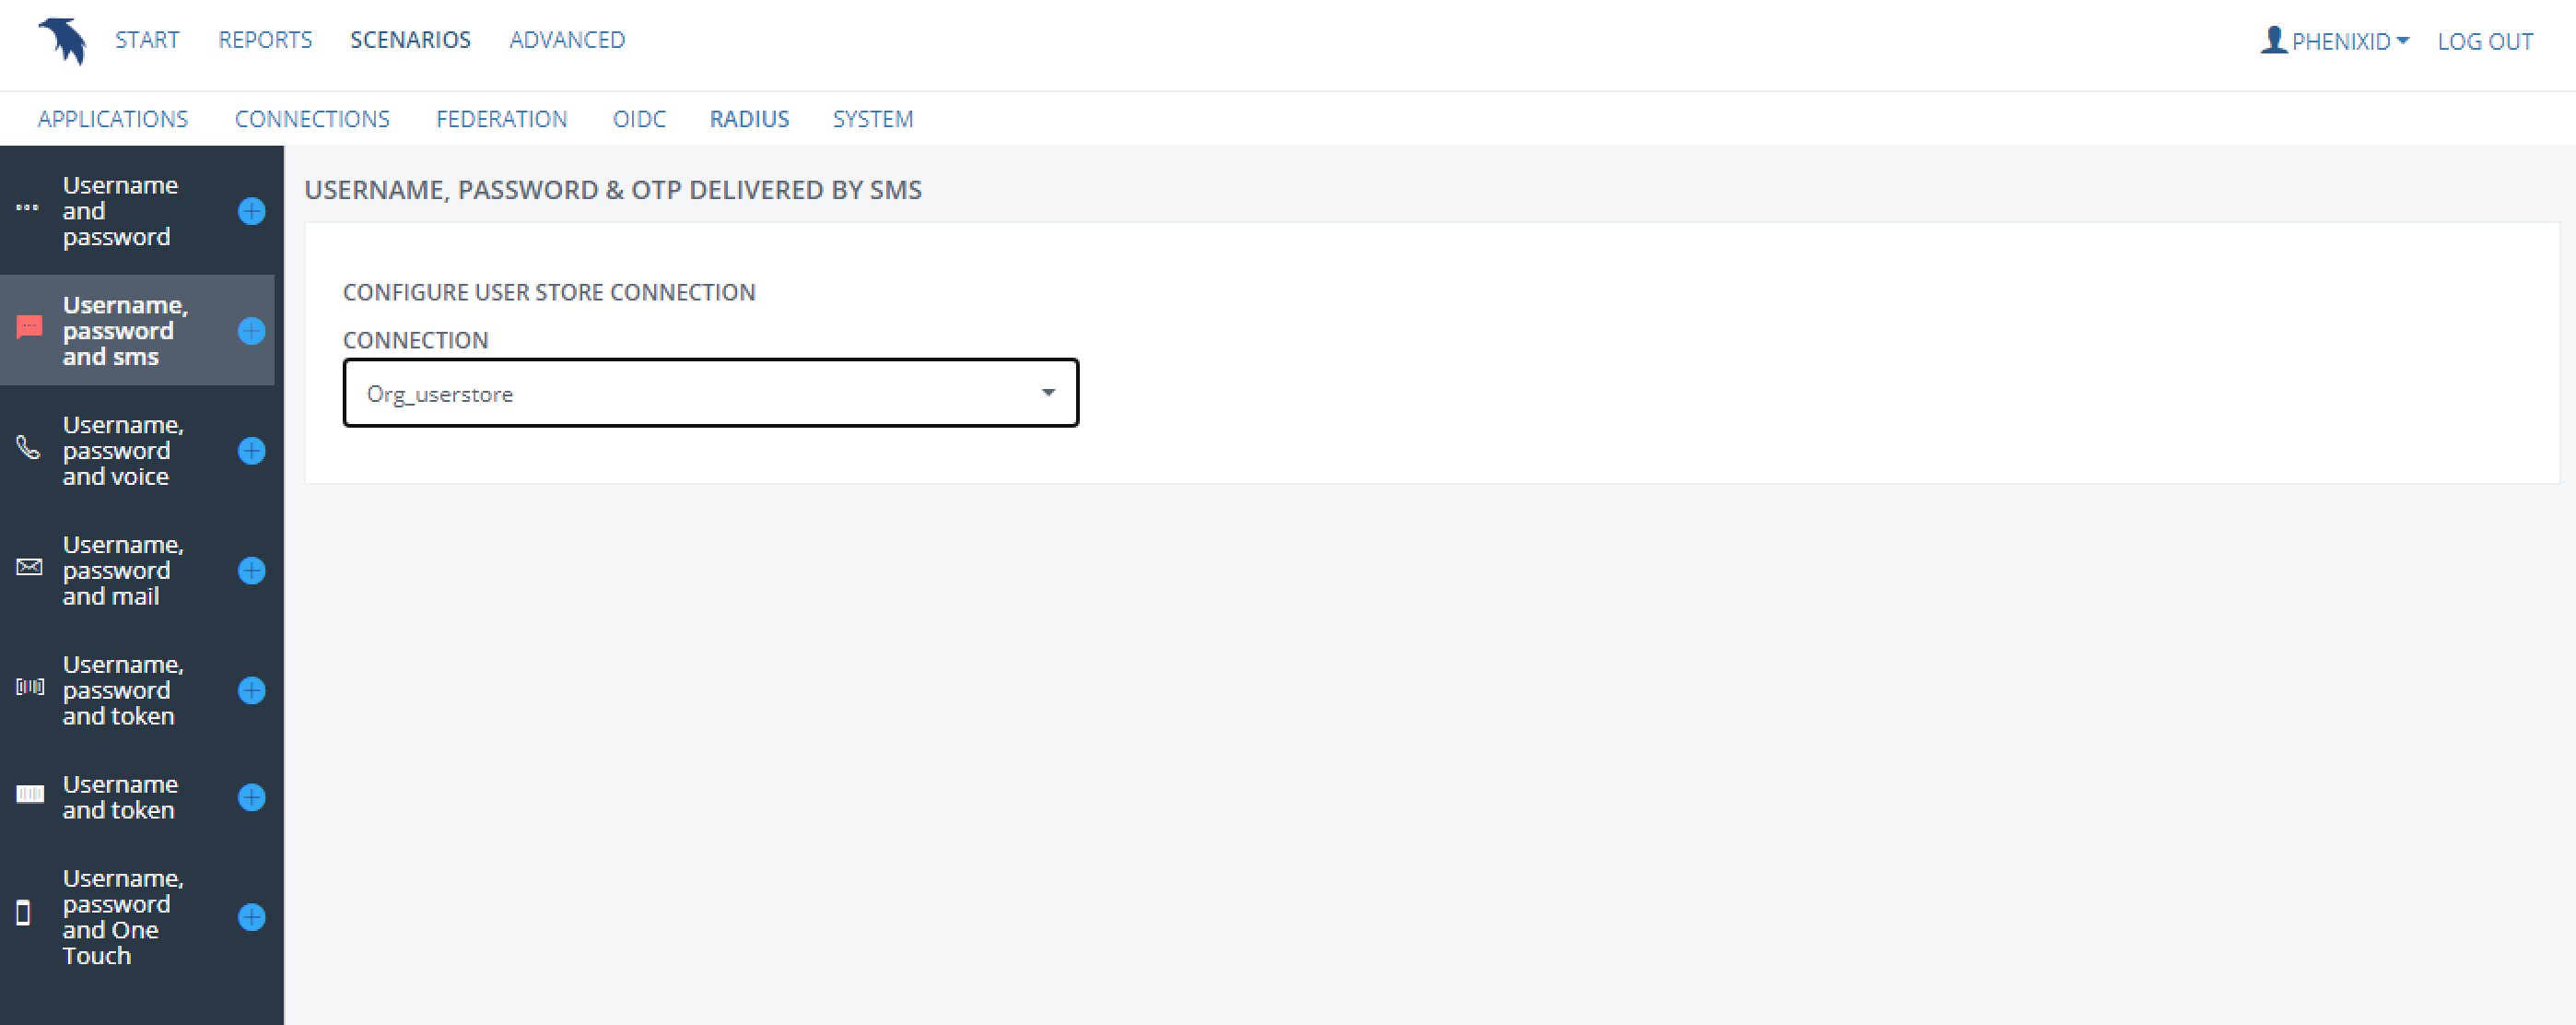
Choose already configured user store, or create a new one:
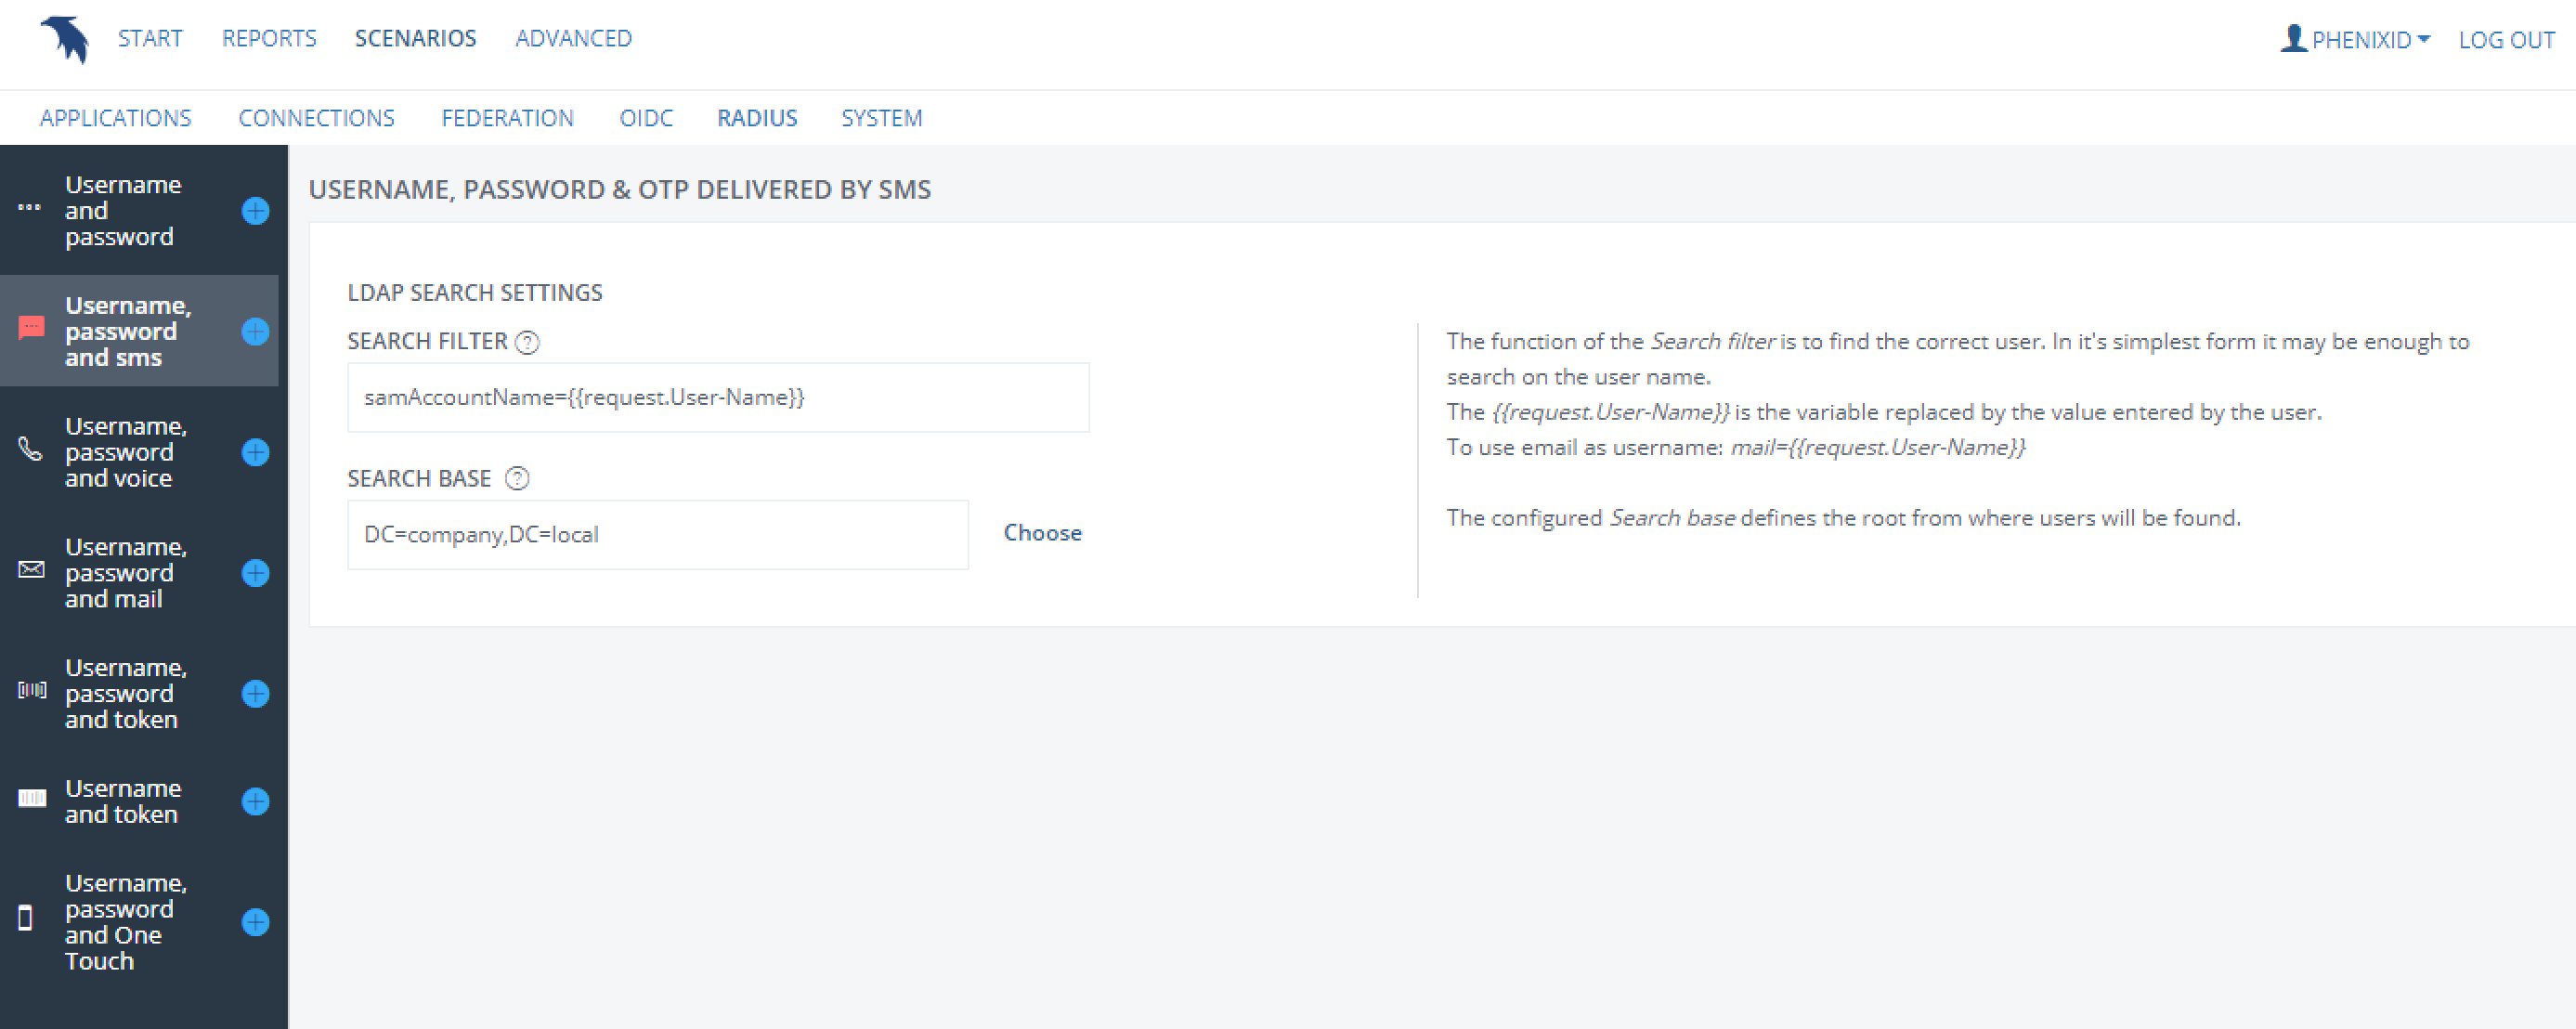
Set the LDAP search parameters according to the environment:
Choose already created RADIUS Server, or create a new one:

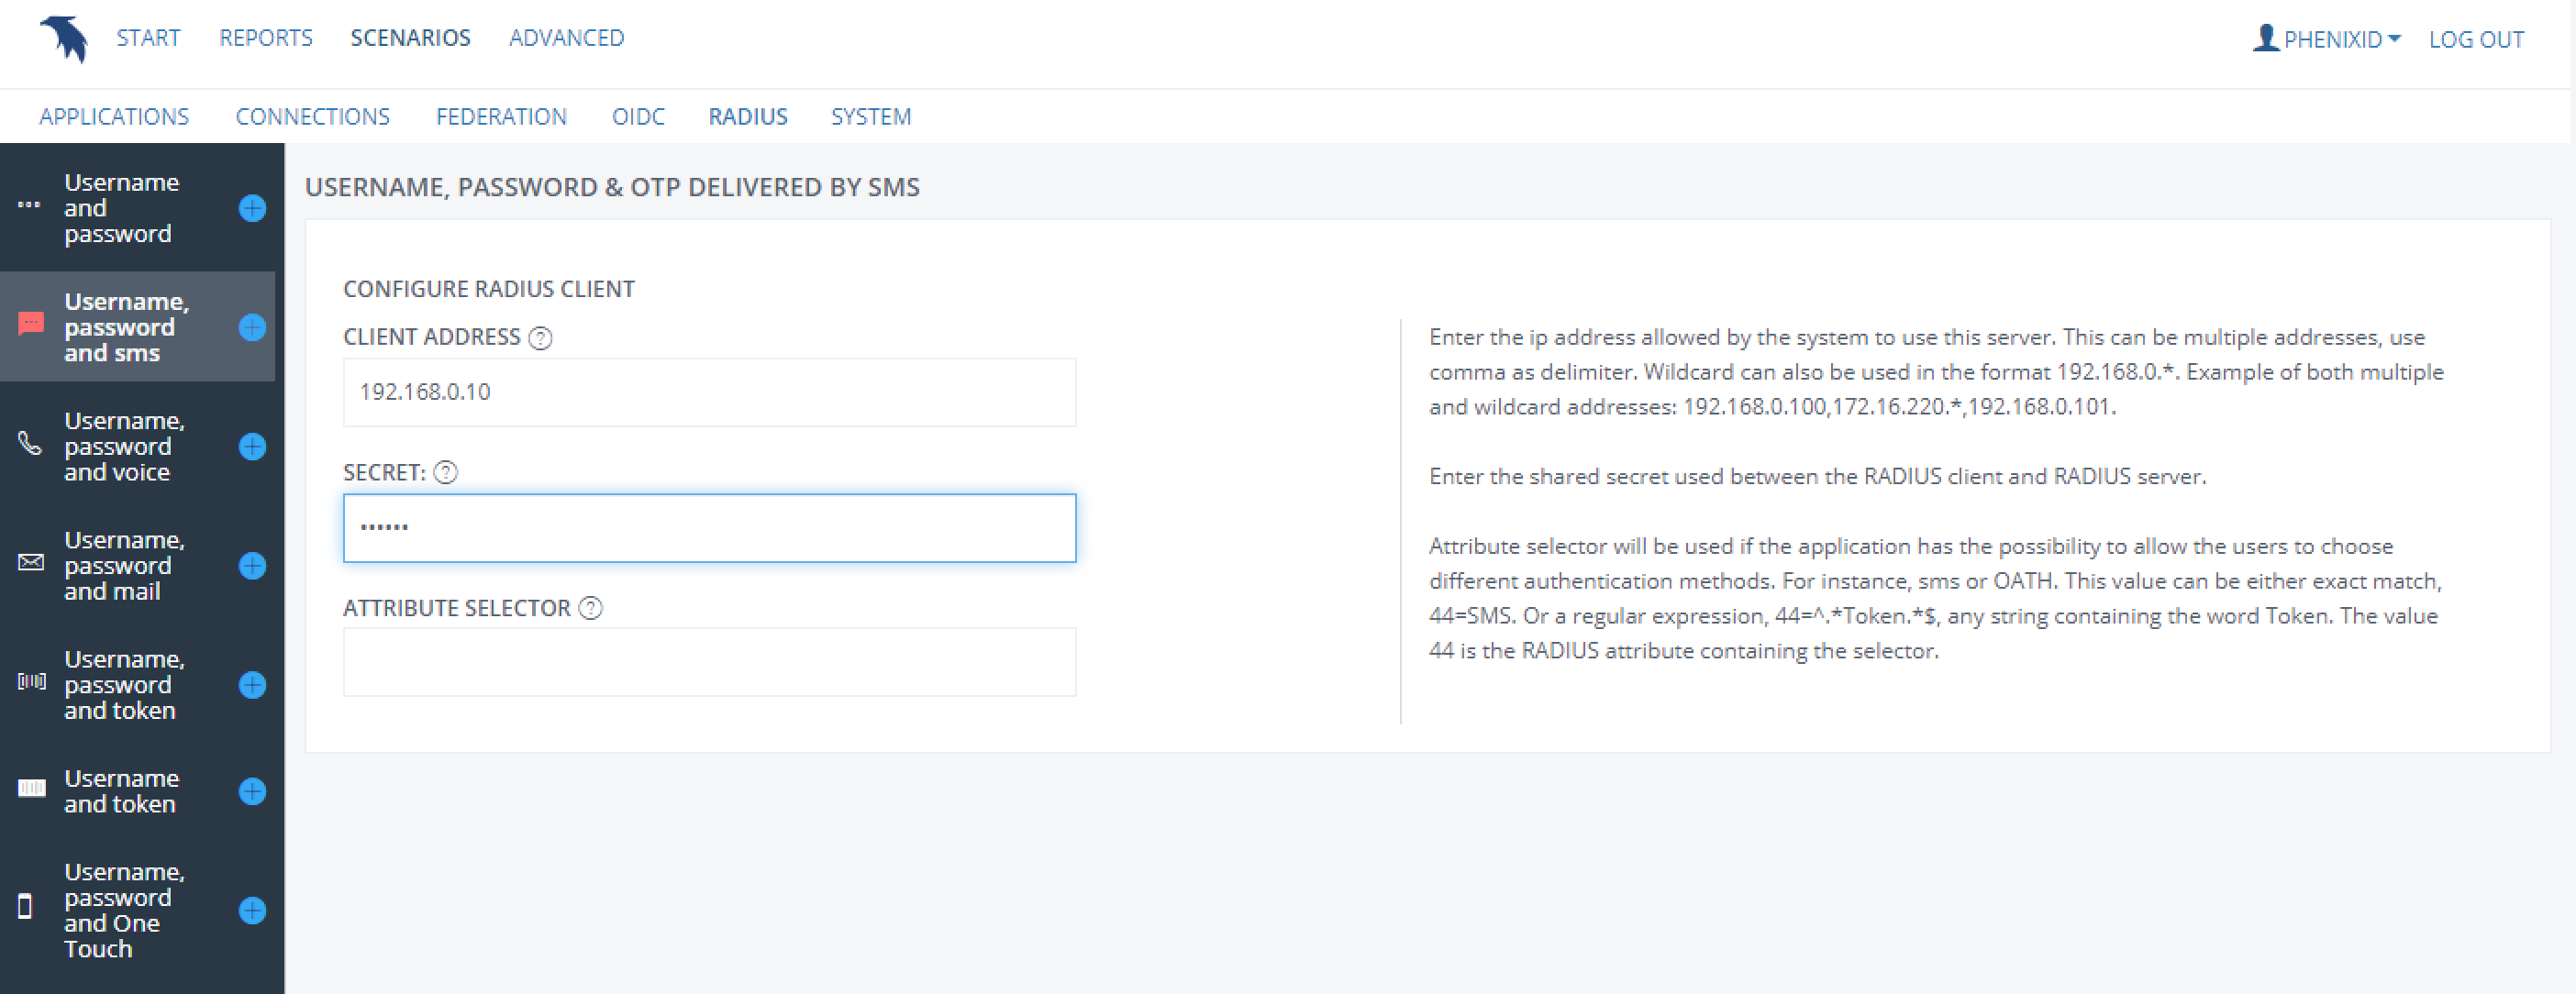
RADIUS client address is the ip address of SonicWall. Set the shared secret that should be used for the RADIUS communication (needs to be set to the same on SonicWall):
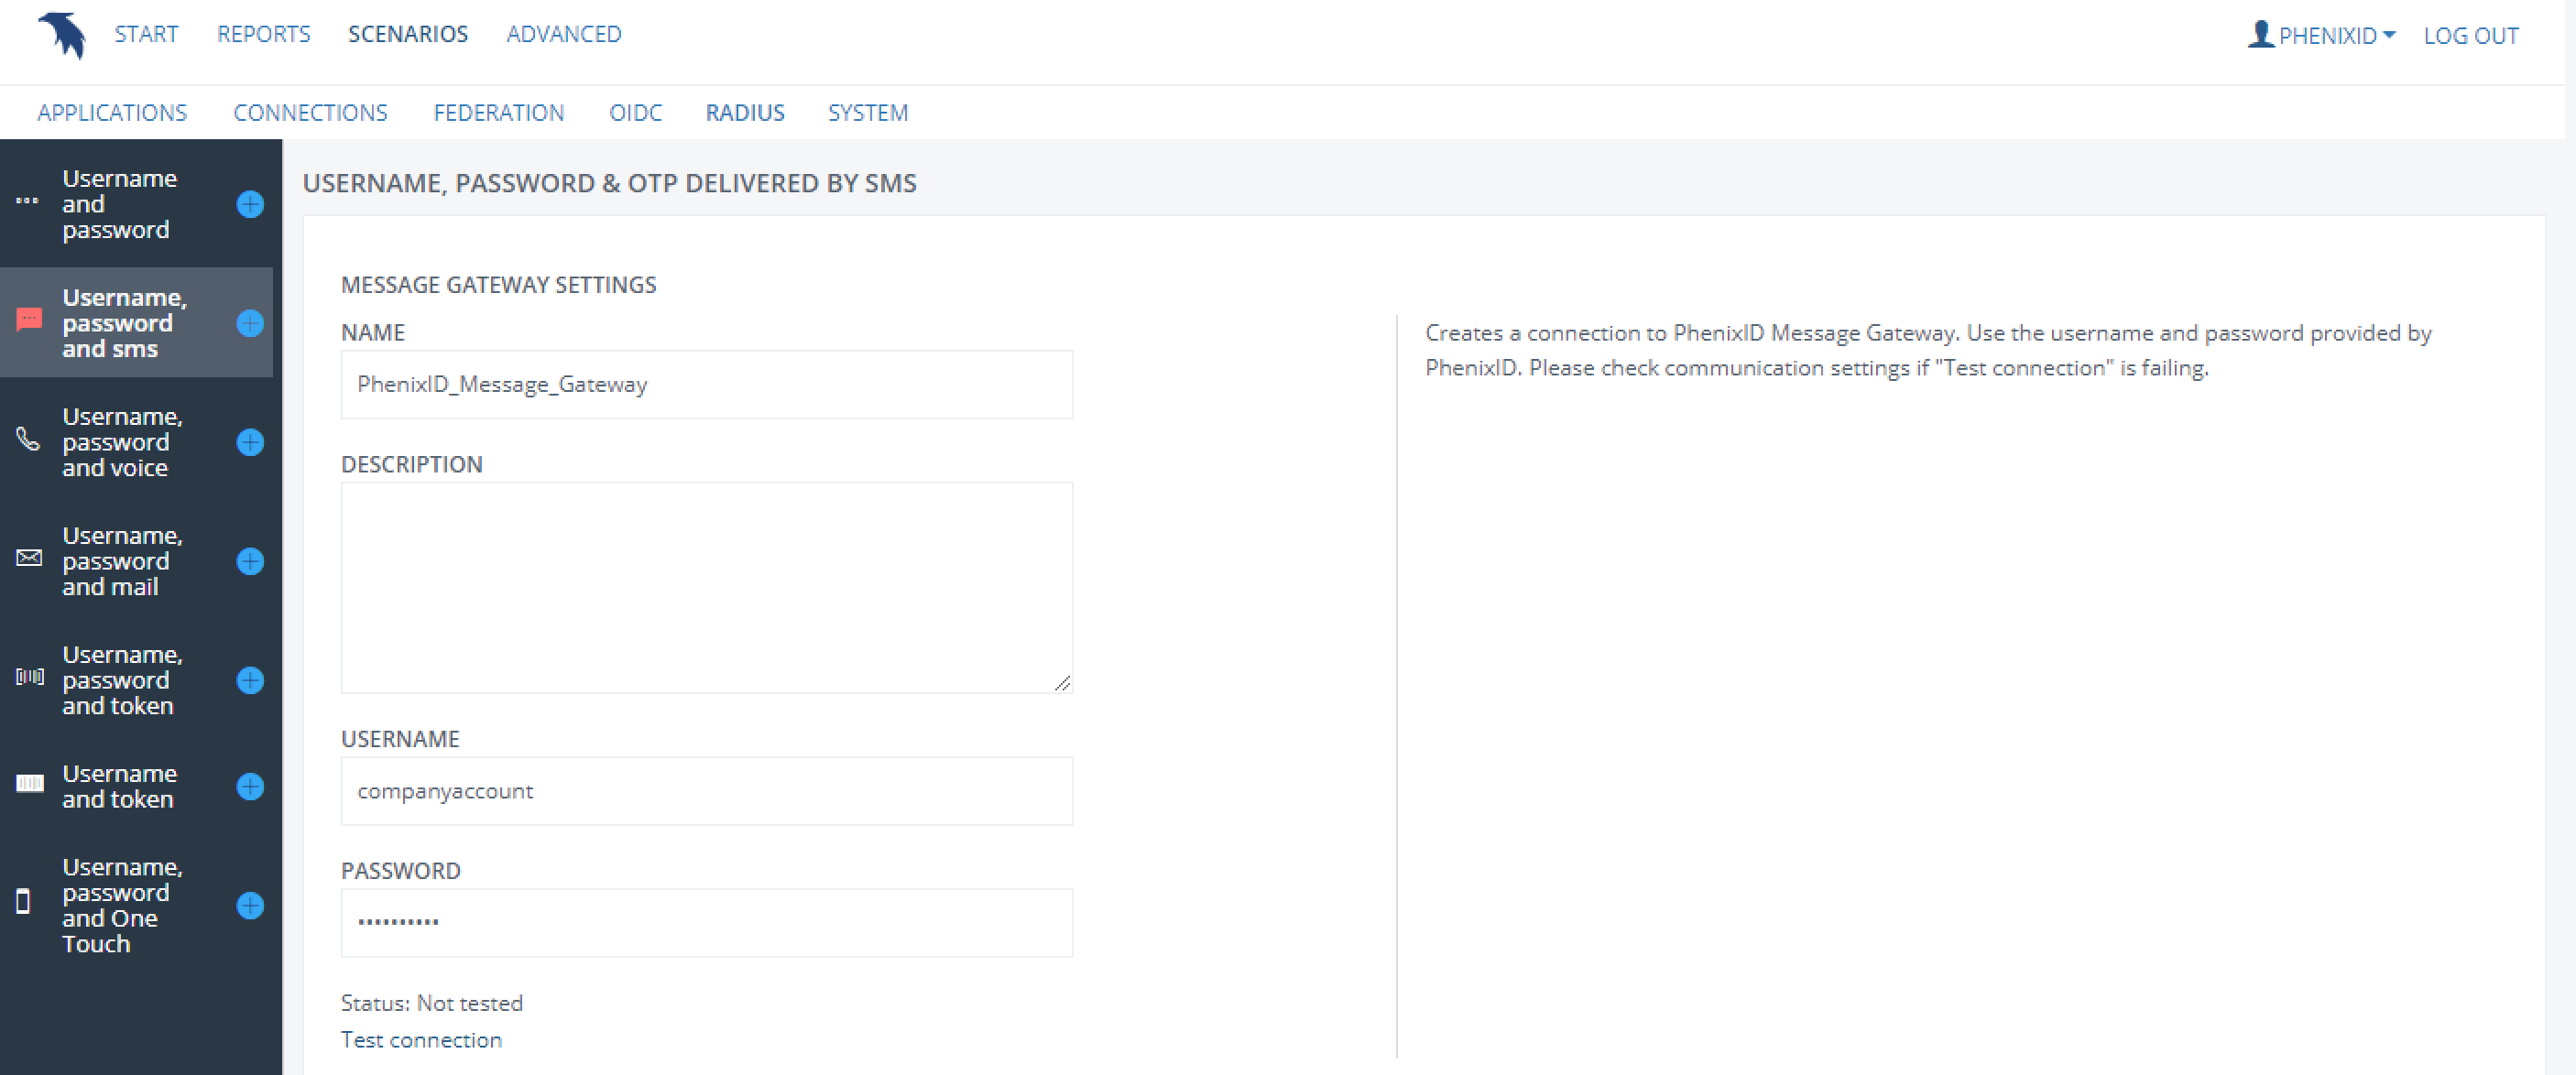
Choose already created PhenixID Message Gateway, or create a new one:
Specify the length of the OTP and the attribute containing the number where the SMS should be sent.:

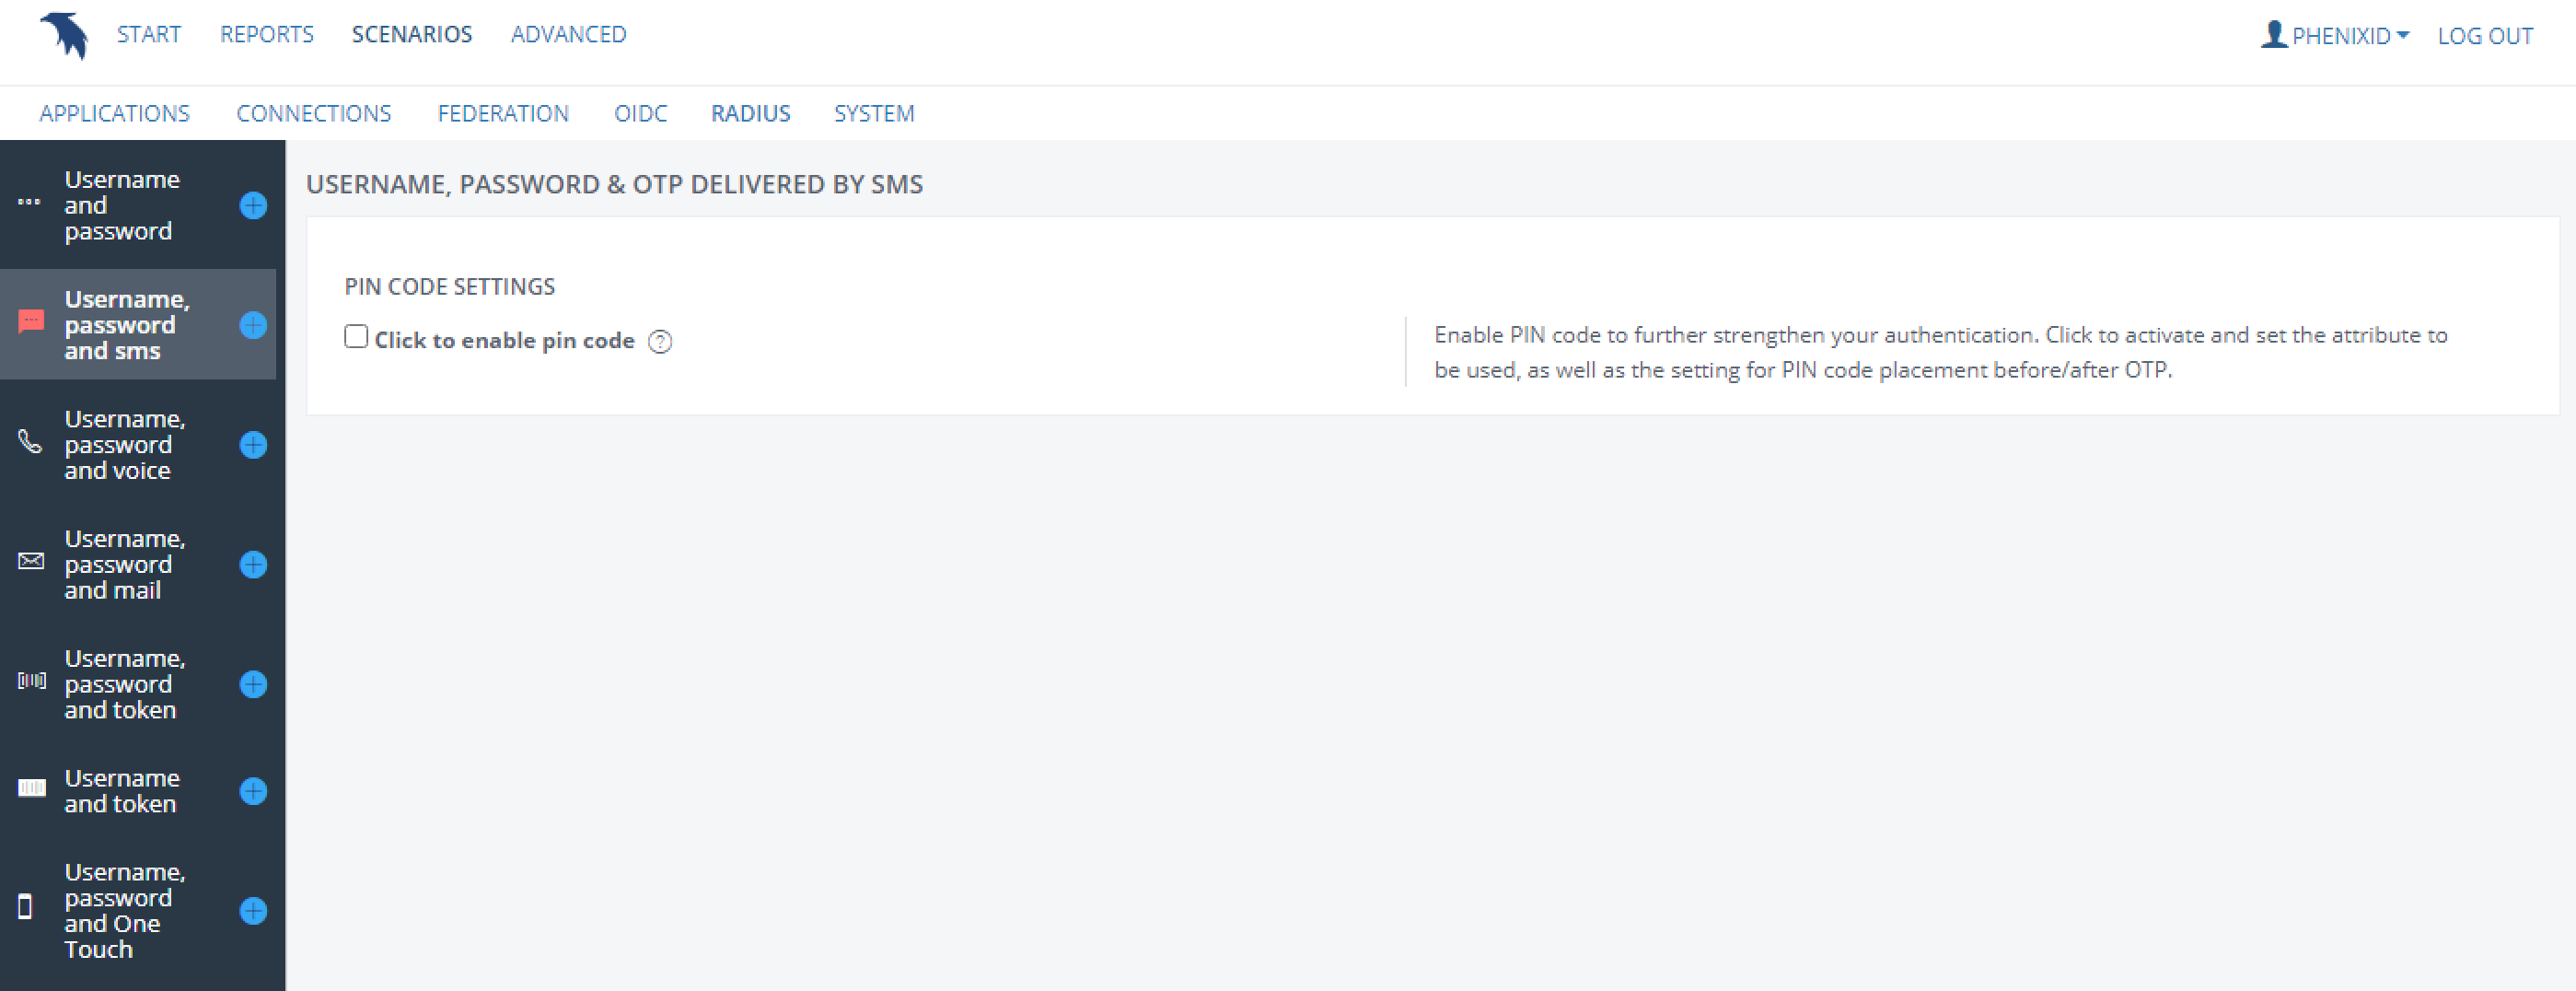
If pin code should be used along with otp, configure it accordingly:
When done click “Create” to complete the scenario.
Configure SonicWall to use PhenixID Server for 2FA
- After logging in to the SonicWall UI, navigate to Manage/Users/Settings, set the desired “User authentication method” and click Configure Radius.
- Click “Add” and then Enter the IP address of the Primary RADIUS Server and the radius port according to PhenixID scenario.
- Enter the RADIUS server shared secret in the “Shared Secret” field and in the “Confirm Shared Secret” field. The alphanumeric Shared Secret can range from 1 to 31 characters in length and is case sensitive.
Needs to be the same as set on the PhenixID RADIUS scenario. - Make sure that the RADIUS timeout is set to 30 seconds or higher (RADIUS Server Timeout (seconds).). This is to make sure that login has enough time to receive the otp and enter it.
- If a secondary PhenixID server is in place, add information for it in the Secondary RADIUS Server fields.
- Click “Apply” and test the configuration.
Troubleshooting
If, for some reason, the configuration is not working, investigate PhenixID server.log located in the logs directory and also the SonicWall log.
For extended information about the RADIUS traffic on PhenixID server, add the following line:
<asynclogger name=”com.phenixidentity.radius.authenticator” level=”DEBUG”></asynclogger>
to /config/log4j.xml.
Example: 
DISCLAIMER
Information provided in this document is for your information only. PhenixID makes no explicit or implied claims to the validity of this information. Any trademarks referenced in this document are the property of their respective owners.The origin of this information may be internal or external to PhenixID. PhenixID makes all reasonable efforts to verify this information.
PhenixID - support.phenixid.se