Summary
This document will guide you through the steps to secure the authentication of your Watchguard solution with PhenixID Server, delivering two-factor authentication via SMS to your phone.
System Requirements
- PhenixID Server installed and configured as a RADIUS server
- The Scenario will make use of RADIUS, so we need to know the port and shared secret configured on the application being secured with PhenixID Server two-factor authentication.
Instruction
Overview
This document will guide you through the configuration steps to integrate two-factor authentication against Watchguard.
Login to PhenixID Administration Portal
We will use one of the scenarios included in the administration portal.
Open a browser and go to https://PhenixidServerIP:8443/config/.
Use e.g. the default administrator user called phenixid with the default password password to login.
Configure PhenixID Server as a RADIUS server and 2FA
This is explained in another Step-by-Step document, please read through it and then return to this document to continue the setup of Watchguard.
The step-by-step document to configure PhenixID server to act as a RADIUS server:
http://support.phenixid.se/sbs/radiusserverwith2fa/
The Watchguard box will require RADIUS attribute 11 in the communication to verify the group membership of the user logging in.
So after following the above step-by-step, we will add configuration for this to the file <PhenixID Server installationdirectory>/config/phenix-store.json.
Please make sure to have a backup copy of this file before porceeding.
We will add the configuration using the PhenixID Configuration Manager.
So please login to https://PhenixidServerIP:8443/config/ and go to the tab Configuration (needs to be enabled in boot.json, see document http://document.phenixid.net/m/52601/l/513298-enable-configuration-tab-in-phenixid-configuration-manager).
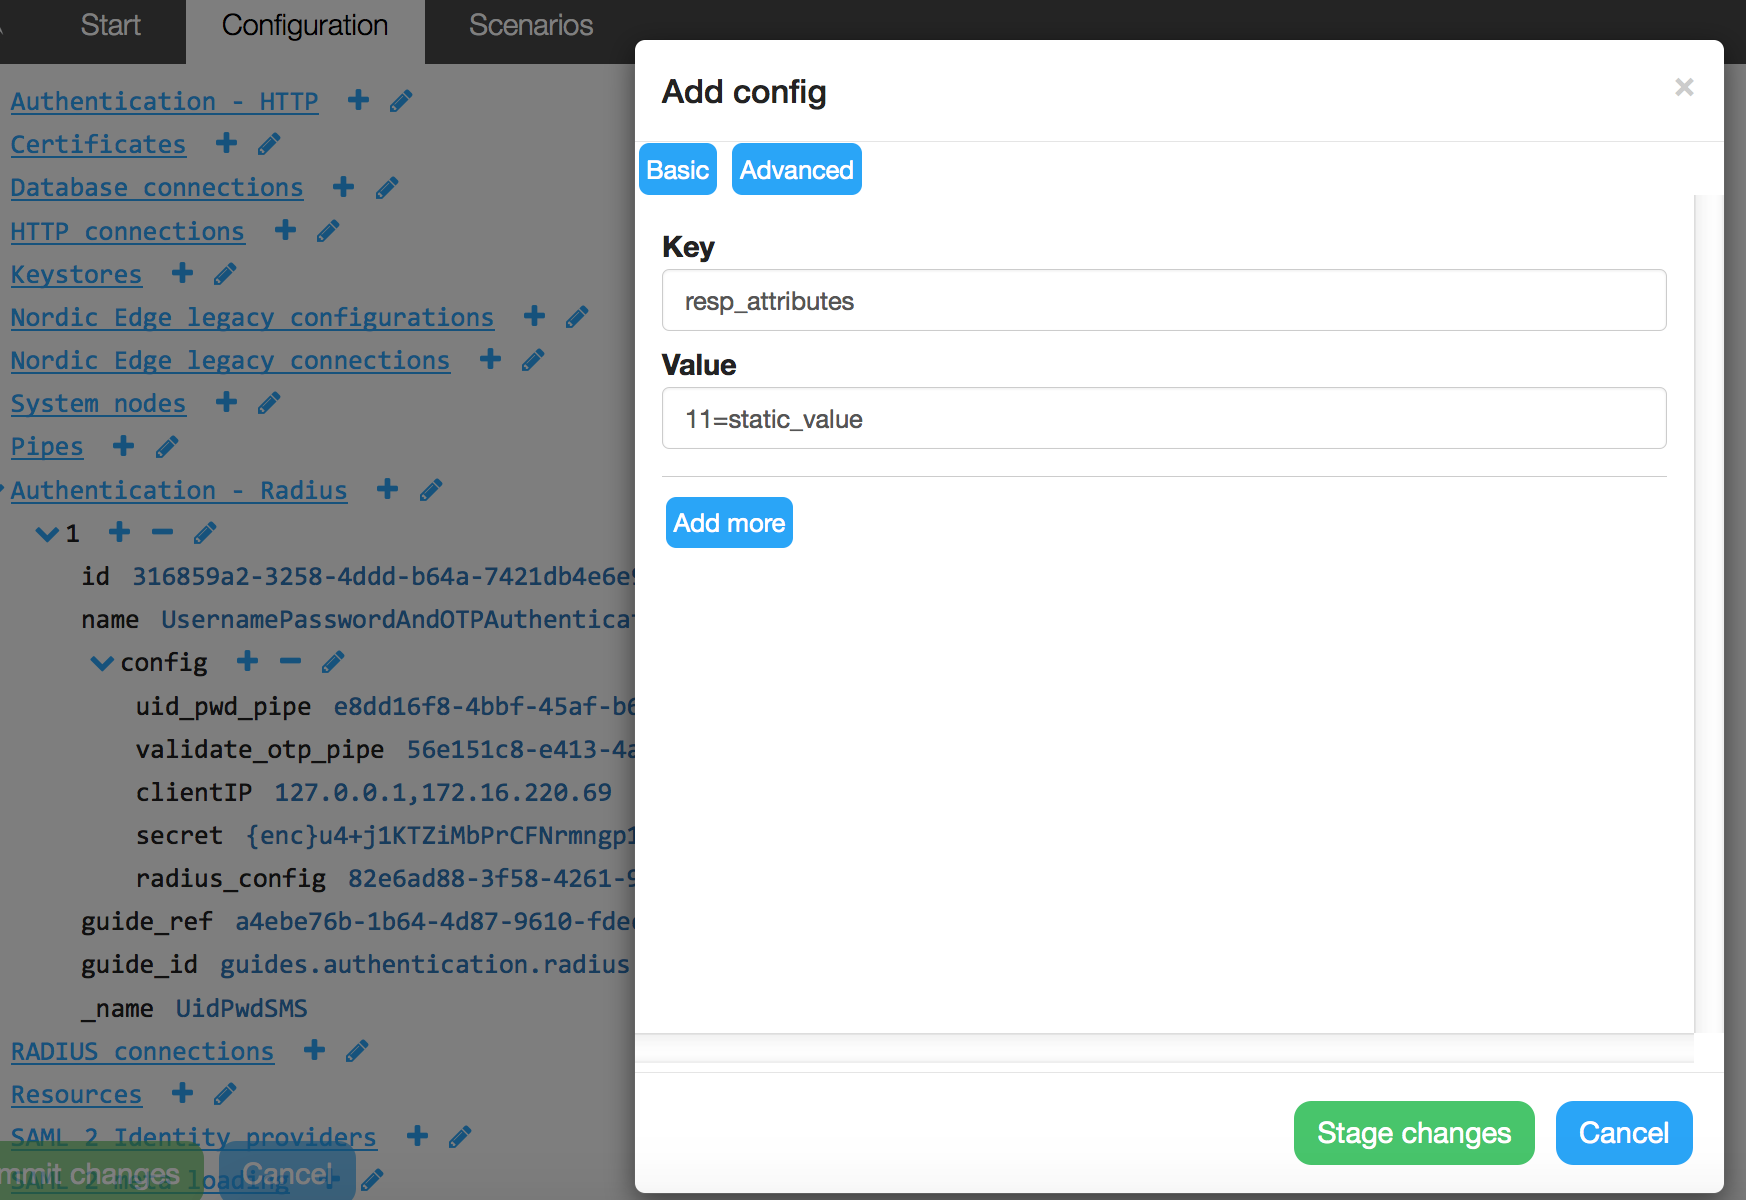
Go to Authentication – Radius and press + besides config.
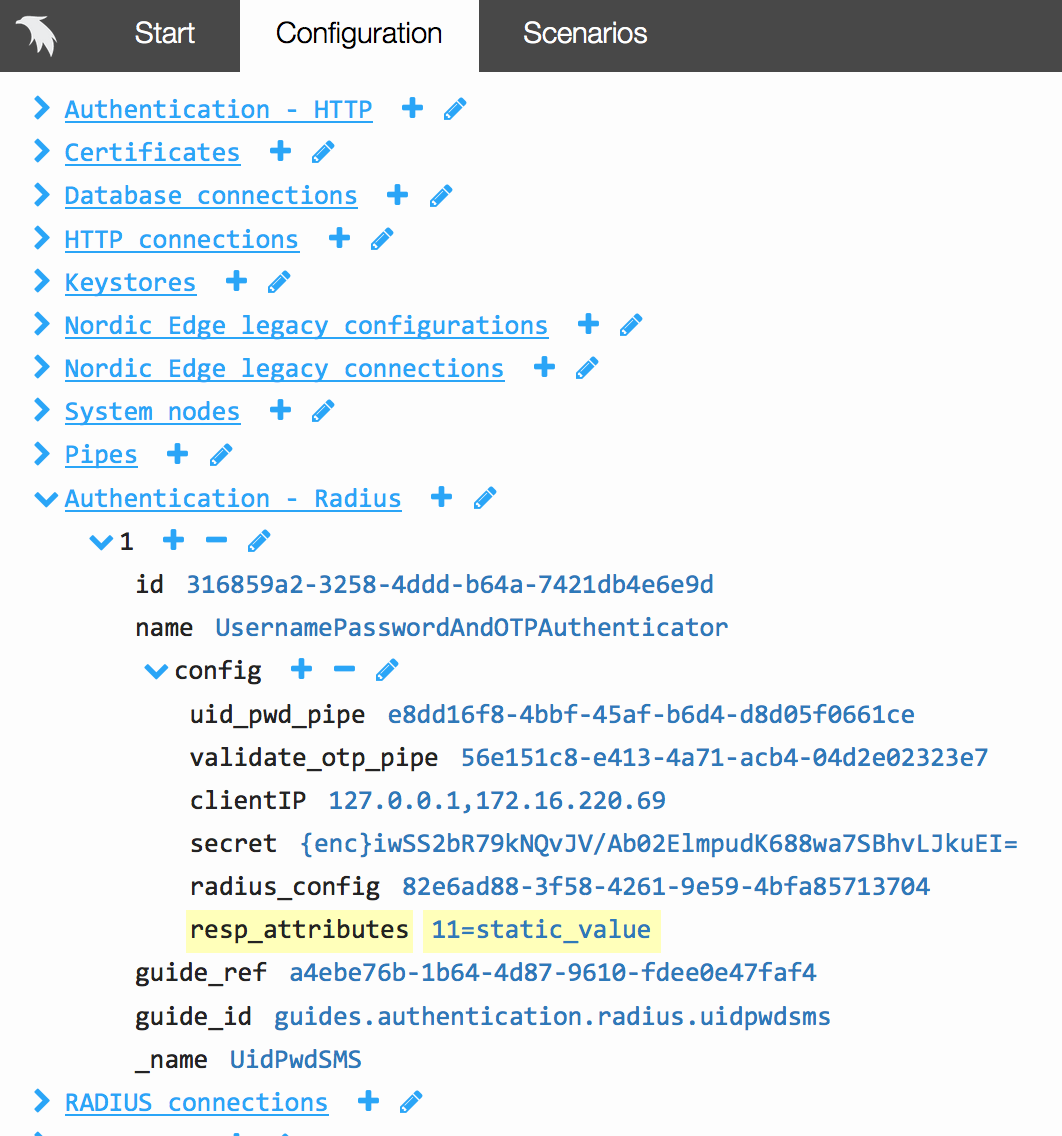
Add resp_attributes as Key and 11=static_value as Value, then press Stage changes.
Should now look like this:
Next step is to add two valves that will add the attribute value in the communication to the Watchguard.
So in the pipe that has your OTPValidationValve, please press edit (pencil) on valves:

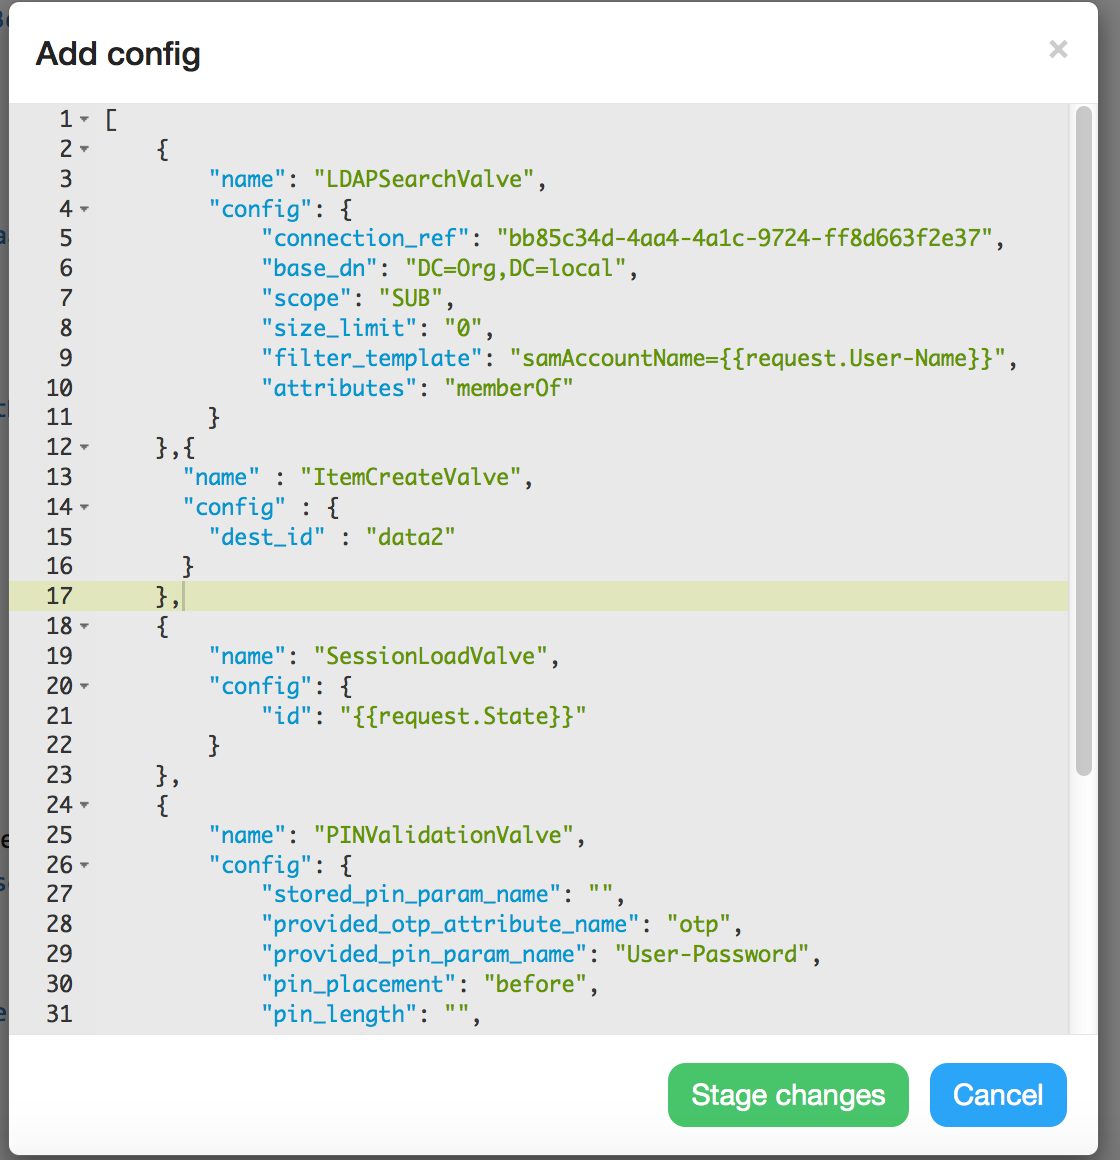
and add the following valve just after the LDAPSearchValve:
{
      "name" : "ItemCreateValve",
      "config" : {
        "dest_id" : "data2"
      }
    }
Should look like this:
Then add the PropertyAddValve containing the name of your RADIUS group after the OTPValidationValve:
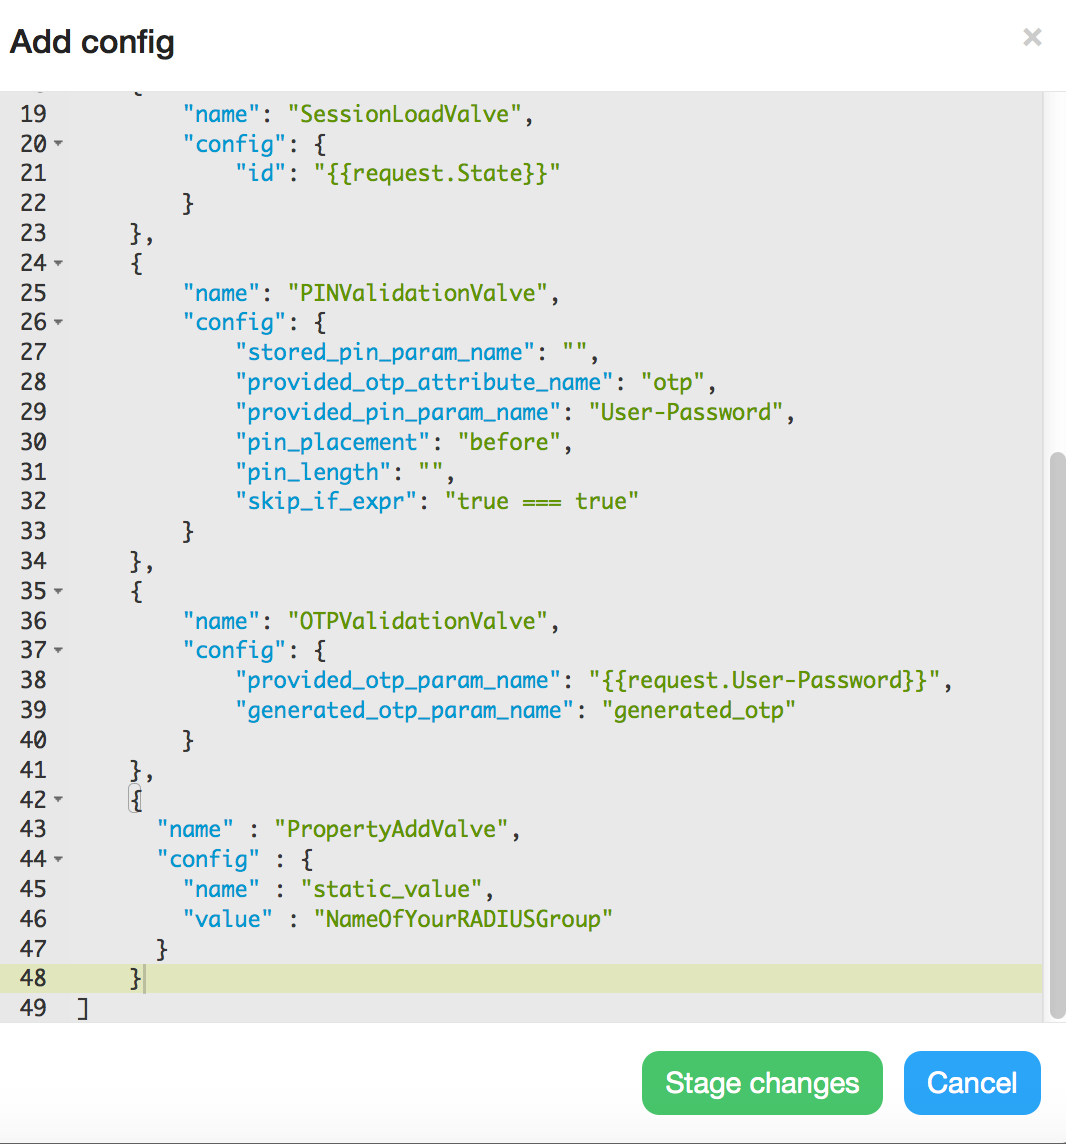
 {
      "name" : "PropertyAddValve",
      "config" : {
        "name" : "static_value",
        "value" : "NameOfYourRADIUSGroup"
      }
    }
When done, press Stage changes and then Commit changes.
Guide to configure Watchguard to use PhenixID Server for two-factor
1 – We will start by enable RADIUS. So from Policy Manager, select Setup > Authentication Servers.
2 – From the RADIUS tab, select the Enable RADIUS Server check box.
3 – In the IP Address text box, type the IP address of the primary RADIUS server for Watchguard to contact with authentication requests.
4 – From the Port drop-down list, select the UDP port number for Watchguard to use to send RADIUS requests.
5 – Type and confirm the RADIUS Secret.
6 – Set the Timeout value to 20 seconds or higher.
7 – Do not change the Group Attribute default value, it needs to be set to 11.
8 – Add information for a backup RADIUS server, if you have one.
9 – Click OK and save your changes.
10 – We can now try the new login using RADIUS against PhenixID Server.
DISCLAIMER
Information provided in this document is for your information only. PhenixID makes no explicit or implied claims to the validity of this information. Any trademarks referenced in this document are the property of their respective owners.The origin of this information may be internal or external to PhenixID. PhenixID makes all reasonable efforts to verify this information.
PhenixID - support.phenixid.se