Document version (last updated) : 2021, April 6th.
Prerequisite
- PhenixID Identity Manager (IM) 5.6.0 or later
- PhenixID Identity Provisioning (PIP) 5.3.0 or later
- NOTE: For a better understanding of how PIP and PIP communicate using REST Web Service can be read in PSD1062.
- Active Directory
Overview
The main focus for this use case are two things:
- Manage mandatory attributes in a PIM form using PIP
- Verify the uniqueness of an attributes in a PIM form.
Configuration
This PSD includes configuration so you can set this up in your own environment. First you need to download a ZIP file that contains a number of files. Open the different files and update them to map your environment, e.g change to your Active Directory name.
Use Cases
Overview PIP manage mandatory attributes
When creating a new object you can specify different attribute to be mandatory. If you like to manage this using PIP, this use case will explain that..
Overview PIP verify the uniqueness
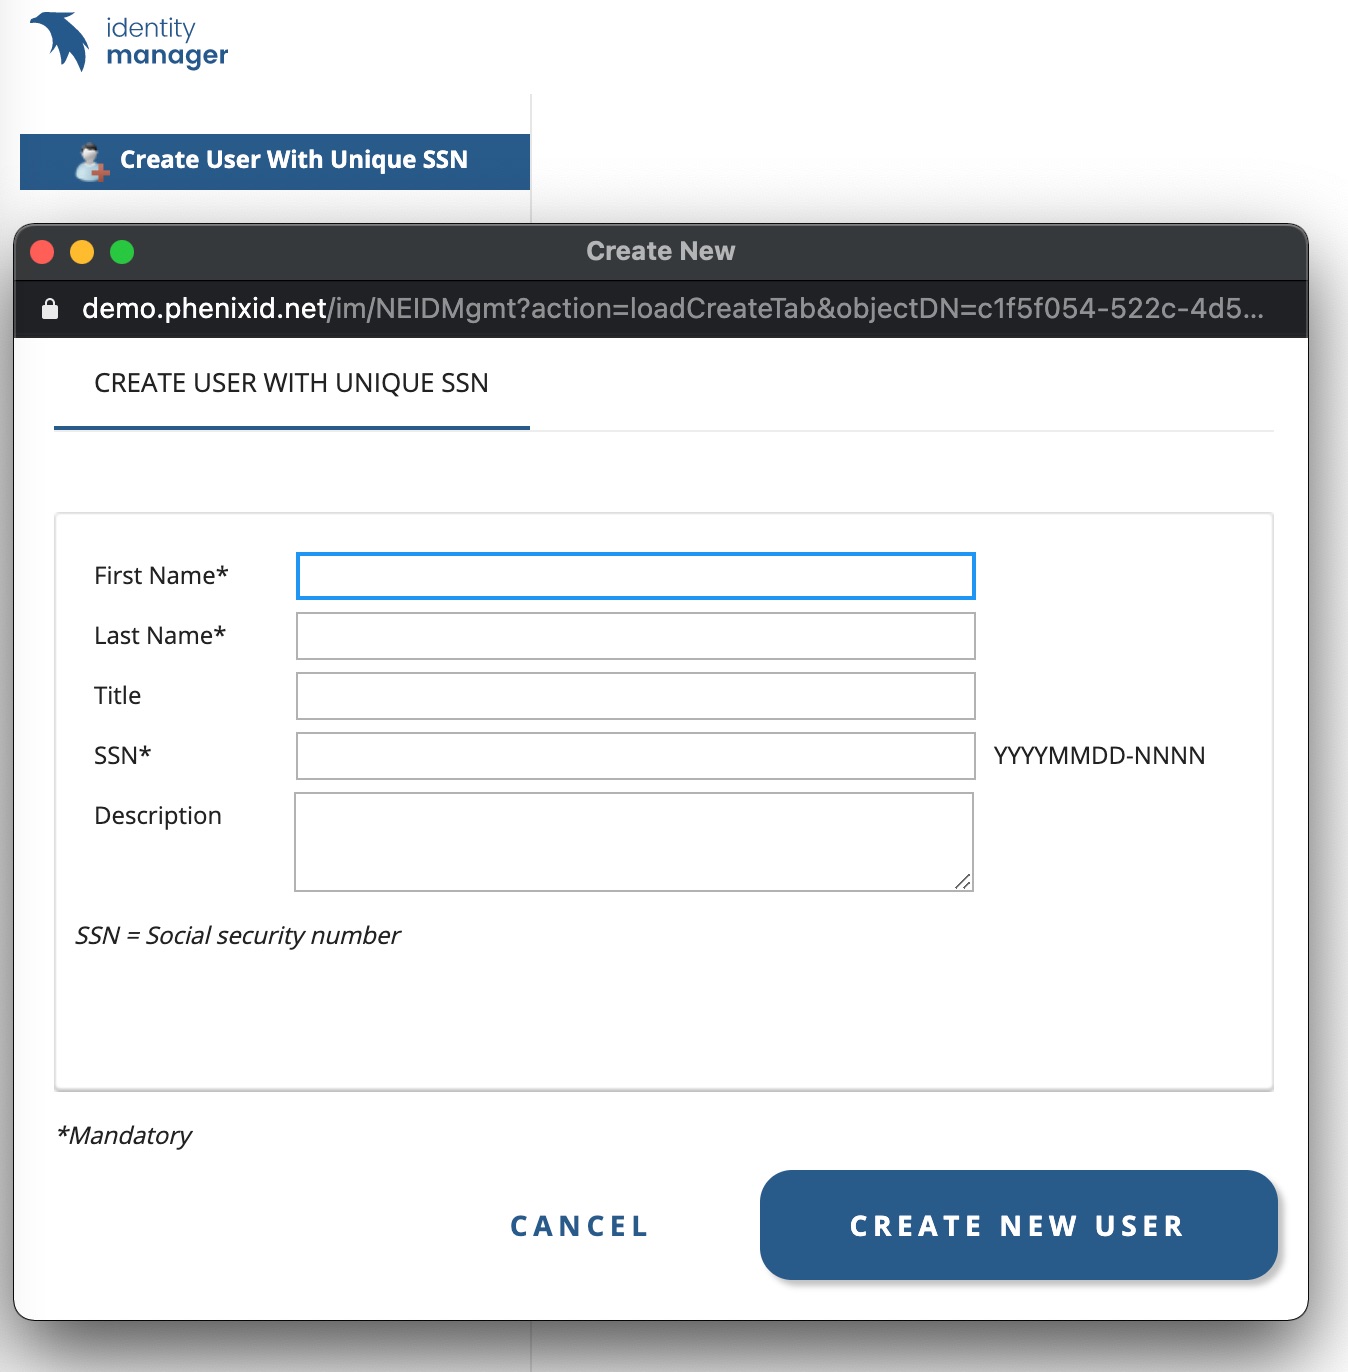
When creating a new object, often there are some attributes that needs to be unique. In this use case we use Social Security Number (SSN) as an example to verify both length, uniqueness and correct syntax.
1. Download and extract configuration ZIP
Download the PSD1174.zip file.
Extract the zip-file.
2. PIM files
2.1 – Add PIM files and folders
- Add the /UC – PSD1174 – Create User with unique SSN folder from the zip-file to the /role folder to your PIM installation.
- Open DSEditor.properties
- Change below parameters to map your environment:
BASEDN=DC=demo,DC=phenixid,DC=net
filter.PIPFilter.URL=http://127.0.0.1:8085 - Save file and restart PhenixID Identity Manager service
2.2 – Change configuration in PIM file
- Open Create User With Unique SSN.xml file
- Find VirtualViewBaseDNs parameter (line 25) and change value to map an OU in your environment.
3. PIP files
3.1 – Import PSD1174_Unique_Mandatory.aax
- Open the Identity Provisioning Configurator
- Click File -> Import Objects
- In the extracted ZIP you downloaded, open /PSD1174_Unique_Mandatory folder and then the /PIP_files folder
- Choose PSD1174_Unique_Mandatory.aax
- Click Import Objects
- When imported it should look below. verify that Data source AD-DEMO matches your environment and connection works ok.
- Save the PIP configuration
3.2 – Change data source to map your Active Directory
- Open PIP configurator
- Expand Data Sources -> LDAP and click LDAP PIM-UC
- Change configuration to map you environment
3.3 – Create Global parameter for where the Root of your AD
- Open PIP configurator
- Click Tools and Global Parameters
- Add one custom parameter for the root of your LDAP/AD.
- LDAPRoot – e.g. DC=company,DC=local
- Click OK
- Save PIP configuration
3.4 – Create and OU in Active Directory called PSD1174 under LDAPRoot
E.g. OU=PSD1174,DC=company,DC=local
DISCLAIMER
Information provided in this document is for your information only. PhenixID makes no explicit or implied claims to the validity of this information. Any trademarks referenced in this document are the property of their respective owners.The origin of this information may be internal or external to PhenixID. PhenixID makes all reasonable efforts to verify this information.
PhenixID - support.phenixid.se