Document version (last updated) : August 30th, 2022.
Note: If you downloaded this PSD before the date above, please remove it and reinstall with this PSD.
Prerequisite
- PhenixID Identity Manager (IM) 5.6.0 or later
- PhenixID Identity Provisioning (PIP) 5.3.0 or later
- NOTE: For a better understanding of how PIP and PIP communicate using REST Web Service can be read in PSD1062.
- Active Directory
- Google Suite account
- Office 365 account
Overview
Use PIM to select whether to create an Active Directory, Google or/and Office 365 account. Your choice will be sent to PIP that will create the account(s).
For other PIM/PIP use cases, please read PSD1173
Configuration
This PSD includes configuration so you can set this up in your own environment. First you need to download a ZIP file that contains a number of files for PIM and PIP. Open the different files and configure them to map your environment, e.g change to your Active Directory name.
Use Cases
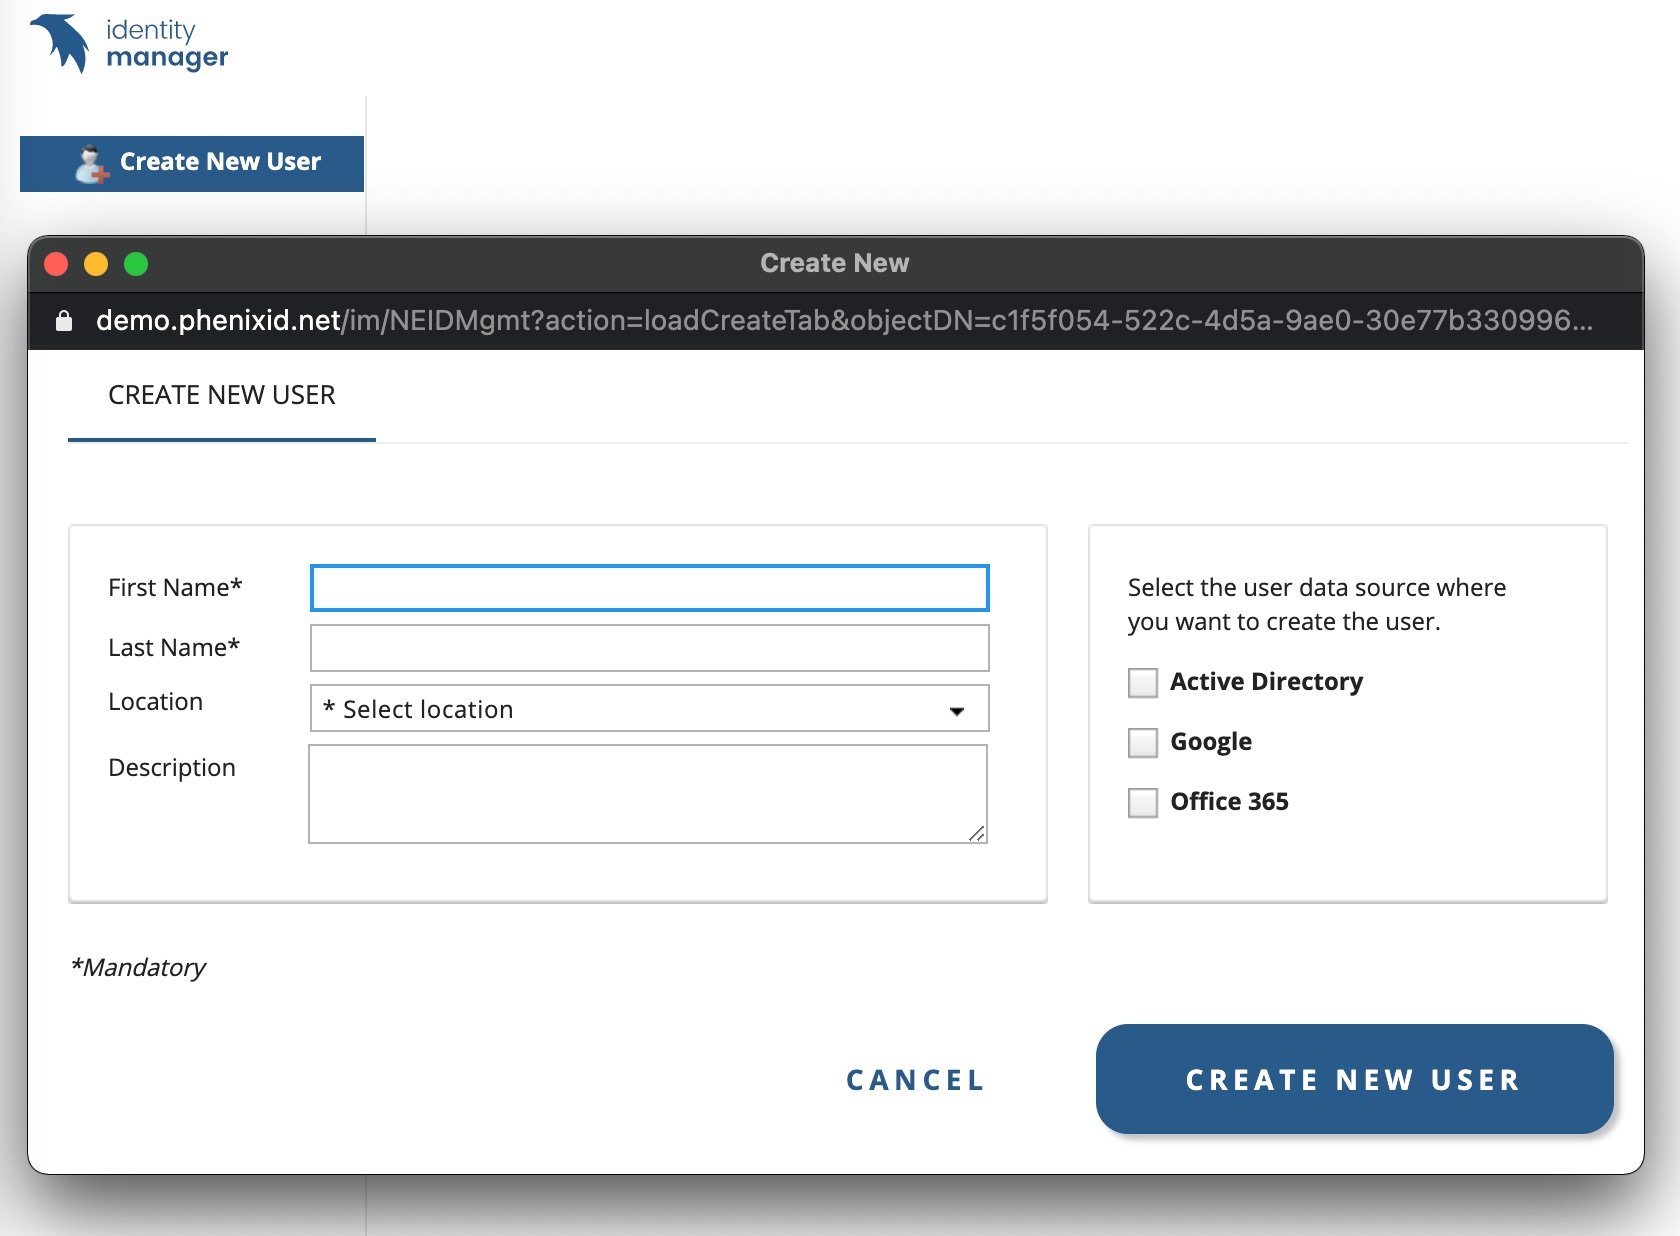
This user case allows you to choose in which data source or sources you want to create a new user.
The use case includes creation of users in:
1. Download and extract configuration ZIP
Download the PSD1175.zip file.
Extract the zip-file.
2. PIM files and configuration
2.1 – Add PIM files and folders
- Add the UC – PSD1175 – Create an account in LGO folder from the zip-file to the /role folder to your PIM installation.
- Open DSEditor.properties
- Change below parameters to map your environment:
- BASEDN=DC=demo,DC=phenixid,DC=net
- filter.PIPFilter.URL=http://127.0.0.1:8085
- Save file and restart PhenixID Identity Manager service
2.2 – Change configuration in PIM file
- Open Create User With Unique SSN.xml file
- Find VirtualViewBaseDNs parameter (line 25) and change value to map an OU in your environment.
3. PIP files and configuration
3.0 – Import Google actions
Read PSD1171 on how to import Google Action into to PIP.
3.1 – Import PSD1175_CreateUserInLGO.aax
- Open the Identity Provisioning Configurator
- Click File -> Import Objects
- In the extracted ZIP you downloaded, open /PSD1175 folder and then the /PIP folder
- Choose PSD1175_CreateUserInLGO.aax
- Click Import Objects
- When imported it should look below. verify that Data source AD-DEMO matches your environment and connection works ok.
- Save the PIP configuration
3.2 – Change data source to map your Active Directory
- Open PIP configurator
- Expand Data Sources -> LDAP and click LDAP PIM-UC
- Change configuration to map you environment
3.3 – Create four global PIP parameters and map to your organisation
- Open PIP configurator
- Click Tools and Global Parameters
- Add five custom parameters
- GoogleAdminID – e.g. admin_name@yourgoogledomain.com
- GoogleCredentials – JSON-file. Get it from your Google domain
- GoogleDomain – yourgoogledomain.com
- LDAPRoot – e.g. DC=company,DC=local
- Off365_UPN – e.g. PhenixID.onmicrosoft.com
3.4 – Create and OU in Active Directory called PSD1175 under LDAPRoot
E.g. OU=PSD1175,DC=company,DC=local
4. Powershell script
Prerequisite
The example powershell script uses a certificate to authenticate to Azure and the tenant and app. You MUST change the values in the powershell script to map your environments configuration. To understand what needs to be done, please read PSD1200 for more info.
- In the zip-file and the /Powershell folder. Copy the Create_Office365_User.ps1 file and place it in C:\
4.1 – Add Powershell script to file system
- In the zip-file and the /Powershell folder. Copy the Create_Office365_User.ps1 file and place it in C:\
4.2 – Change script to map to your Office 365 environment
For more info about the asked IDs below, please read PSD1200.
- Open script
- Find your_app_id and add your APPID
- Find your_tenant_id and add your TENANTID
- Find your_thumbprint_id and add your certificate THUMBPRINT
4.3 – Allow script to be trusted on your Windows Server
- Open Windows Explorer
- Right click the script and select Properties.
- Unselect checkbox Unblock to trust the scripts.
DISCLAIMER
Information provided in this document is for your information only. PhenixID makes no explicit or implied claims to the validity of this information. Any trademarks referenced in this document are the property of their respective owners.The origin of this information may be internal or external to PhenixID. PhenixID makes all reasonable efforts to verify this information.
PhenixID - support.phenixid.se