Summary
This PhenixID Solution Document (PSD) is written for PhenixID Identity Manager 5.5.0 or later.
When you have installed PhenixID Identity Manager you will need to start to create forms, predefined searches and policies for example. If you have an Active Directory environment then you can use this PSD to add a number example roles to see what the product is capable of.
System Requirements
- PhenixID Identity Manager 5.6.0 or later installed
- Microsoft Active Directory
Overview
This document gives you a number of example roles, forms, searches and policies for an environment with Active Directory, if you have another LDAP directory you can easily change the forms to fit you environment.. This is only examples, change the configuration in any way you want to fit to your environment or needs.
First you need to download a ZIP file that contains a number of files.
Open the different files and update them to map your environment, e.g change to your Active Directory name.
Instruction
In this example there are five roles with its number of policies, forms and searches.
The example roles are:
- Certificate Manager
- Custom View
- Identity Auditor
- Manager
- MultiDB
- Resource Owner
- Role Admin
- Self Service
- Service Desk
Before you start the different tasks below, make sure you have a correct version of IM installed. Verify this PSD system requirements.
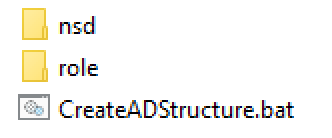
Download and extract PSD1097.zip
For this PSD there are a number of example files that you will be asked to use.
Download the PSD1097.zip file.
Extract the zip file.
The result should look like this:
Create an example Active Directory structure
With this package you can create and search different objects in Active Directory. To make this demo work in your environment the easiest way is to create a number of Active Directory object for the demo.
This script will create in the root of your domain an OU called PhenixID_Demo. In that OU there will be an OU structure to reflect the example and four groups that will be used as IM roles.
No Active Directory schema extension is necessary.
From the PSD1097.zip file, open the CreateADStructure.bat file.
Open the file and do a search and replace.
Search for DC=demo,DC=phenixid,DC=net and replace with your AD name, e.g. DC=MyCompanyAD,DC=se
Run the script CreateADStructure.bat.
Make sure you are running this on a Domain Controller and that you have permission to create object in the root of your domain.
Insert the role folder
The role folder includes all policies, forms and searches for each role.
From the PSD1097.zip, copy the content of the folder /role to:
drive:/Program Files/PhenixID/IM/customer/role
The result should look like this: (some more roles has been added since this screenshot)

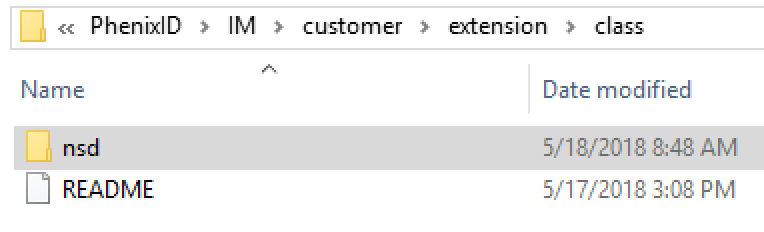
Add the nsd folder
Some of the roles (mainly the Service Desk role) have some feature that is not included in the “out-of-the-box” version of Identity Manager. Those features have corresponding class files. The only thing you need to do is to copy this folder to your installation folder.
From the PSD1097.zip, copy the folder nsd to:
drive:/Program Files/PhenixID/IM/customer/extension/class
The result should look like this:
Modify DSEditor.properties so IM only reads data from file
The file DSEditor.properties in (drive:/Program Files/PhenixID/IM/customer/config/) is the configuration file that Tomcat reads when it starts the IM web app.
Open the DSEditor.properties that was created when you installed IM in a text editor.
Scroll down to the bottom of the file.
Paste the information below to your DSEditor.properties file.
The result should look like this:
# ------ LINE BELOW IS WHERE TO START TO COPY------
#
# Specific for Active Directory
LDAP_REFERRAL_BIND_PROC=true
LDAP_IGNORE_REFERRAL=true
Use_LDAP_Paged_Result=true
#
# Settings when reading policies, forms and searches from file instead from directory
#
# Settings for role selector
ROLESELECTOR_CLASS=se.nordicedge.rolemanagement.LDAPBasedRoleSelector
# Make sure no policy is loaded/read from directory
LOAD_POLICY_FROM_FILE_ONLY=true
# Load predefined search from file
PREDEFINED_SEARCH.LOAD_FROM_FILE=true
#
#------ LINE ABOVE IS WHERE TO STOP THE COPY ------
Save and close the DSEditor.properties file.
Modify different example files to map your directory
In the role folder, there are one DSEditor.properties (policy file) per role and several forms and searches per role. These policies, forms and searches are mapped to the directory used when PhenixID created this package. These mapping needs to be changed to reflect your environment.
For example, use Notepad++ to do a search and replace for all files in a folder structure.
Search and replace DC=demo,DC=phenixid,DC=net with your domain name, for example DC=myadname,DC=com
Some notes about the MultiDB role
The purpose for the MultiDB role is to search, create and edit objects in another LDAP database.
The MultiDB role has some policies for the external LDAP. Those policies must also change to map your environment. The policies to change start with MULTIDB_1_*
Open DSEditor.properties for the MultiDB role.
Some notes about the Custom View role
Read PSD1177 if you have upgraded an IM to version 5.6.0. If you did a clean install of 5.6.0 or later this role will work by default,.
Test the example roles
Start Identity Manager web.
Restart Identity Manager.
Open a web browser and execute the address http://IM_Web_Server/im
Login as a user that is member of one or more of the example roles.
DISCLAIMER
Information provided in this document is for your information only. PhenixID makes no explicit or implied claims to the validity of this information. Any trademarks referenced in this document are the property of their respective owners.The origin of this information may be internal or external to PhenixID. PhenixID makes all reasonable efforts to verify this information.
PhenixID - support.phenixid.se