Summary
This document will guide you through the steps to enable multi-factor authentication and Single-Sign On for Citrix StoreFront (https://docs.citrix.com/en-us/storefront/current-release.html) using SAML2.
System Requirements
- PhenixID Authentication Server 2.8 or higher
- Citrix StoreFront version 3.9 or higher
- StoreFront administration rights
- The users to be federated must be present in LDAP store connected to StoreFront (usually Active Directory)
Instruction
Overview
This document will guide you through the steps to enable multi-factor authentication and Single-Sign on for Citrix StoreFront .
PhenixID Server acting as SAML IdP
- Setup PhenixID Authentication Services as a SAML IdP using one of the Federation scenarios described here. (If the desired authentication method is not provided by a scenario, use the documentation for the SAML authenticator here)
- Depending on your setup, fetch the AD userID value from the appropriate attribute (typically sAMAccountName or userPrincipalName) on the user object.
- Use sAMAccountName/userPrincipalName as Name ID attribute.
- Go to Scenarios->Federation-> <newly_added_scenario> -> Identity Provider. Deselect “Require signed requests”. Save.
- Then export your SAML IdP metadata by going to the URL:
https://<YourServerDomainName>/saml/authenticate/<authenticator_alias>?getIDPMeta
and download the metadata to a xml file. - Save the IDP Signing Certificate as a file (follow this instruction)
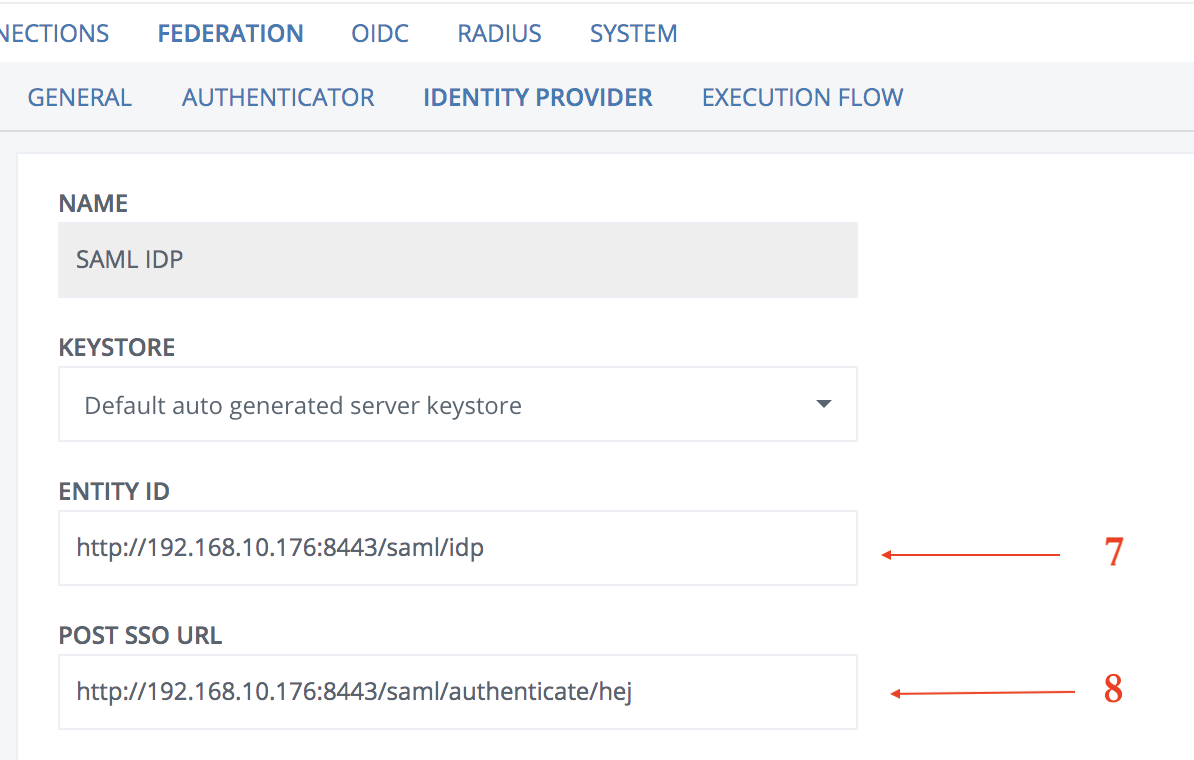
- Fetch the IdP entityID value (see below).
- Fetch the IdP Post SSO value (see below).
- Click Execution Flow
- Expand the execution flow containing the AssertionProvider valve
- Expand the AssertionProvider valve
- Add two keys under Miscellanous
- signMessage = false
- signAssertion = true
- Click Save
Configure Citrix StoreFront
- Open the StoreFront management console
- Select the store that you wish to use SAML for
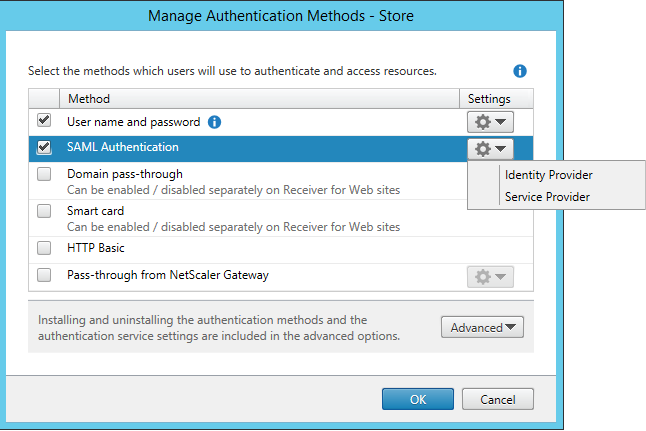
- Click Manage authentication methods
- Select SAML Authentication -> Identity Provider
- This dialog will appear.
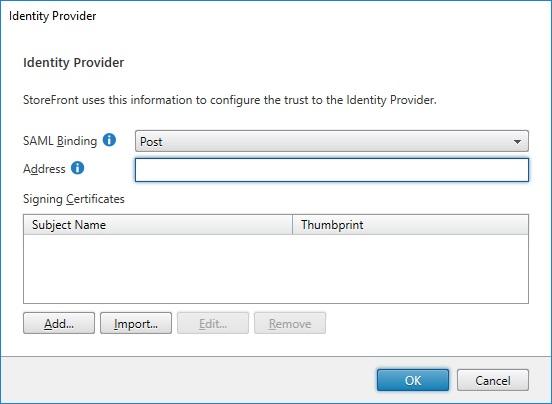
Enter the following values:
– SAML Binding = Post
– Address = <Enter the IdP Post SSO value fetched in previous step>
– Signing Certificates = Click Import and upload the cert fetched in previous step (IDP Signing Certificate) - Click OK
- Select SAML Authentication -> Service Provider
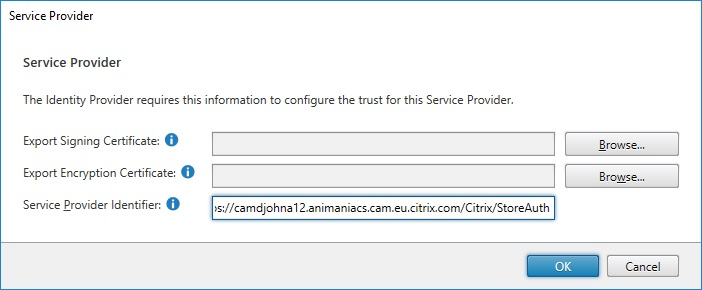
– Export Signing Certificate = Click browse and select certificate
– Service Provider Identifier = Leave default value - Click OK.
- Browse to https://<storefront_domain_name>/Citrix/StoreAuth/SamlForms/ServiceProvider/Metadata to display StoreFront SAML Service Provider metadata
- Save the metadata as an xml file (StoreFront.xml)
Add trust to Citrix StoreFront on PhenixID Authentication Services
- Login to configuration manager
- Open Scenarios->Federation->SAML Metadata upload
- Click the plus sign
- Add StoreFront SAML SP Metadata by uploading the file downloaded in previous step (StoreFront.xml)
Test
- Browse to your Citrix StoreFront site
- This should result in a redirect to PhenixID Authentication Server
- Authenticate
- If authentication was successful, a redirect to StoreFront should occur (with SAML assertion)
- The user should now be logged in.
Troubleshooting
- If error message is presented on PhenixID Authentication Services page, please check server.log for details.
- If error message is presented on Citrix StoreFront page, please check Windows Server event viewer for details.
DISCLAIMER
Information provided in this document is for your information only. PhenixID makes no explicit or implied claims to the validity of this information. Any trademarks referenced in this document are the property of their respective owners.The origin of this information may be internal or external to PhenixID. PhenixID makes all reasonable efforts to verify this information.
PhenixID - support.phenixid.se