Summary
This document will guide you through the steps to set Juniper SSL/VPN remote access policies based on the group membership from LDAP User database with PhenixID Server.
System Requirements
- PhenixID Server and Juniper installed and configured according to the following document:
http://support.phenixid.se/sbs/step-by-step-juniper-networks-sa-ssl-vpn/
Instruction
Overview
This document will guide you through the steps to set Juniper SSL/VPN remote access policies based on the group membership from LDAP User database with PhenixID Server.
Login to PhenixID Administration Portal
We will use one of the scenarios included in the administration portal.
Open a browser and go to https://PhenixidServerIP:8443/config/.
Use e.g. the default administrator user called phenixid with the default password password to login.
Configure PhenixID Server as a RADIUS server with Juniper
This is explained in another Step-by-Step document, please read through it and then return to this document to continue the setup of Juniper groups.
The step-by-step document to configure PhenixID server to act as a RADIUS server with Juniper:
http://support.phenixid.se/sbs/step-by-step-juniper-networks-sa-ssl-vpn/
In this example we will use RADIUS attribute 25 in the communication to verify the group membership of the user logging in.
So after following the above step-by-step, we will add configuration for this to the file <PhenixID Server installationdirectory>/config/phenix-store.json.
Please make sure to have a backup copy of this file before porceeding.
We will add the configuration using the PhenixID Configuration Manager.
So please login to https://PhenixidServerIP:8443/config/ and go to the tab Configuration (needs to be enabled in boot.json, see document http://document.phenixid.net/m/52601/l/513298-enable-configuration-tab-in-phenixid-configuration-manager).
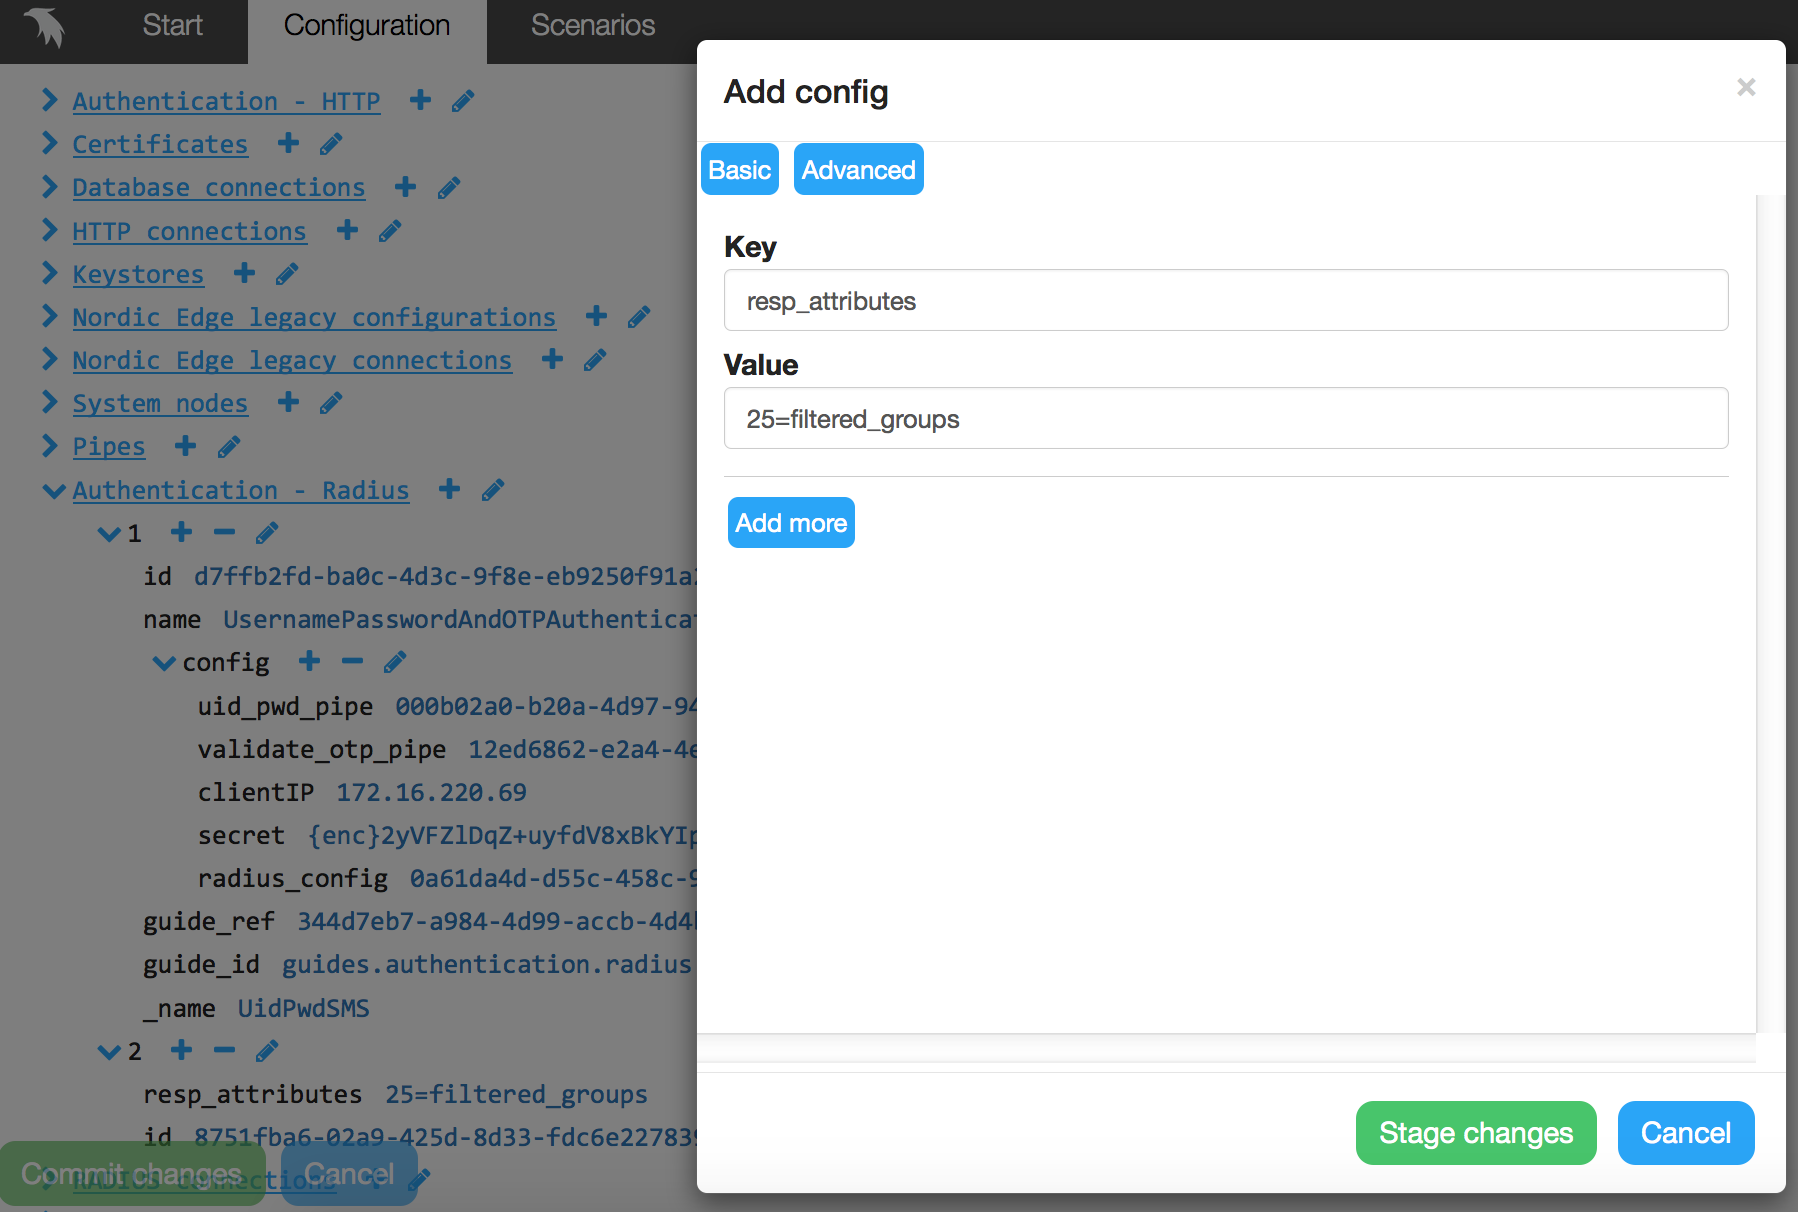
Go to Authentication – Radius find the RADIUS Authenticator and press + besides config.
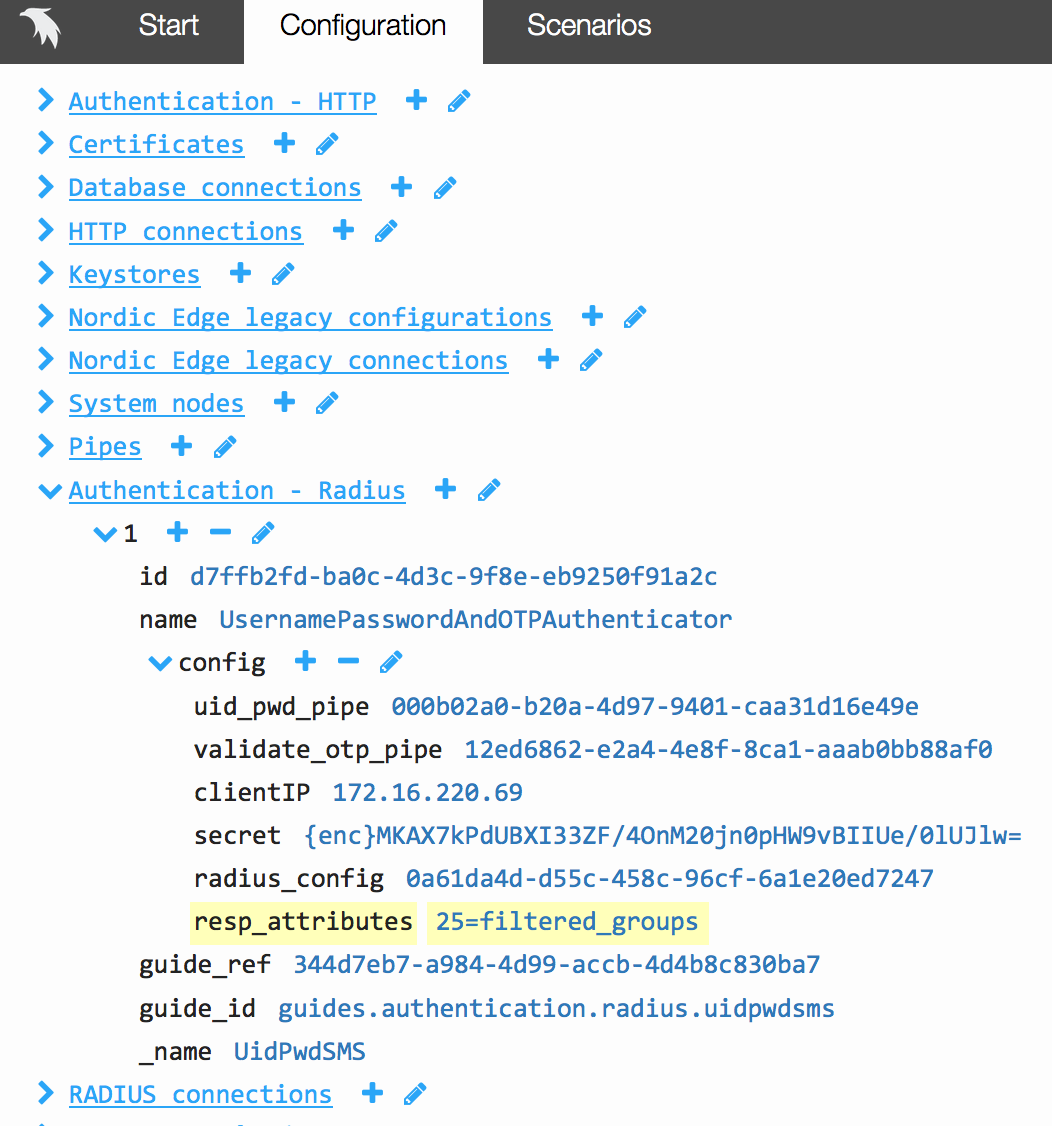
Add resp_attributes as Key and 25=filtered_groups as Value, then press Stage changes.
Should now look like this:
We need to retrieve the group membership from the user account.
So add the attribute memberOf to the list of attributes on your pipe for OTP validation (containing OTPValidationValve) by going to Pipes and press edit on the LDAPSearchValve:
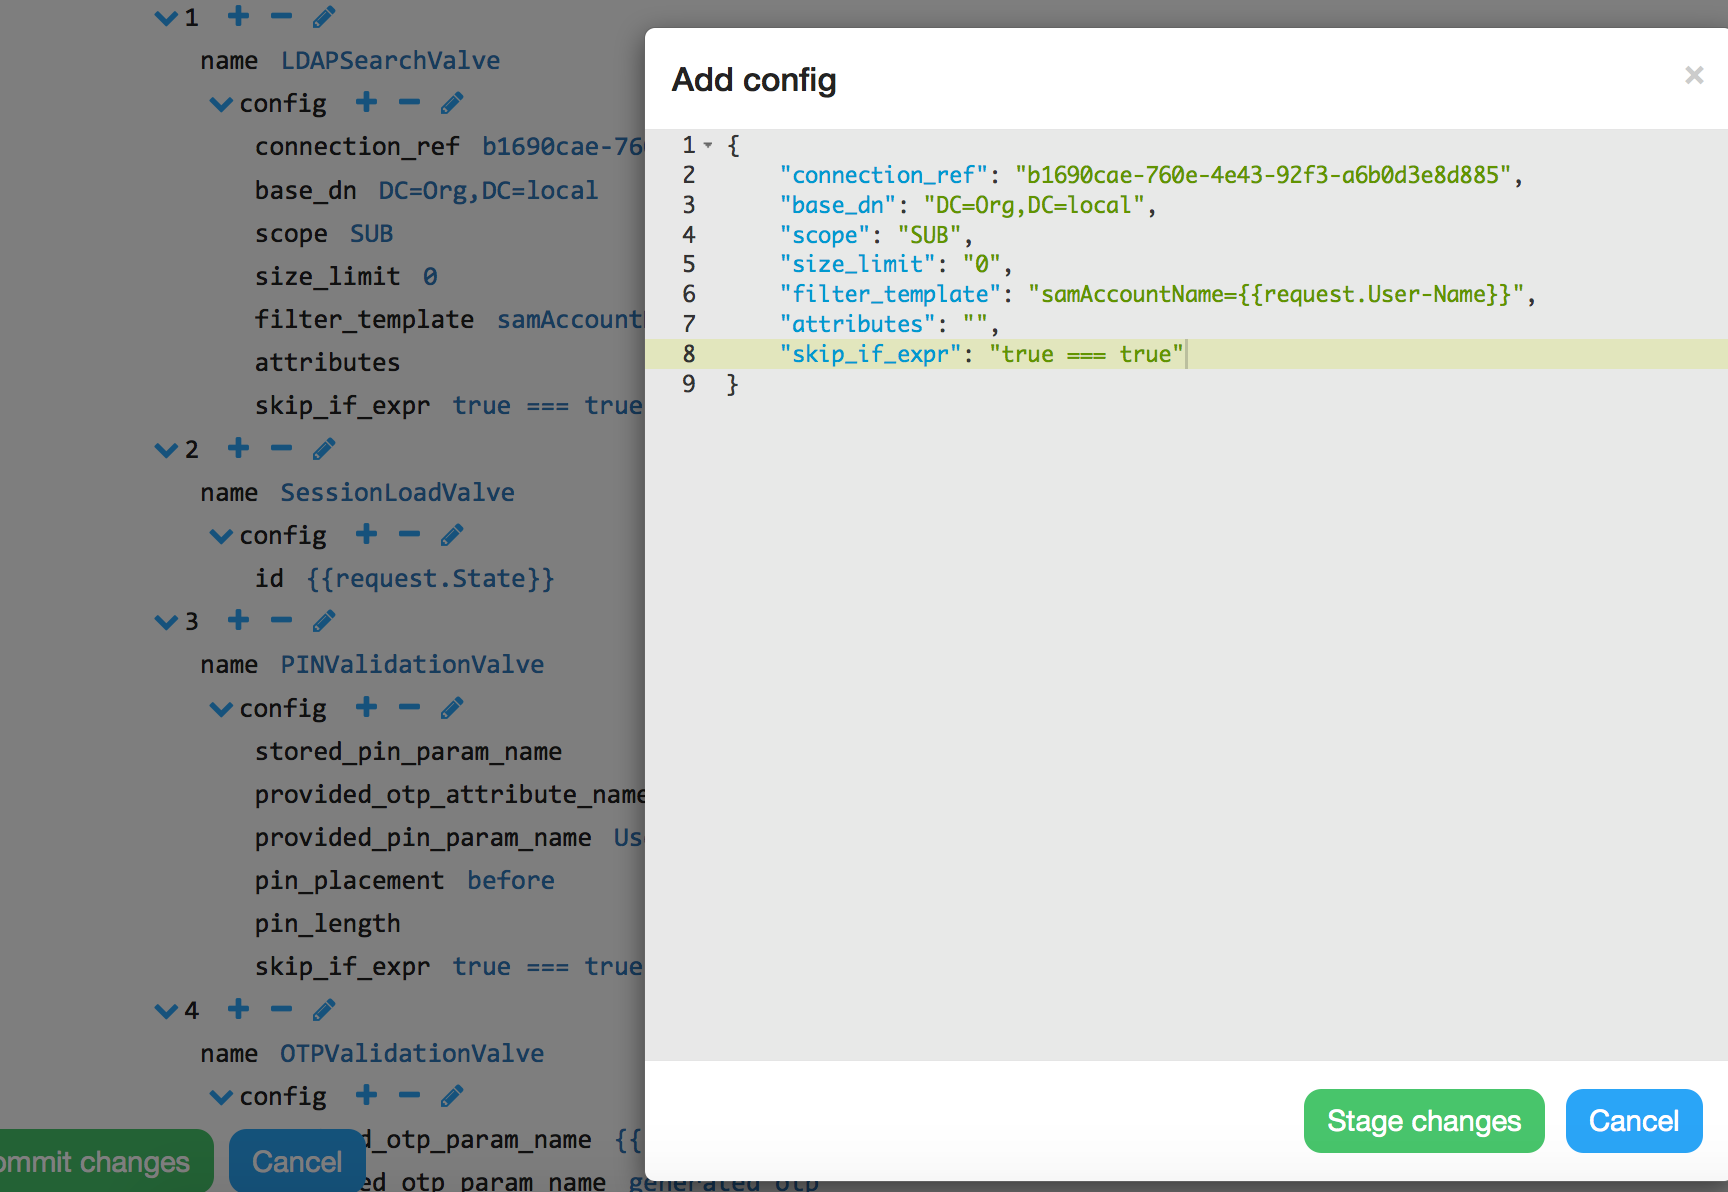
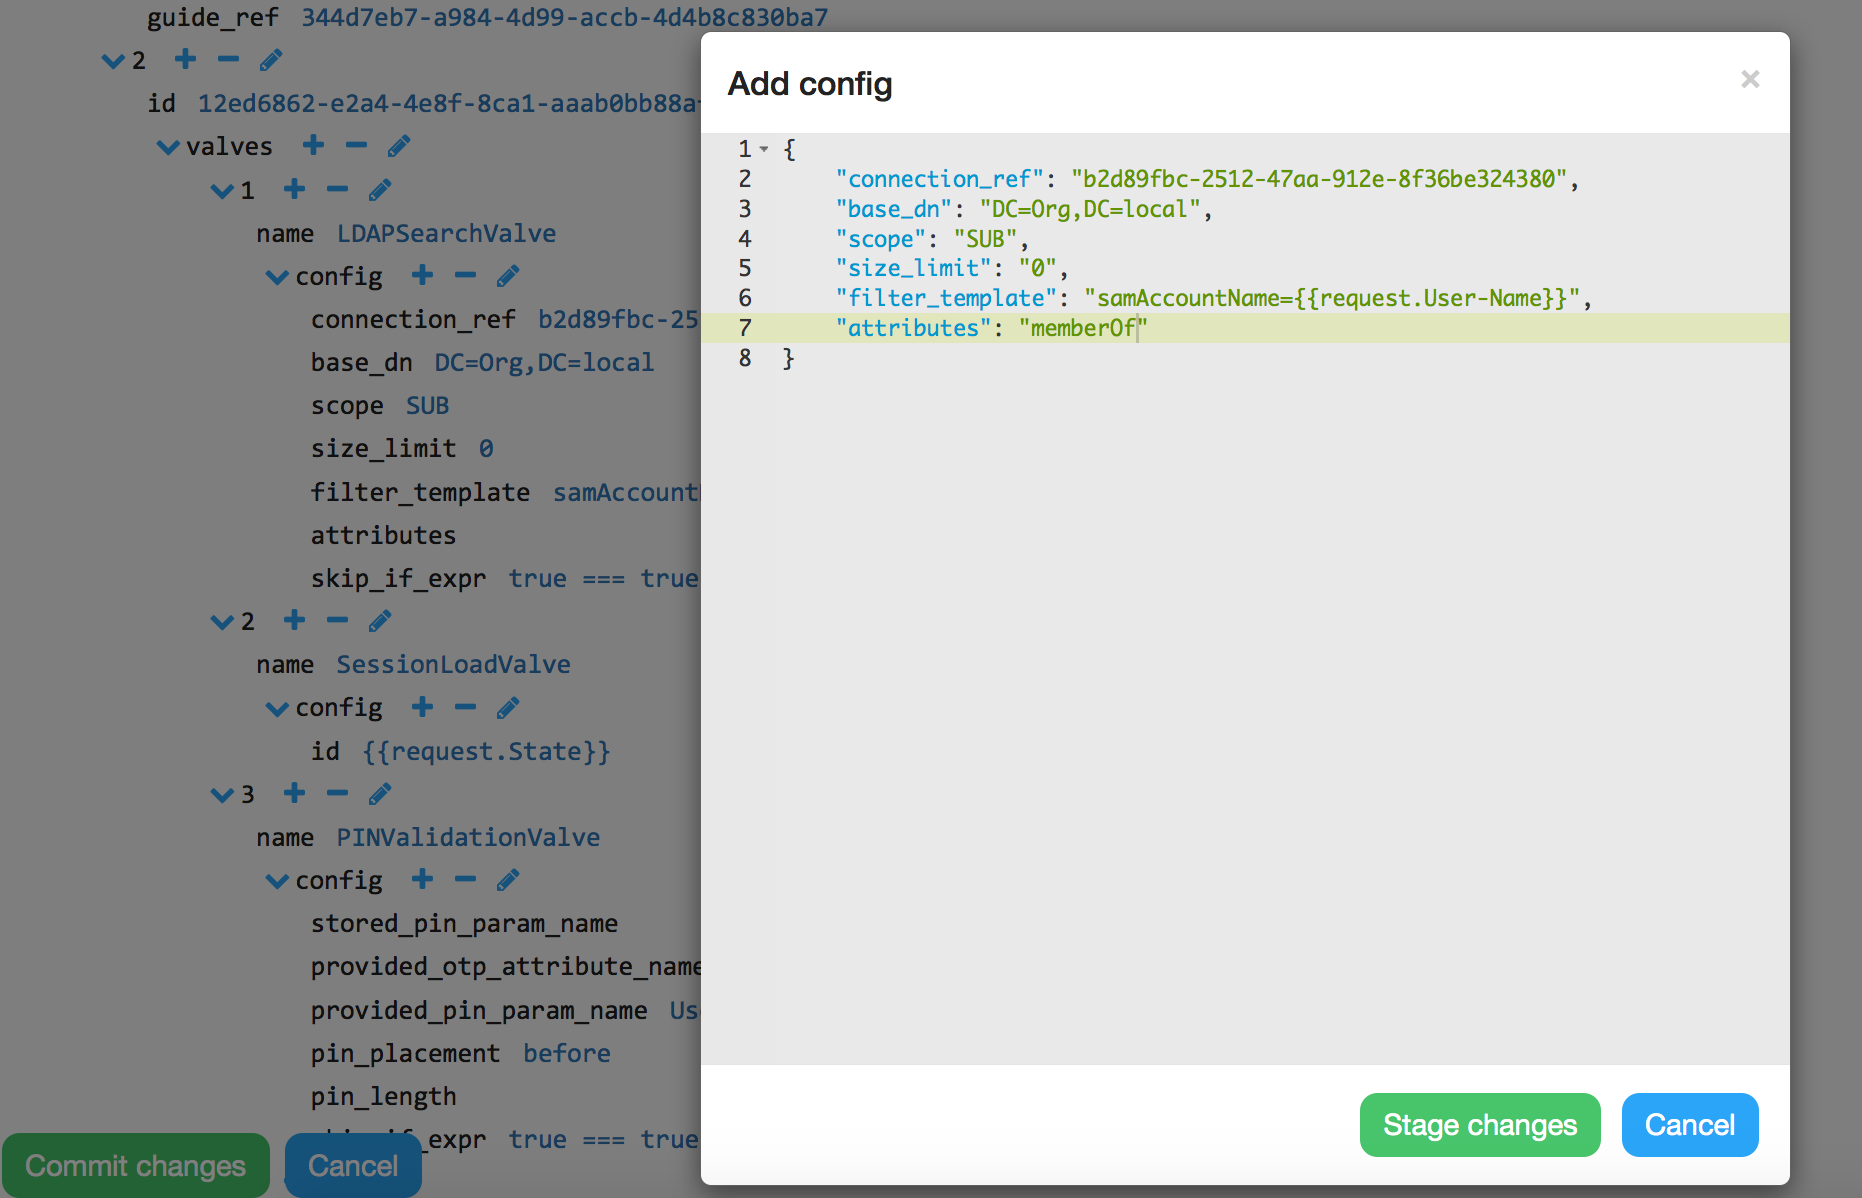
If there is a line 8 like above, please remove it (and the comma on line 7), then add memberOf to attributes.
Should look like this:

Next step is to add the valve that will add the attribute value in the communication to Juniper.
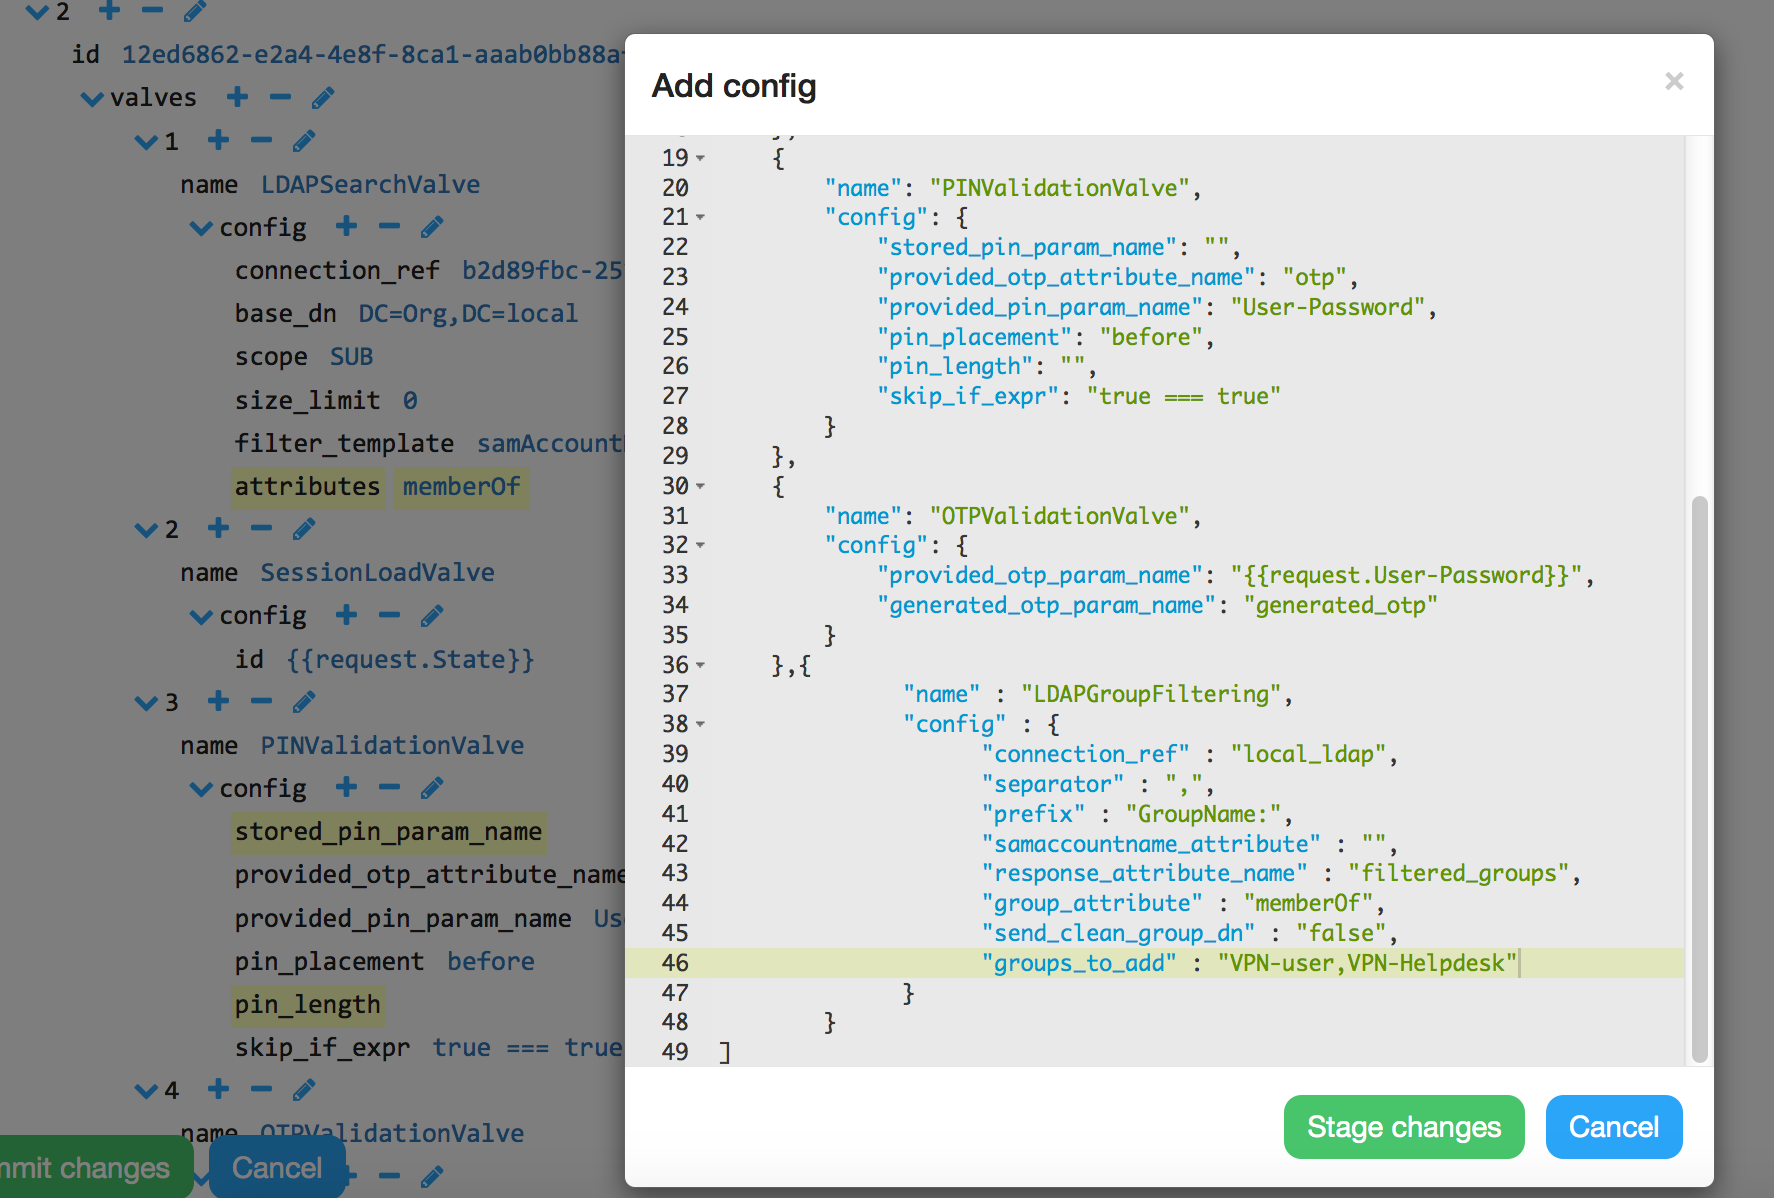
So in the pipe that has your OTPValidationValve, please press edit (pencil) on valves and add the following valve just after the OTPValidationValve:
{
 "name" : "LDAPGroupFiltering",
 "config" : {
 "connection_ref" : "local_ldap",
 "separator" : ",",
 "prefix" : "GroupName:",
 "samaccountname_attribute" : "",
 "response_attribute_name" : "filtered_groups",
 "group_attribute" : "memberOf",
 "send_clean_group_dn" : "false",
 "groups_to_add" : “VPN-user,VPN-Helpdesk”
 }
 }
Make sure to change “connection_ref” according to your configuration, and add your groups to “groups_to_add” with a comma (,) between them.
Should look like this:
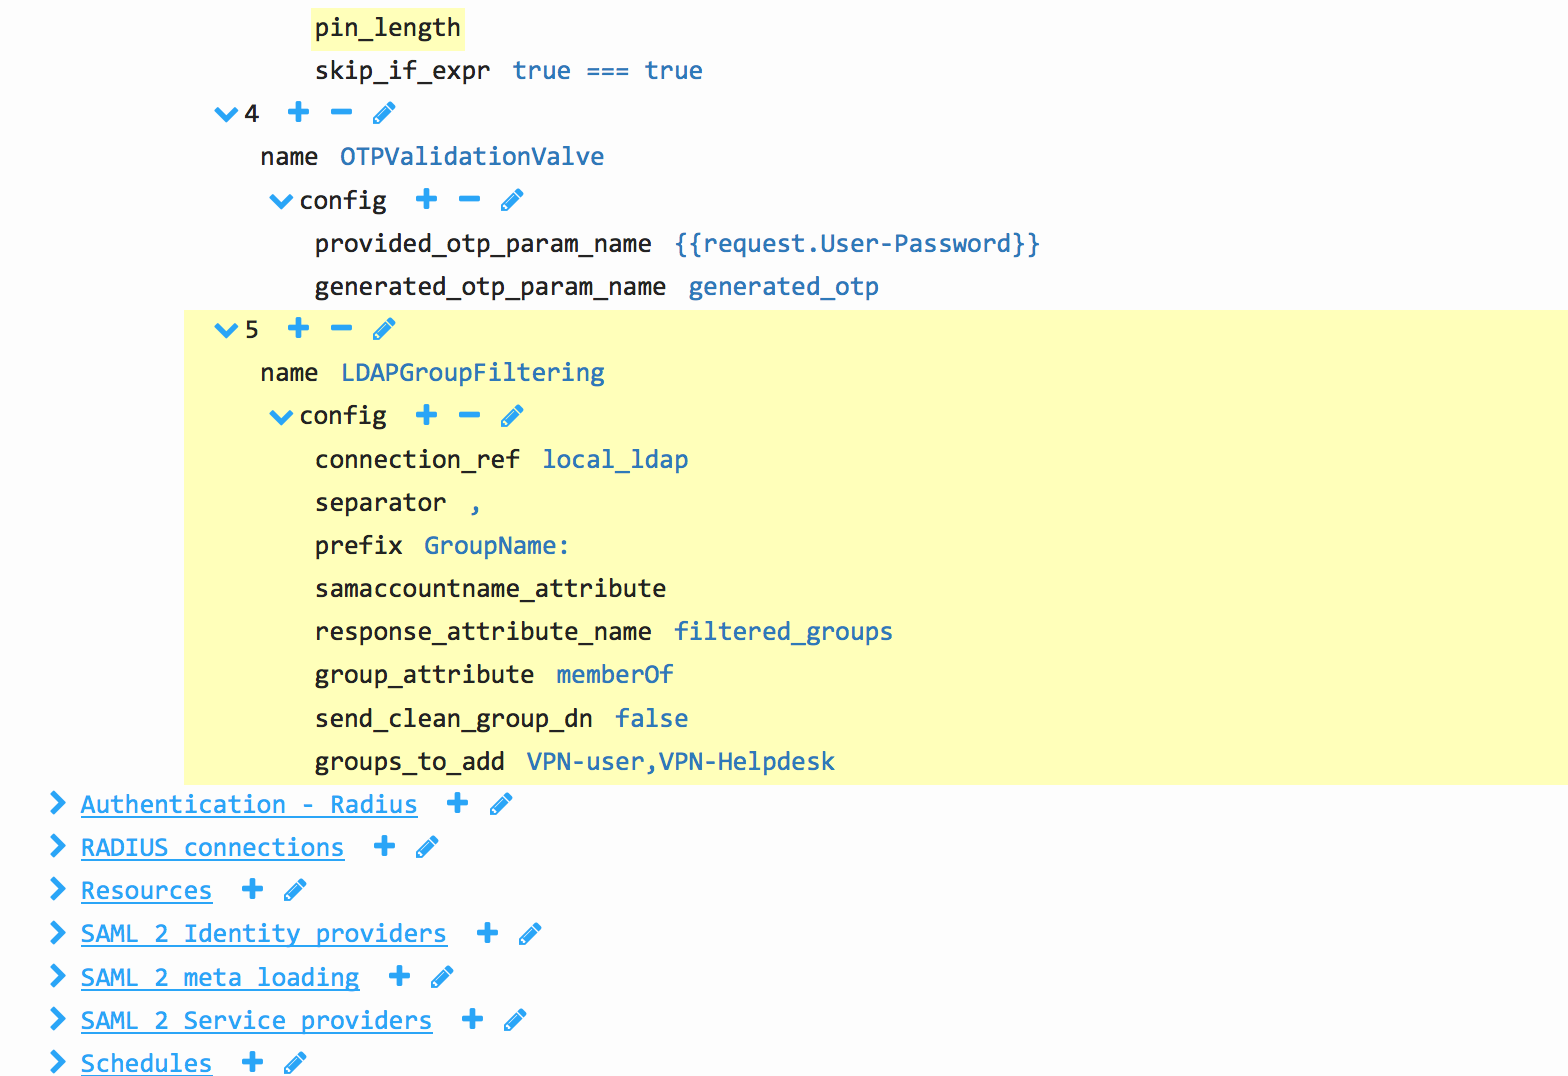
When done, press Stage changes and then Commit changes.
Guide to configure Juniper
Start Juniper Central Manager, select Users / User Roles and create roles matching the groups entered in “groups_to_add” above.
In this example below four roles are created:
VPN-User, VPN-Helpdesk, VPN-Support and VPN-Admins
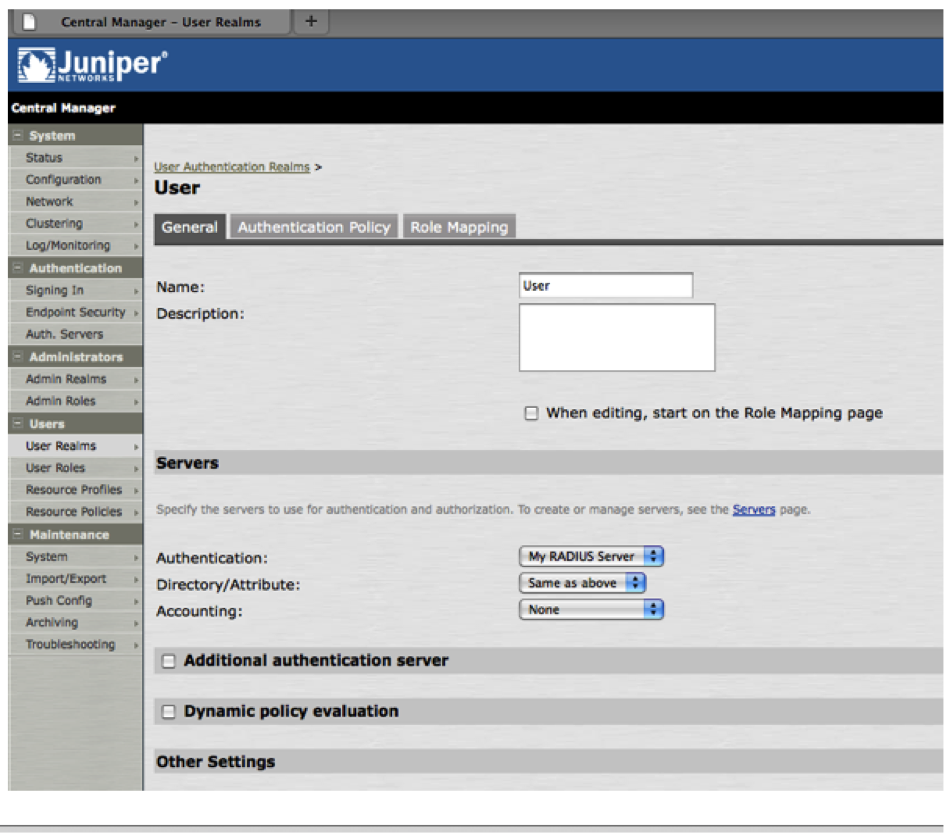
Select Users / Users Realms and open your Realm. In this example the Realm is called “User”.
On the General Page make sure the Directory / Attribute is set to “Same as above”.
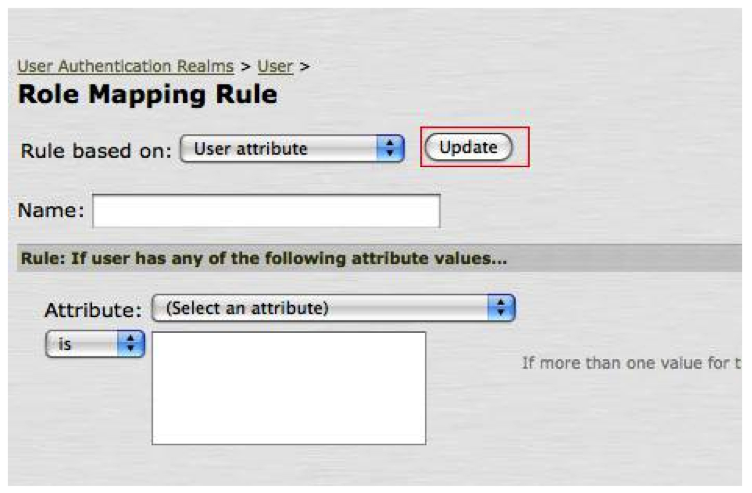
Select the page “Role Mapping” and configure the Rule based on “User attribute”
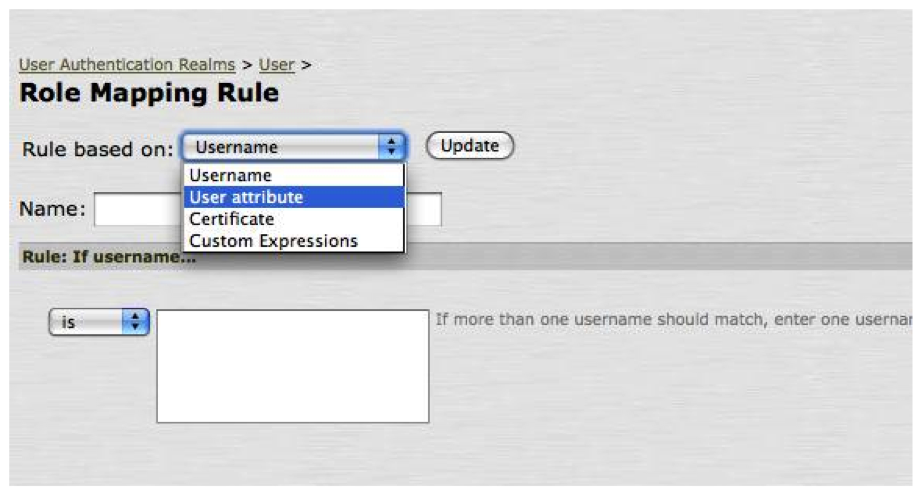
Select “Update”
In this example Role Mapping Rule for Role VPN-User is created as shown below:
Select Attribute Class (25)
Choose “Is” and write group name including GroupNameTag from groupmembership.cfg, i.e “Groupname:VPN-user”
Assign rule to Role “VPN-User”
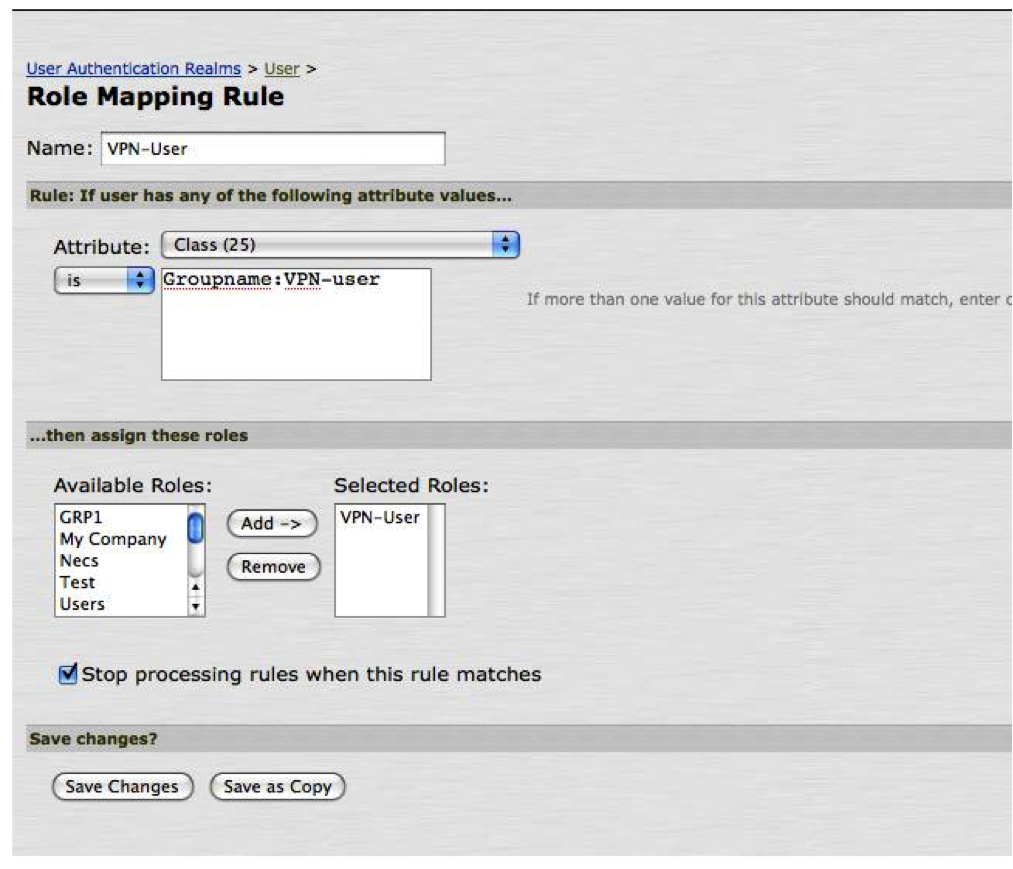
Save changes and repeat for all user groups.
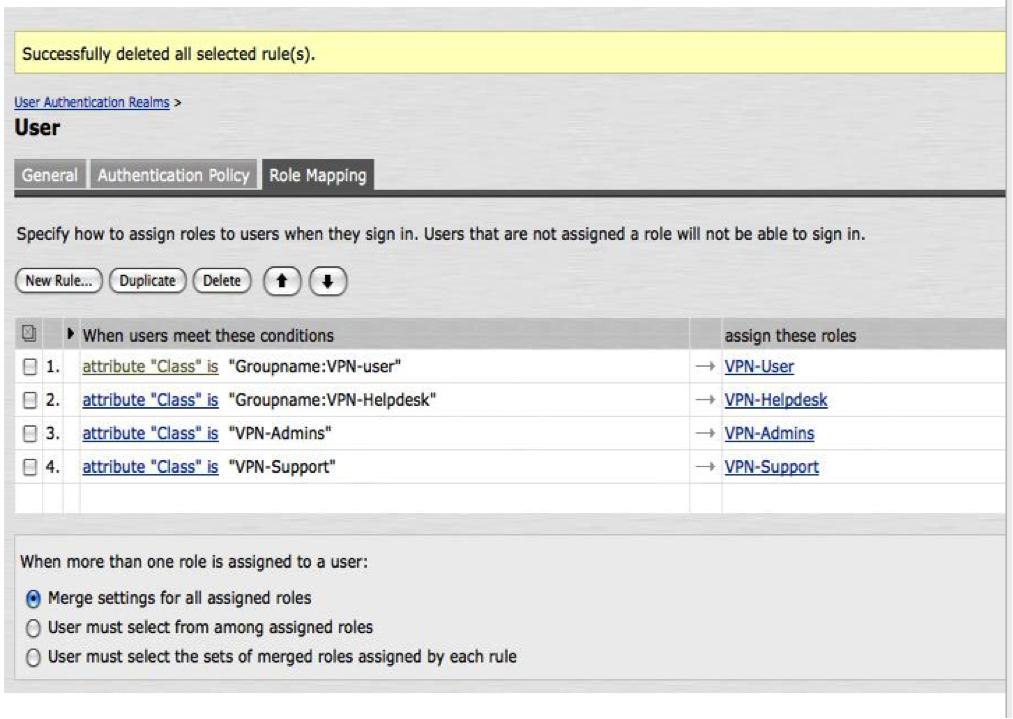
When completed, this example’s configuration looks like the following:
DISCLAIMER
Information provided in this document is for your information only. PhenixID makes no explicit or implied claims to the validity of this information. Any trademarks referenced in this document are the property of their respective owners.The origin of this information may be internal or external to PhenixID. PhenixID makes all reasonable efforts to verify this information.
PhenixID - support.phenixid.se