Summary
This document will guide you through the steps to secure the authentication of your Juniper SA SSL-VPN solution with PhenixID Server, delivering two-factor authentication via SMS. You will be able to test the product, with your current Juniper SA SSL-VPN solution and LDAP user database, without making any changes that affect existing users.
System Requirements
- PhenixID Server installed.
- Information about the userstore, such as ip address/server name, port and userid/password for the connection.
- A userid and password for the PhenixID Message Gateway. Please contact PhenixID Support, support@phenixid.se, to set up the account.
Instruction
Overview
This scenario will:
- Configure PhenixID server as a RADIUS server
- Create a connection to your user store (LDAP)
- Enable two-factor authentication, the one-time password will be delivered via SMS using PhenixID Message Gateway
Configure PhenixID Server to support Juniper Networks for 2fa
We will use one of the scenarios included in the administration portal.
Open a browser and go to https://PhenixidServerIP:8443/config/.
Use the default administrator user called phenixid with the default password password to login.
In this example we will login with username, password and SMS.
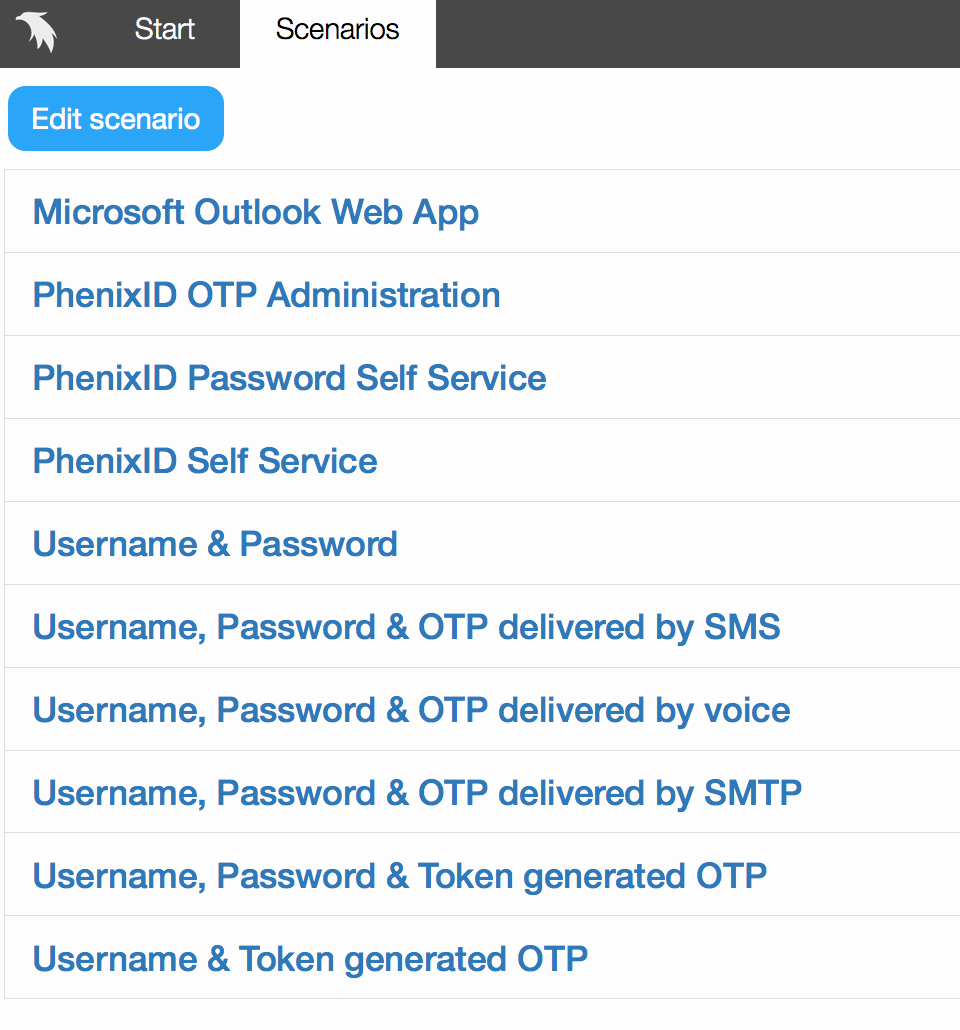
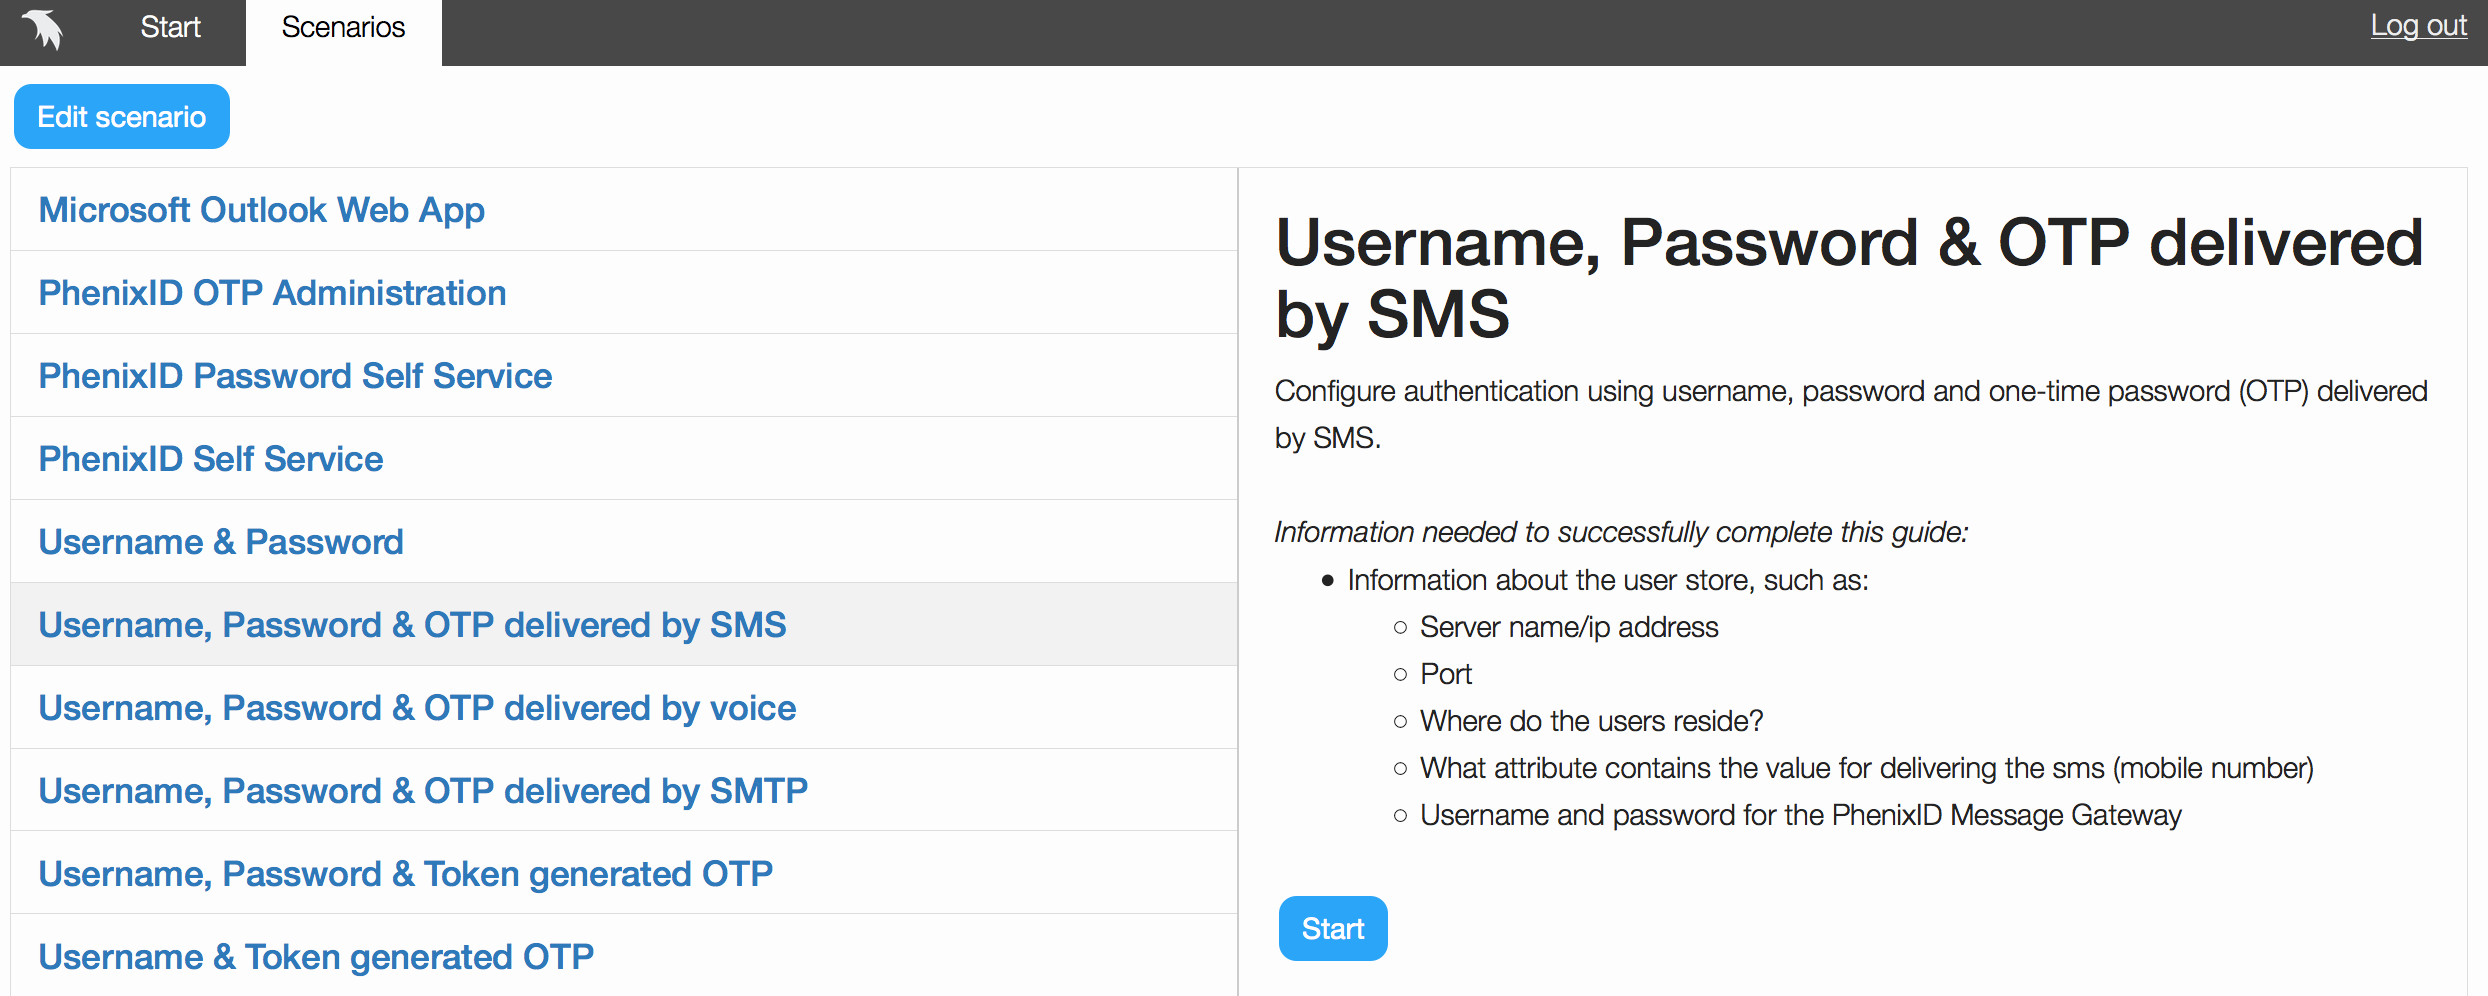
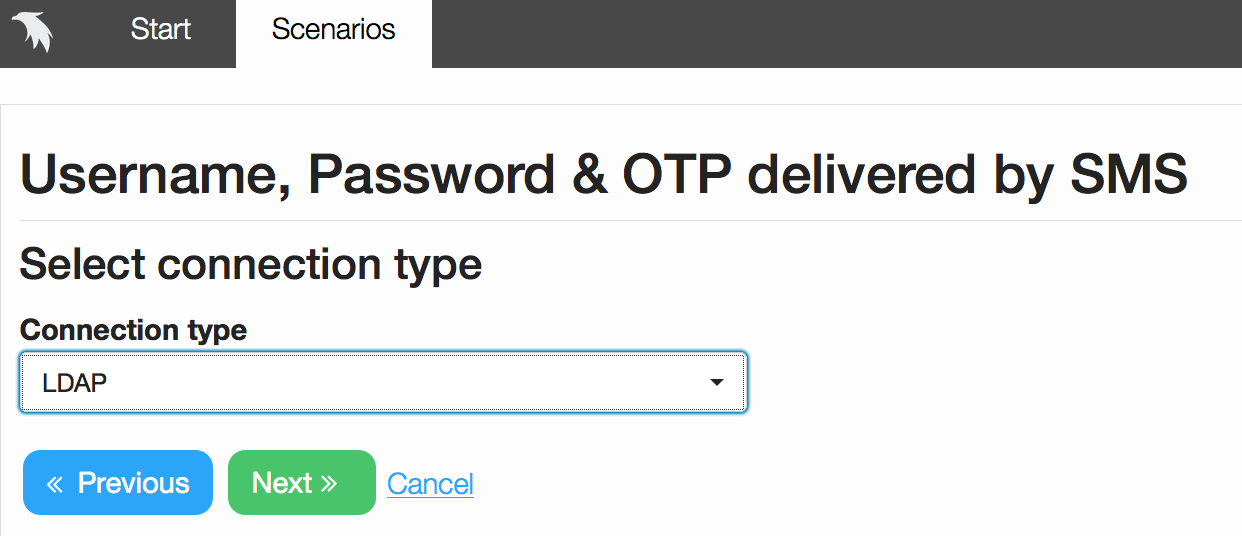
Click Scenarios tab and then click Username, Password & OTP delivered by SMS
Press Start to begin the configuration
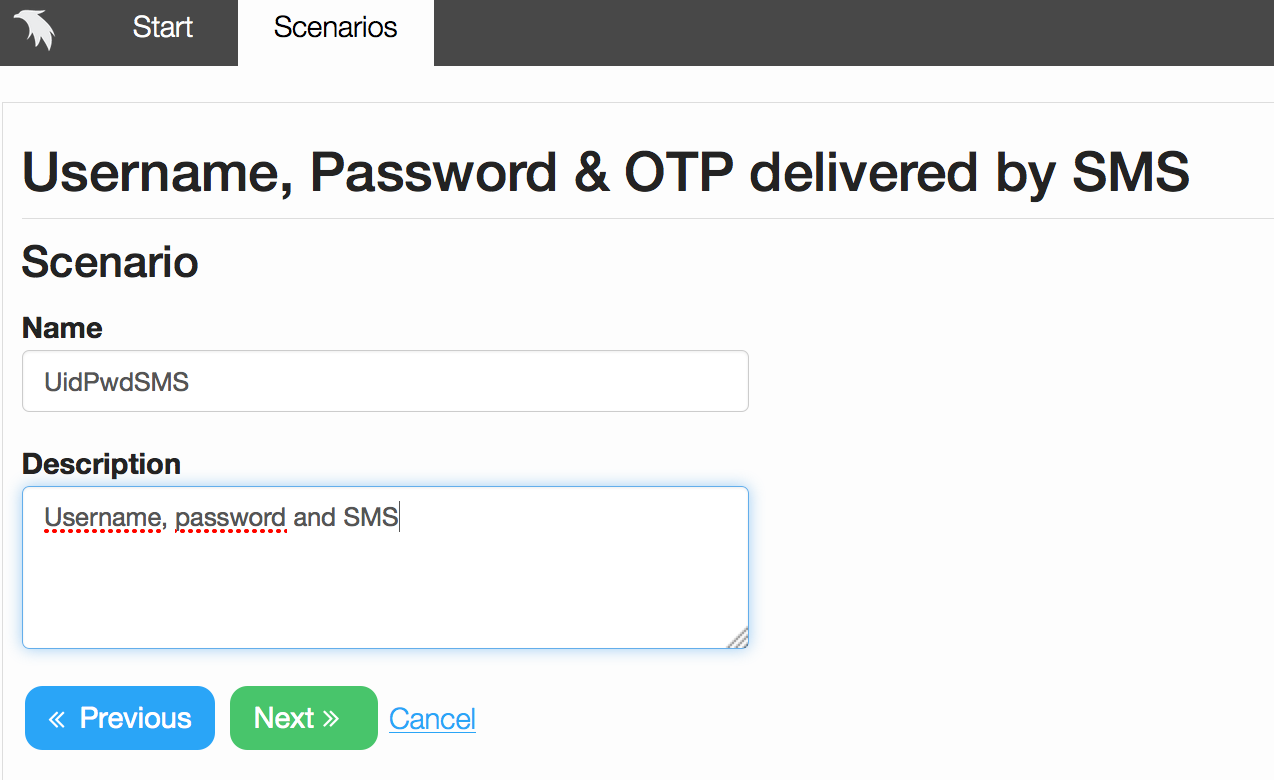
Set a Name and Description for the Scenario
If no user store has been configured, choose Create new, and if you already have on configured, choose it.
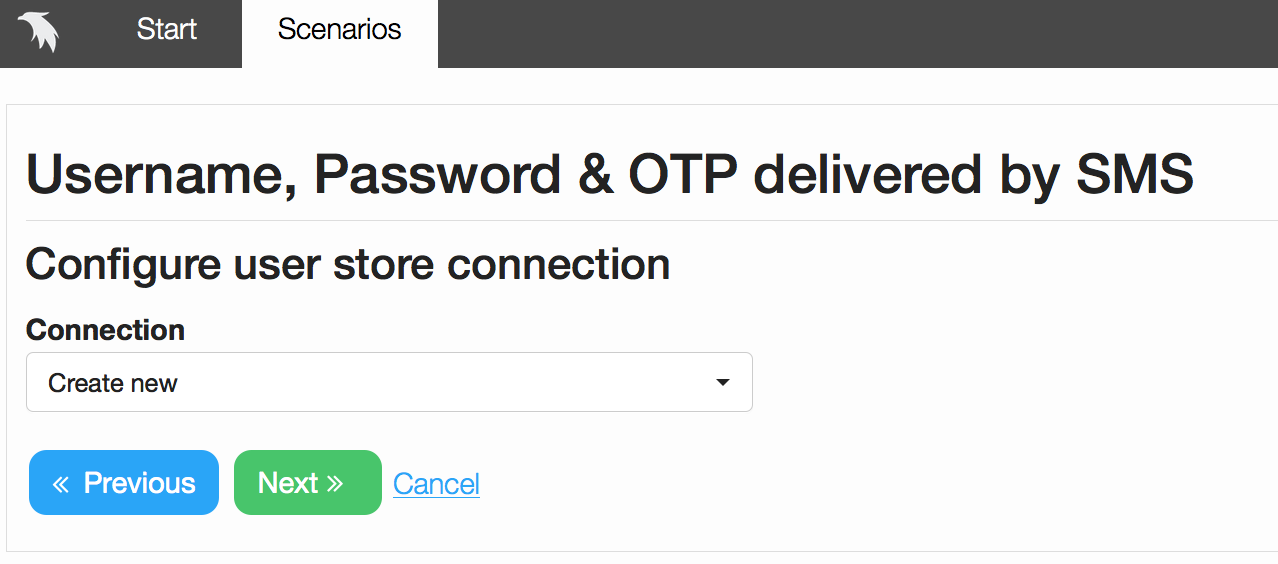
In this example we will create a connection to an LDAP user store
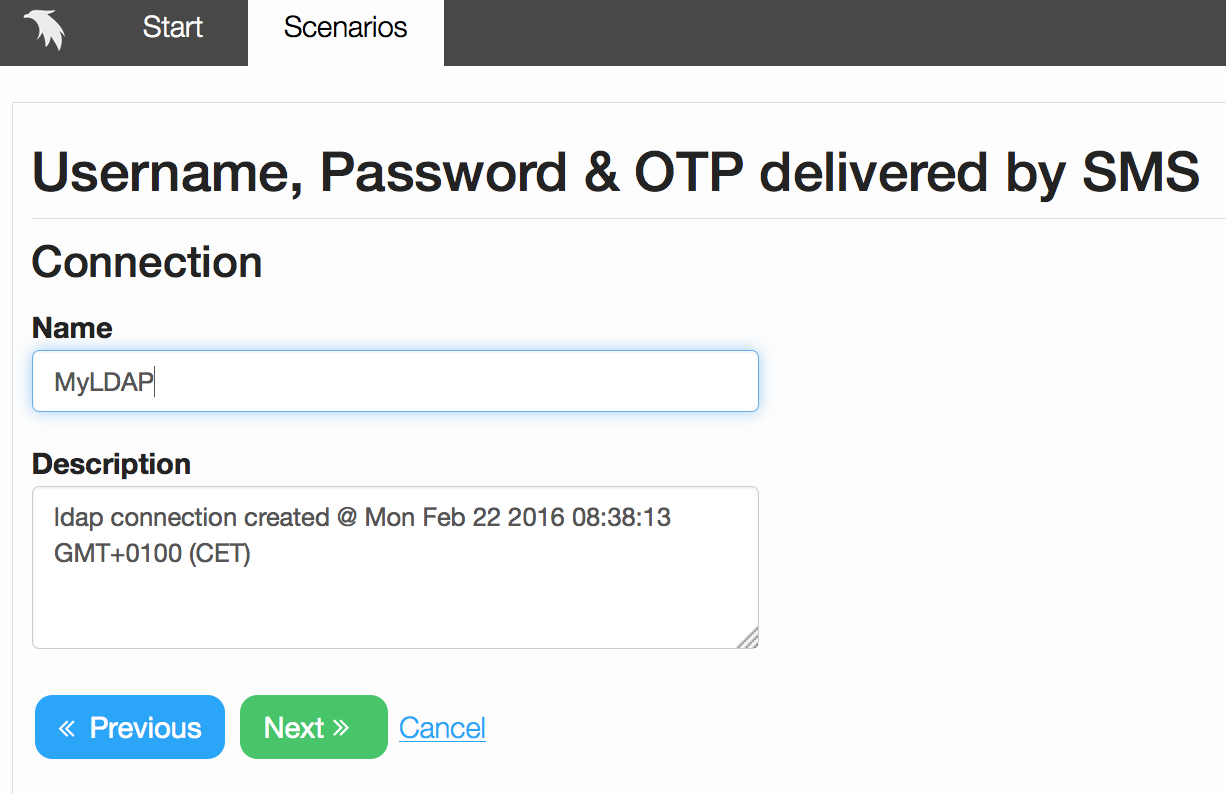
Set a Name and Description for the Connection
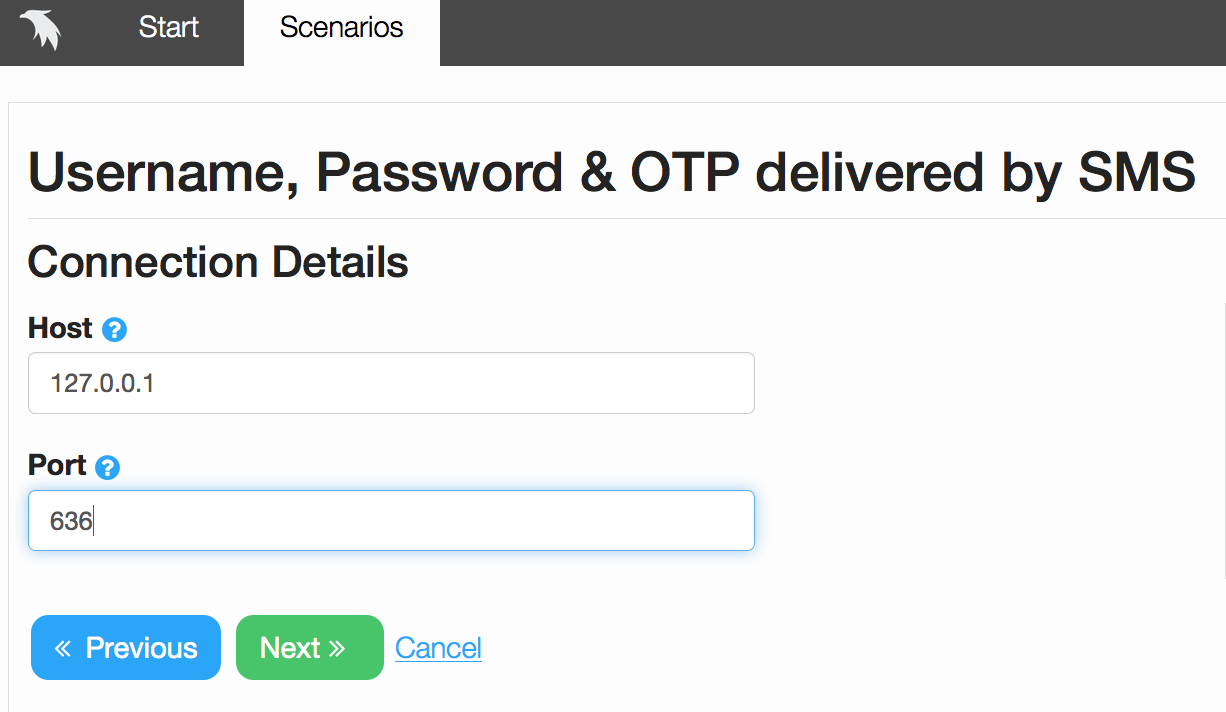
Configure the Host address and Port number of your LDAP user store
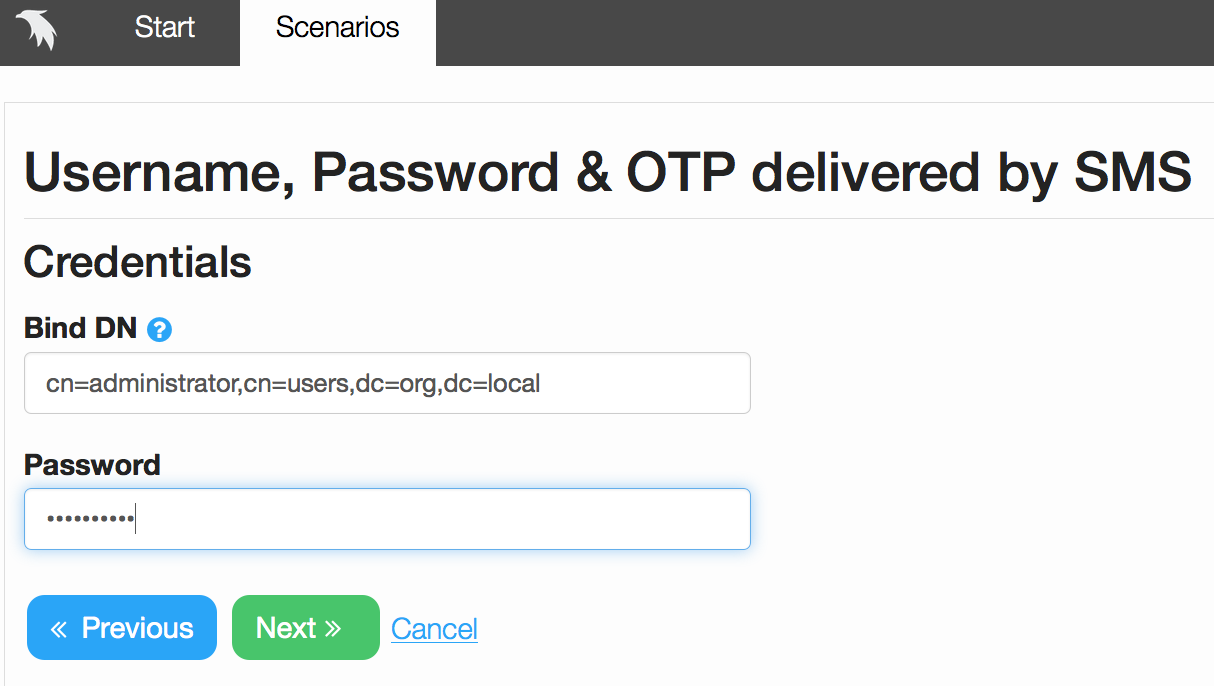
Set the username (Bind DN) and Password used for the connection
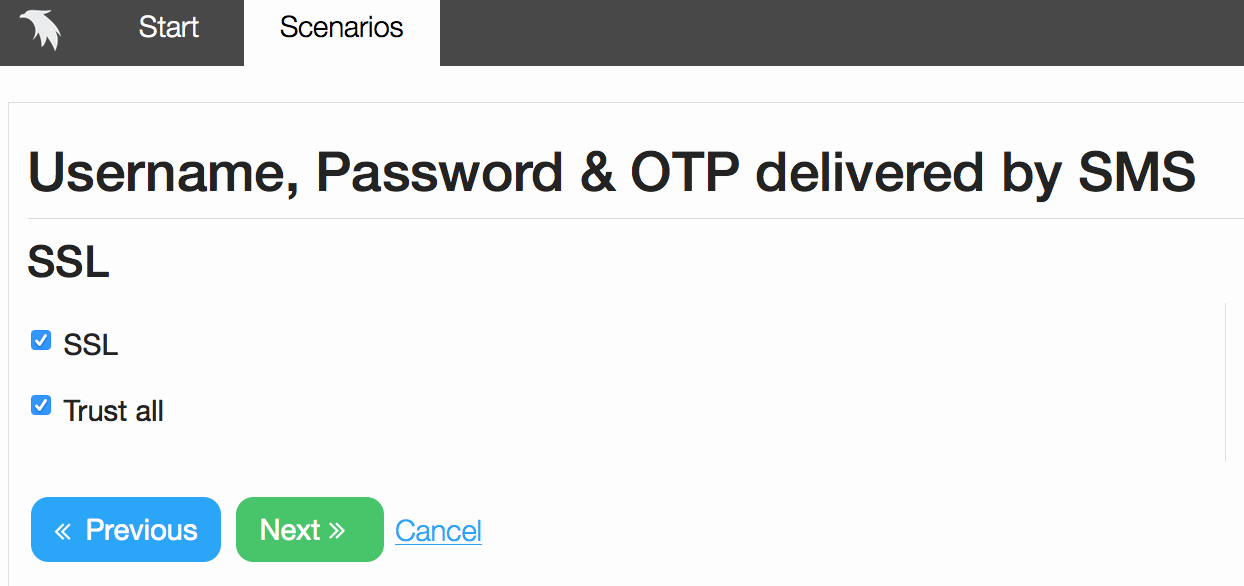
Enable SSL if the LDAP server is configured to use it, and set trust all to accept the certificate
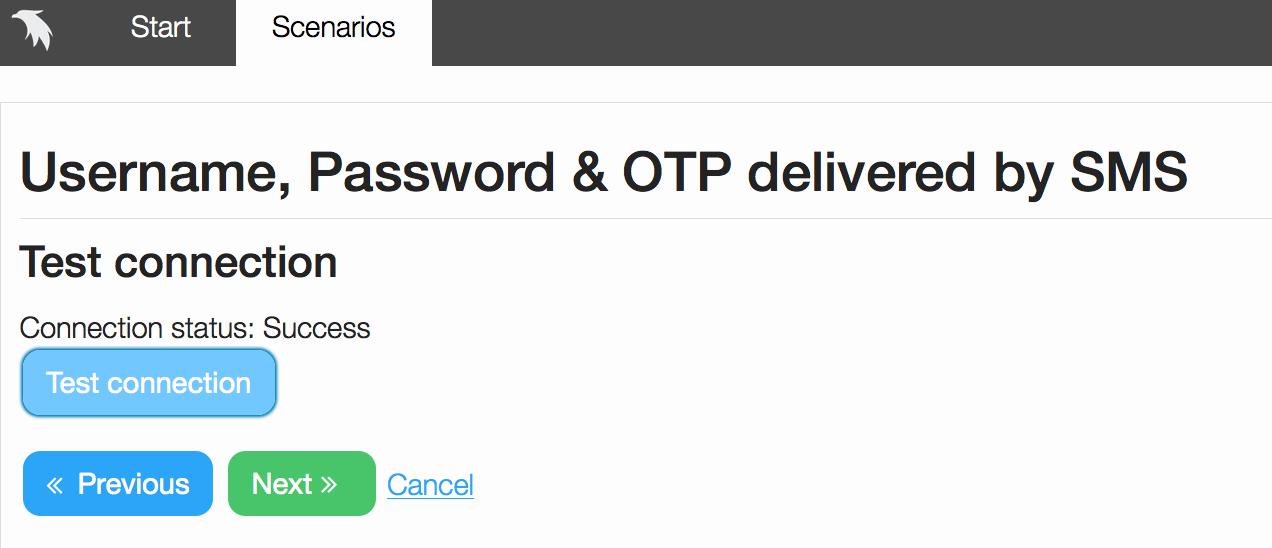
Test the connection to make sure that everything is configured correctly
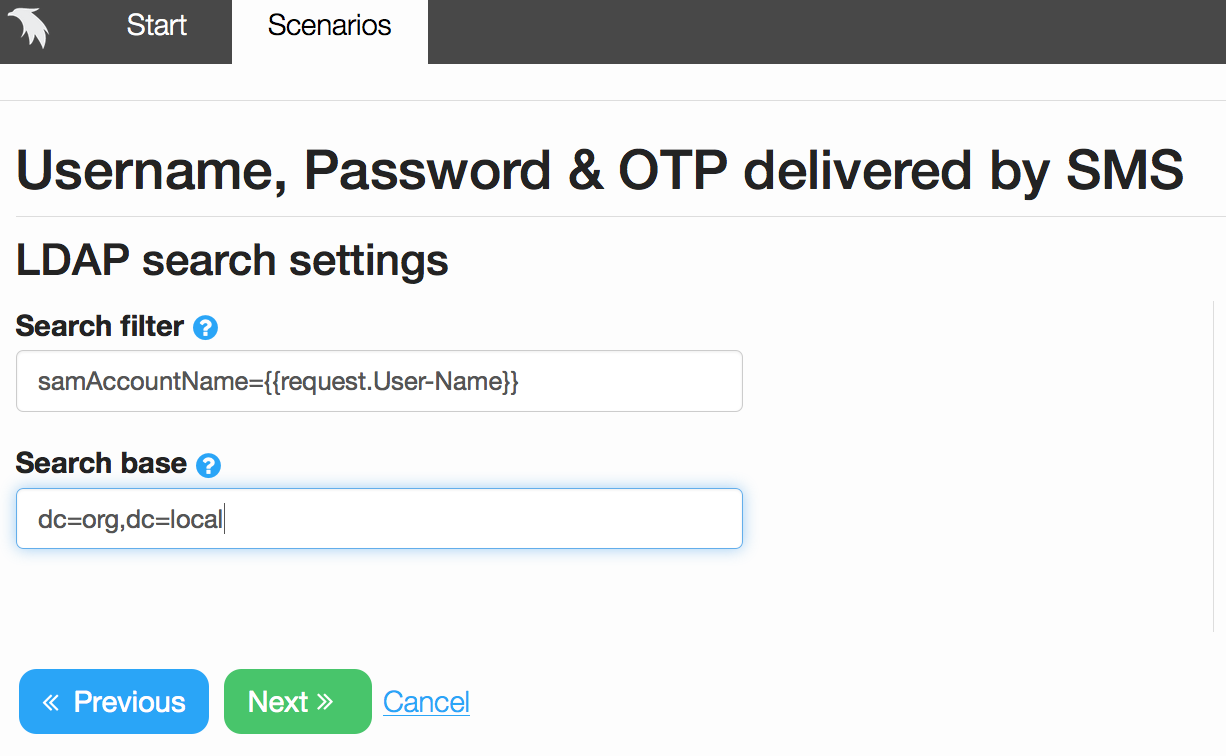
Set the Search filter and Search base according to your user store
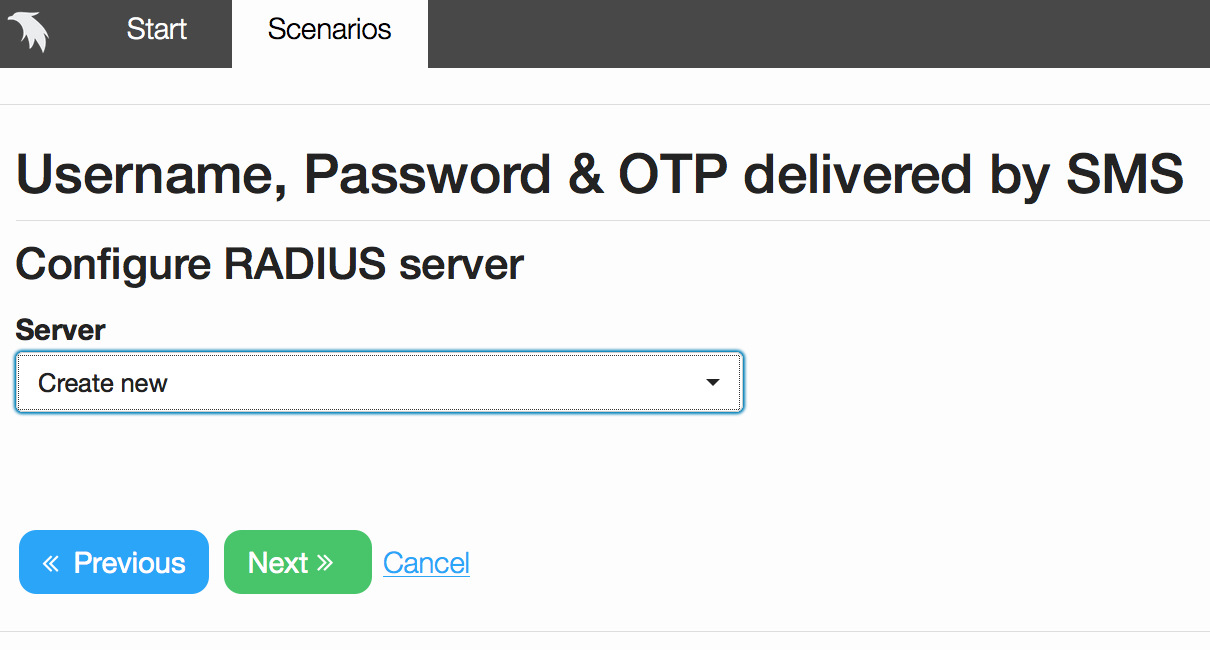
If no RADIUS Server has been configured, choose Create new, and if you already have on configured, choose it
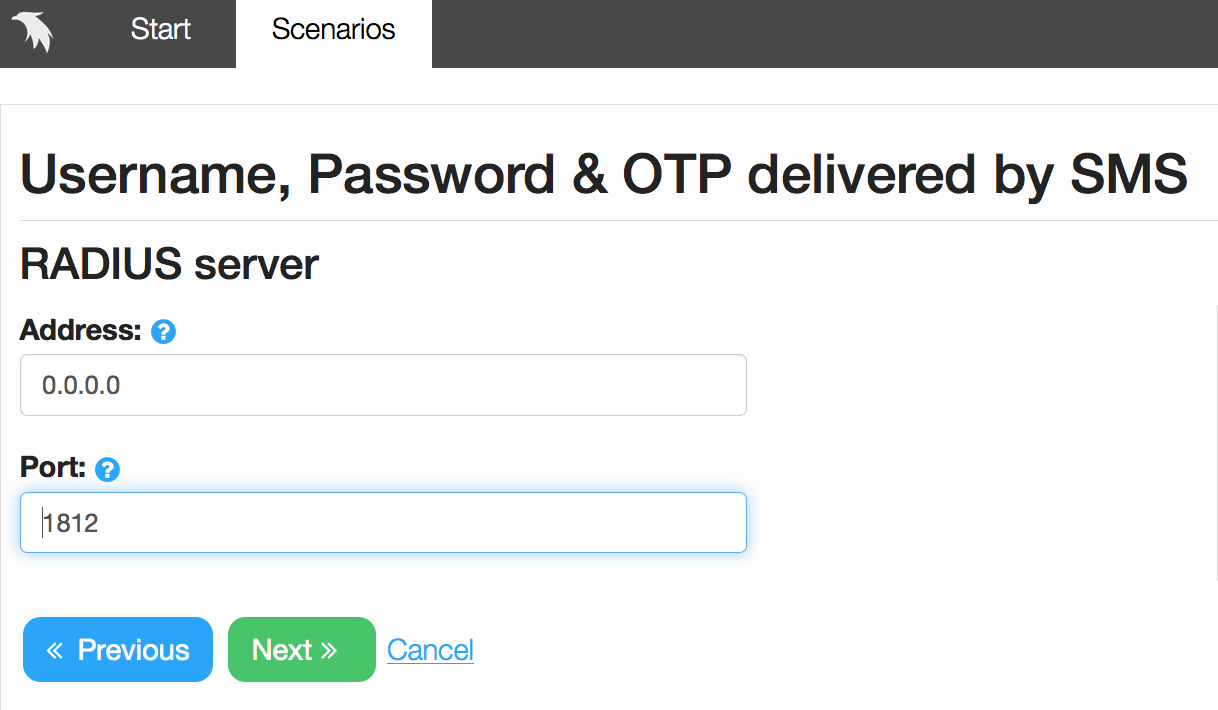
Set the address that you want for the RADIUS server (listener), or choose the default value to listen to all addresses
Also set the RADIUS port corresponding to the configuration on Juniper
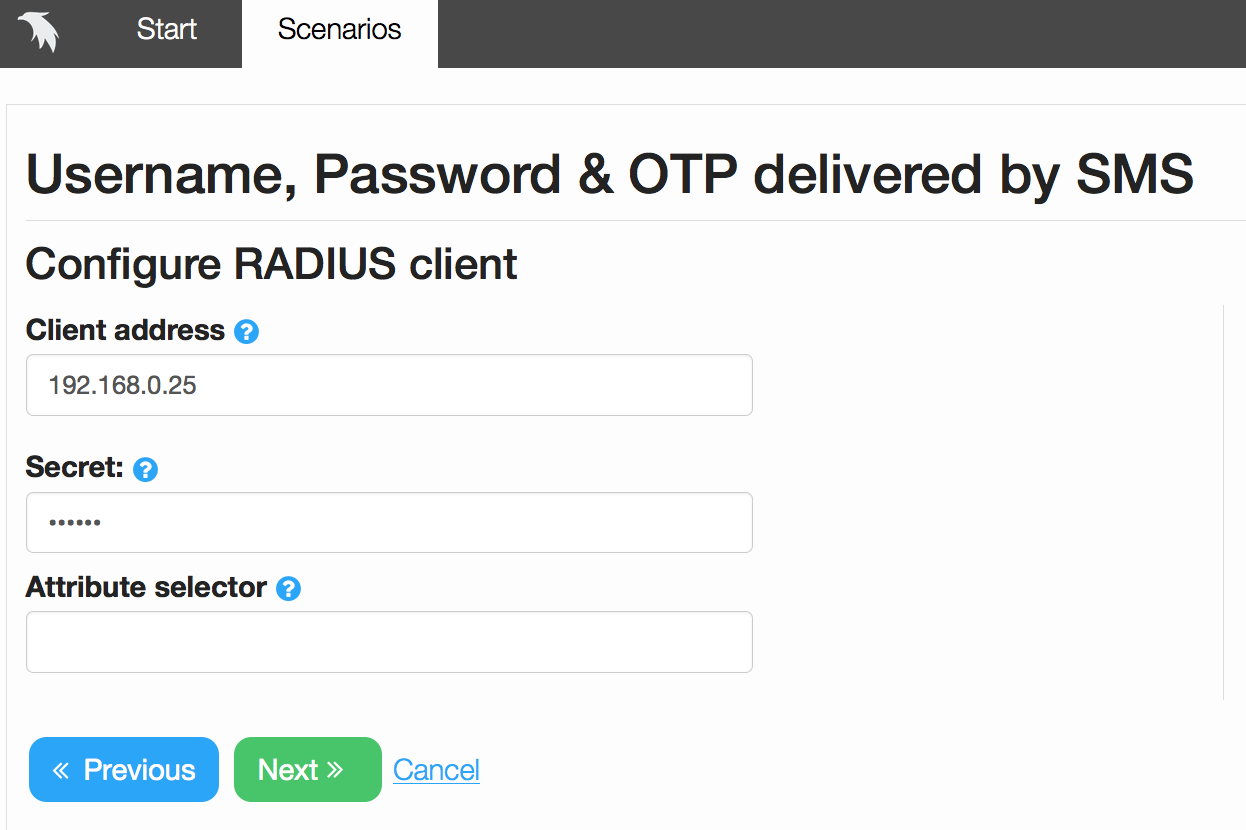
Set the RADIUS Client address to the ip of the Juniper machine, multiple ip’s can be added (seperated by comma)
Then set the secret corresponding to the configuration on Juniper
Attribute selector will be used if Juniper is configured to allow the users to choose
different authentication methods
For instance, SMS or OATH
This value can be either exact match, 44=SMS
Or a regular expression, 44=^.*Token.*$, any string containing the word Token
For Juniper the RADIUS attribute should be 44, and the value must be a regular expression, containing the name of the Juniper realm
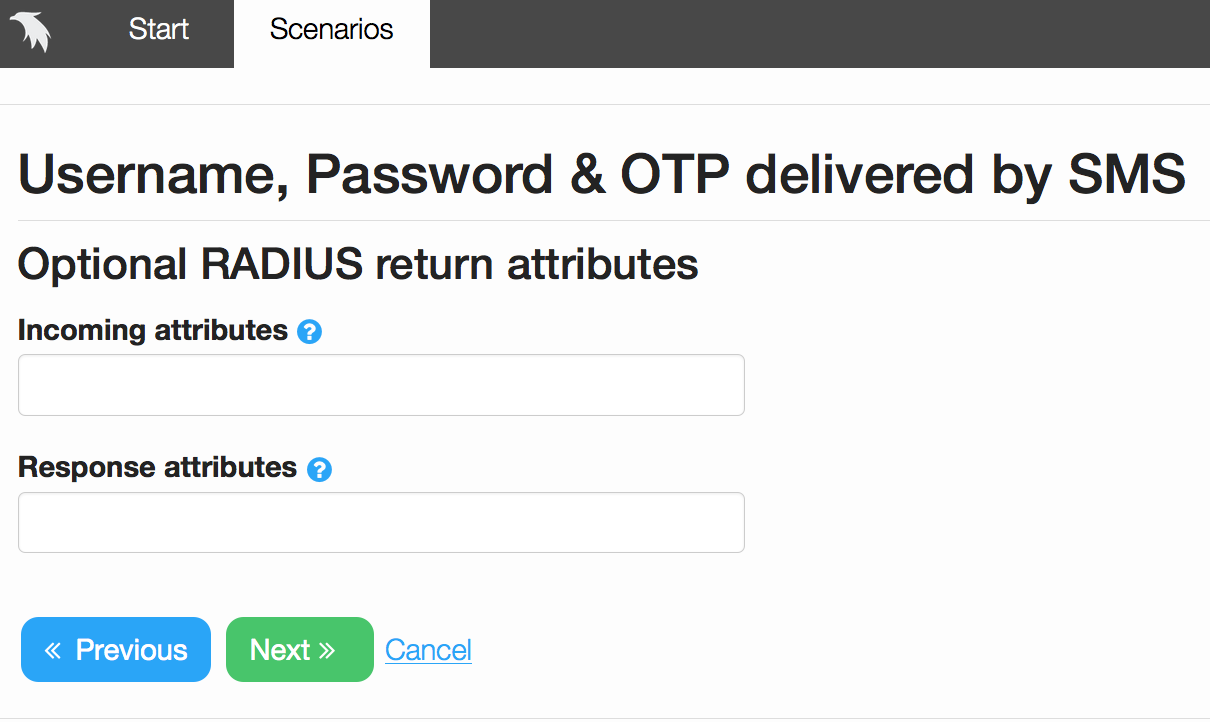
Normally no additional attributes needs to be returned to the RADIUS client after successful authentication, so leave these fields empty
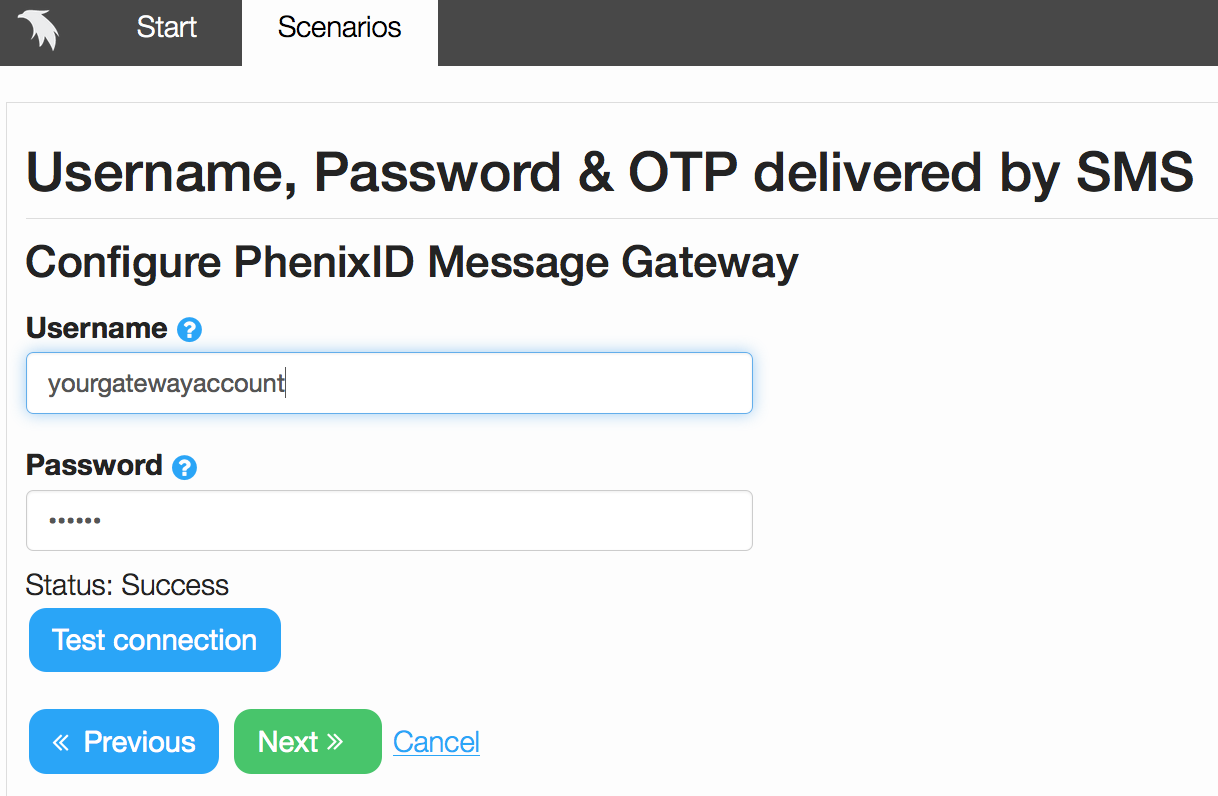
Set the PhenixID Message Gateway username and password, and test the connection
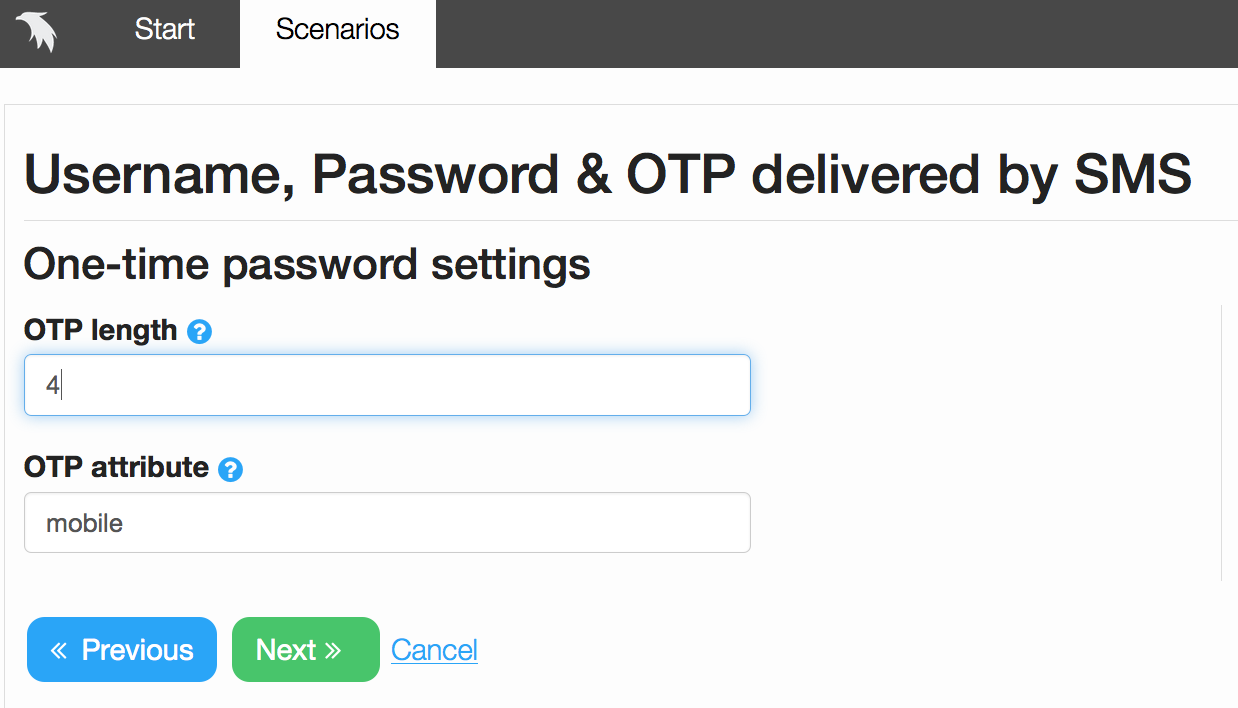
Specify the length of the OTP and the attribute containing the number where the SMS should be sent
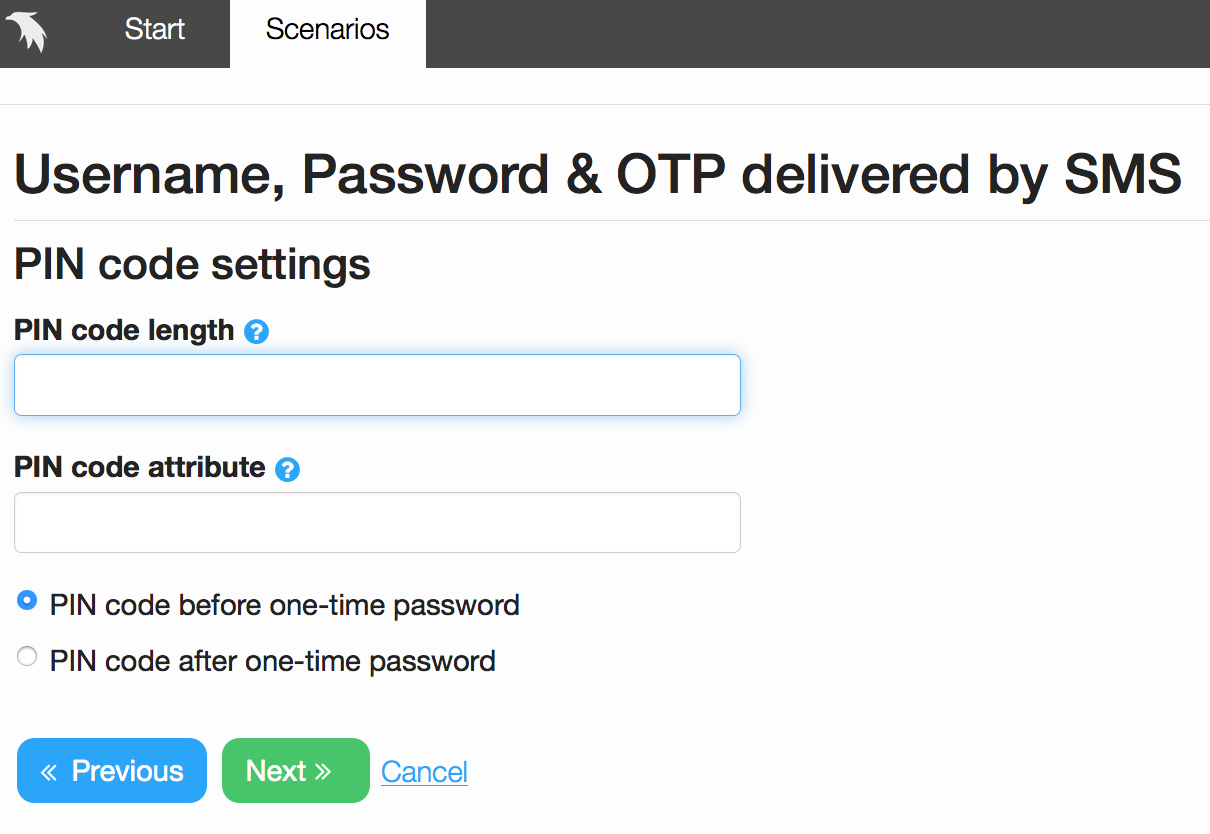
If PIN code should be used, please configure it with the desired parameters
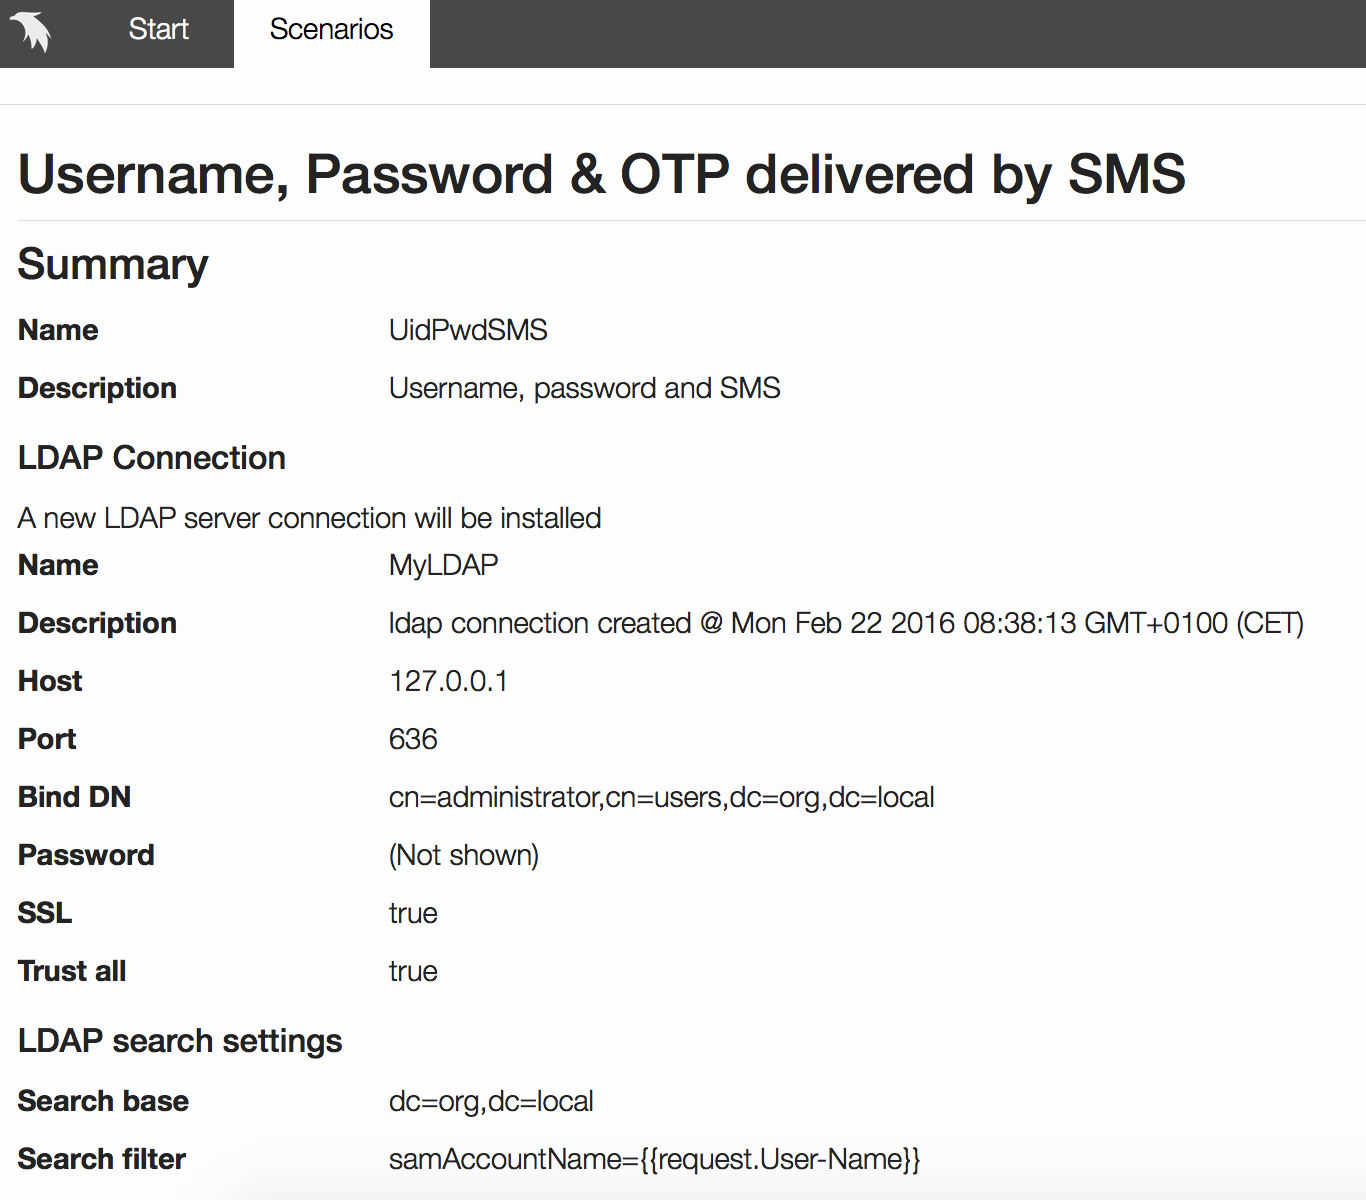
Verify the configuration on the Summary screen, and then press create
Configure Juniper Networks to use PhenixID Server for 2fa
1 – Start by logging in to the Juniper Central Manager (Admin Console).
2 – We will start by adding a Authentication Server, so go to Authentication -> Auth. Servers.
As mentioned earlier RADIUS will be used for this scenario.
So please choose Radius Server in the drop-down list and click New Server…
Configure as below (click for larger image):

2.1 – Specify a Name to identify the server instance.
2.2 – In the NAS-Identifier field, enter the name that identifies the SA Series Network Access Server (NAS) client that communicates with the RADIUS server.
2.3 – In the RADIUS Server field, specify the name or IP address of the PhenixID RADIUS server.
2.4 – Enter the Authentication Port value of the PhenixID RADIUS server. Typically this port is 1812, but some legacy servers might use 1645.
2.5 – Enter a string for the Shared Secret, this must be the same as configured in the PhenixID Server configuration made earlier.
2.6 – Enter the NAS-IP-Address. This allows you to control the NAS IP address value passed to RADIUS requests.
If you have a secondary PhenixID RADIUS backup Server, please enter values for that server in “Backup Server”.
2. 7 – When done, press Save Changes.
3 – The next step is to set two Radius Rules to add a custom challenge that determines the action to take for an incoming packet.
3.1 – First rule should look like this:
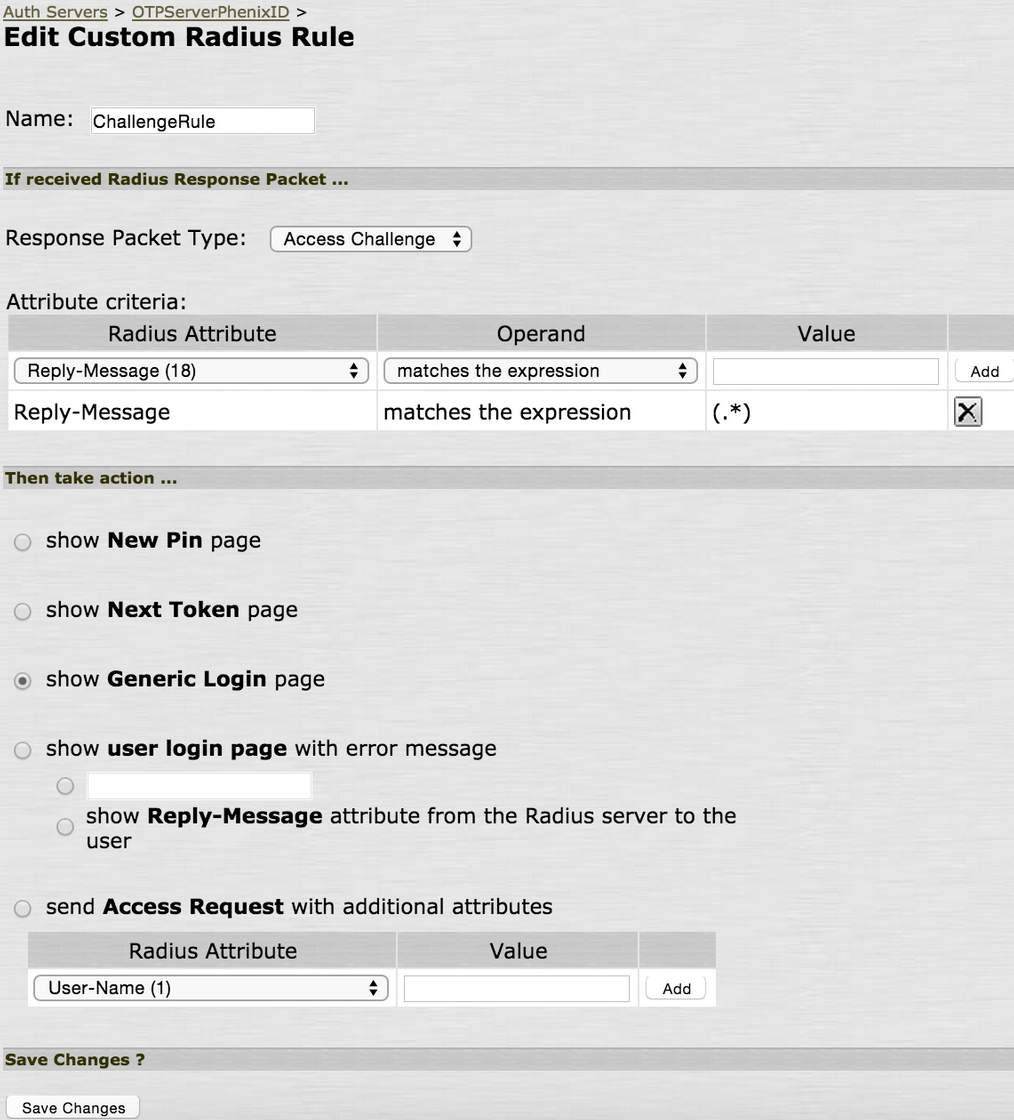
If username/password is successful, this rule will present the One Time Password field to the user.
3.2 – Second rule:
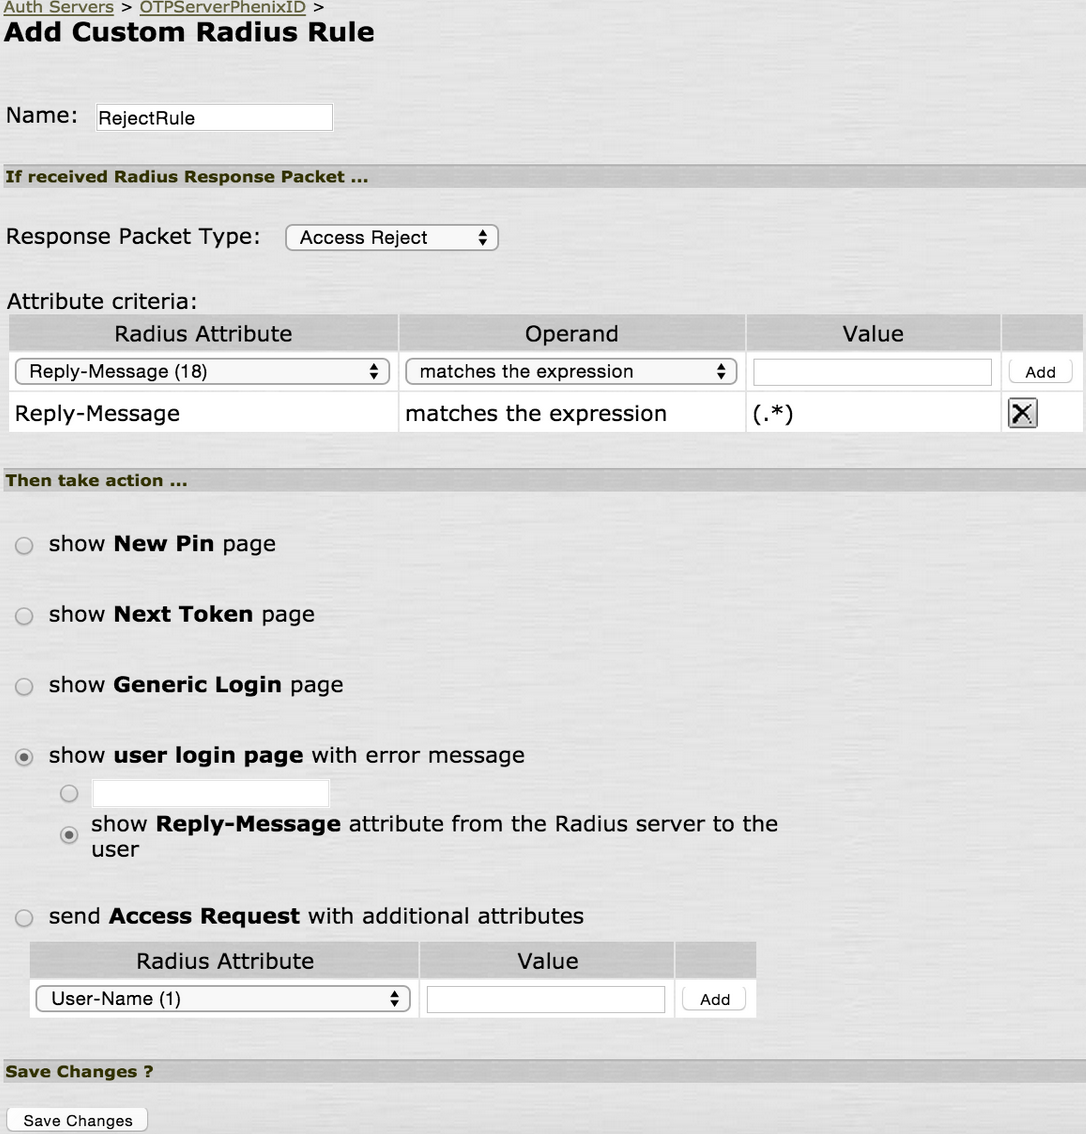
3.3 – If username/password is unsuccessful, this rule will redirect back to the login page, showing the reject message.
When done the rules should look like this:

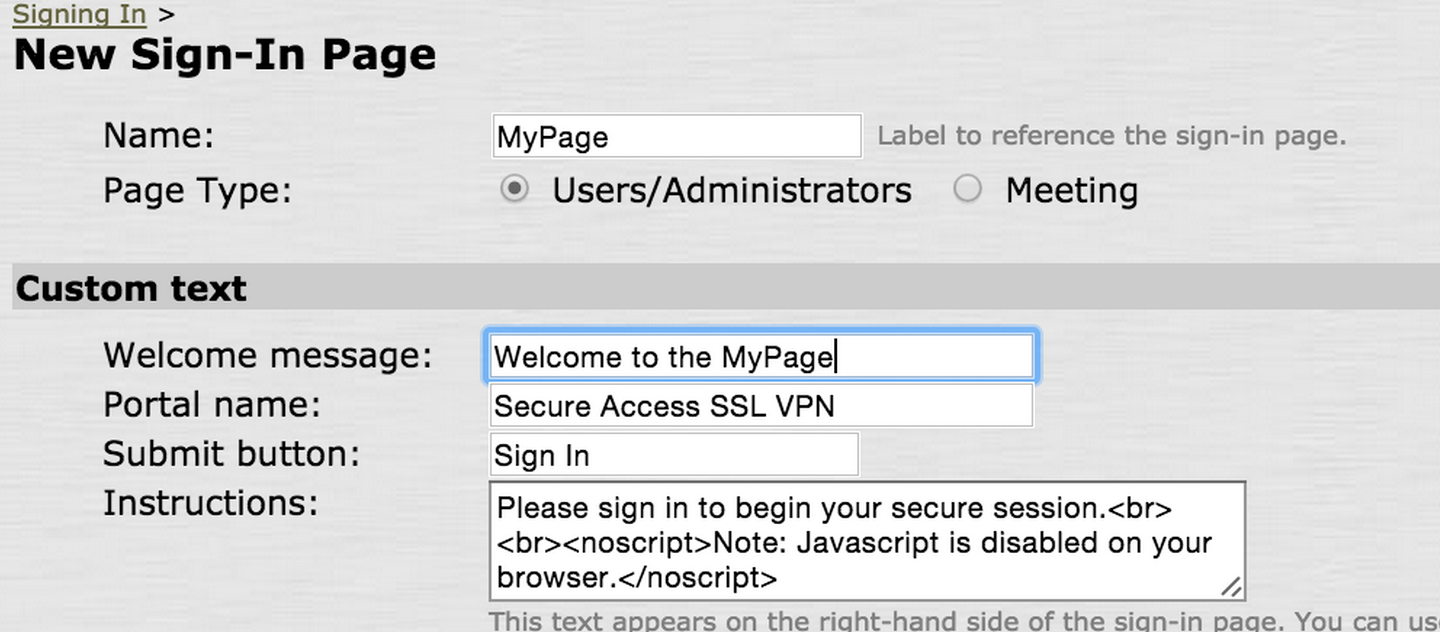
4 – Now we need to create a sign-in page.
A sign-in page defines the customized properties in the end-user’s welcome page such as the welcome text, help text, logo, header, and footer.
4.1 – Go to Authentication -> Signing In ->Sign-in Pages:

4.2 – Give it a Name, add a Welcome Message, and then save the changes:
4.3 – A User Role is needed to assign access features for the users.
Create a User Role by going to Users -> User Roles ->New Role…
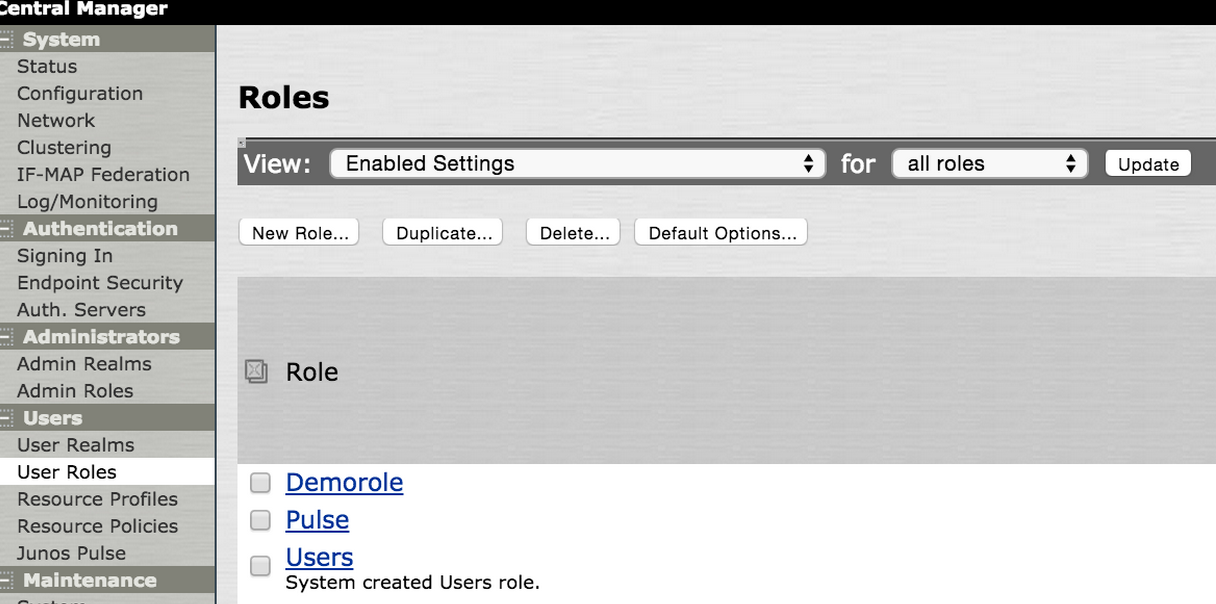
Set a Name and allow at least one Access feature.
In the example below, Web is enabled.

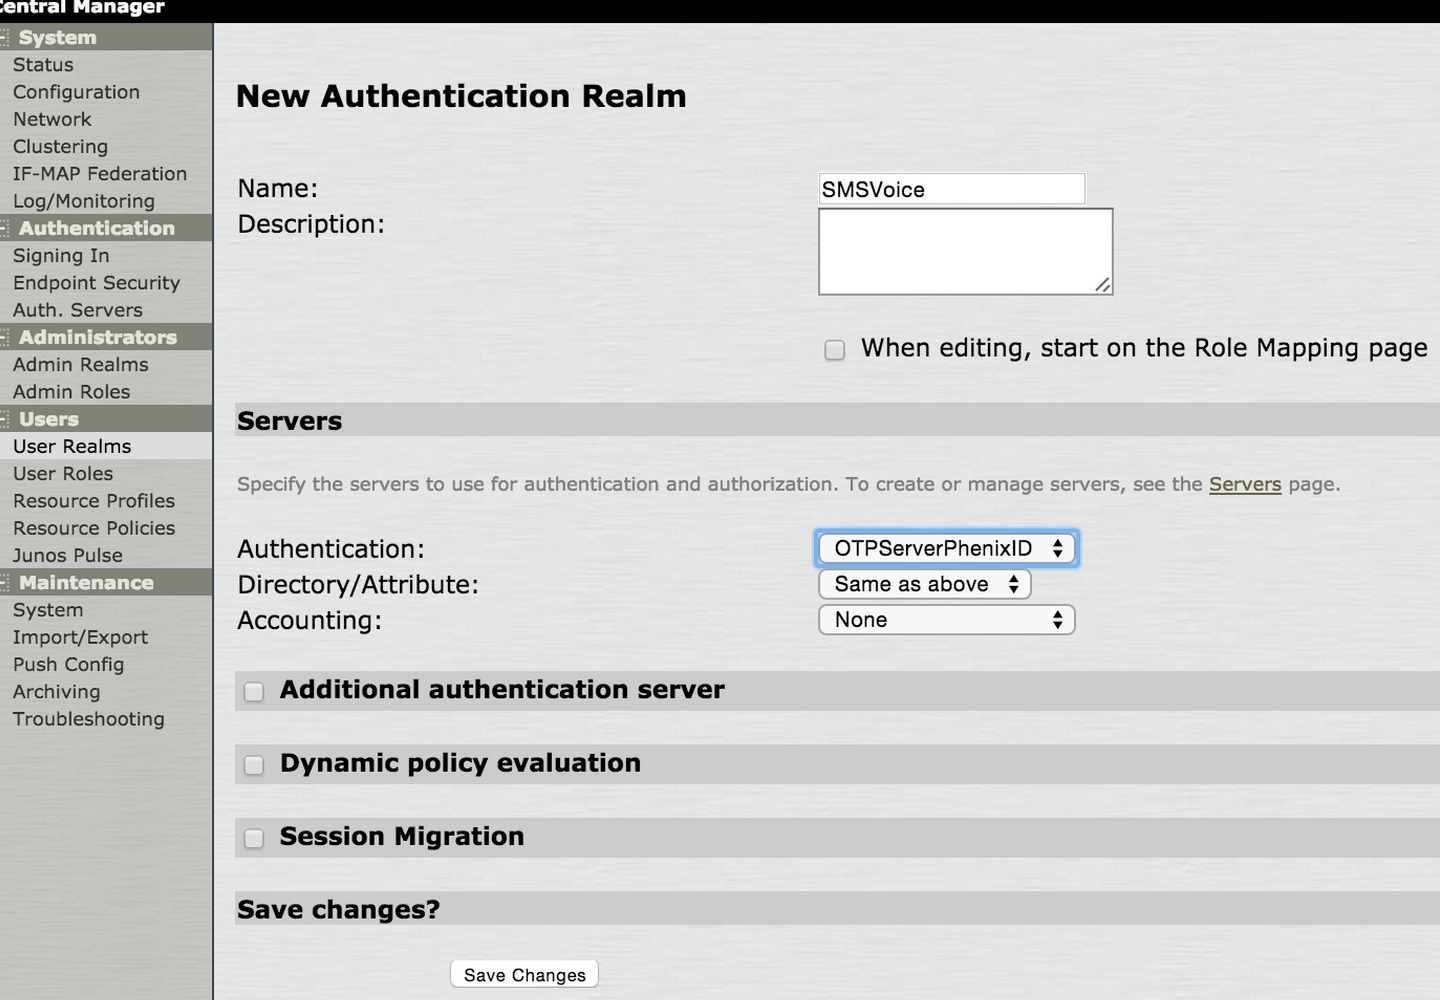
5 – We will now create a User Authentication realm that uses the Authentication Server created earlier.
5.1 – User Authentication realms specify what server to use for authentication, how policies are assigned to users, and restrictions on who can attempt to sign-in.
Go to Users -> User Realms ->New…
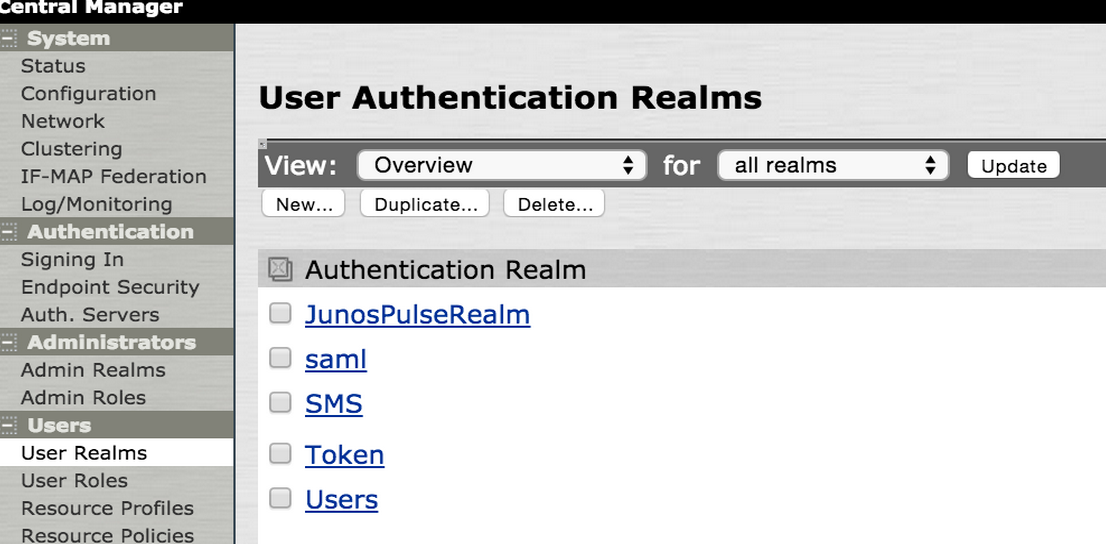
5.2 – Set a Name and choose the Authentication server that we created earlier.
Like in the example below.
6.- Now we create a role mapping for the realm.
The role mapping specifies how to assign roles to users when they sign in. Users that are not assigned a role will not be able to sign in.
In your newly created realm click Role Mapping and New Rule.
Rule should be based on username.
Set a Name and set the rule according to below.
Then add your role to Selected Roles:.
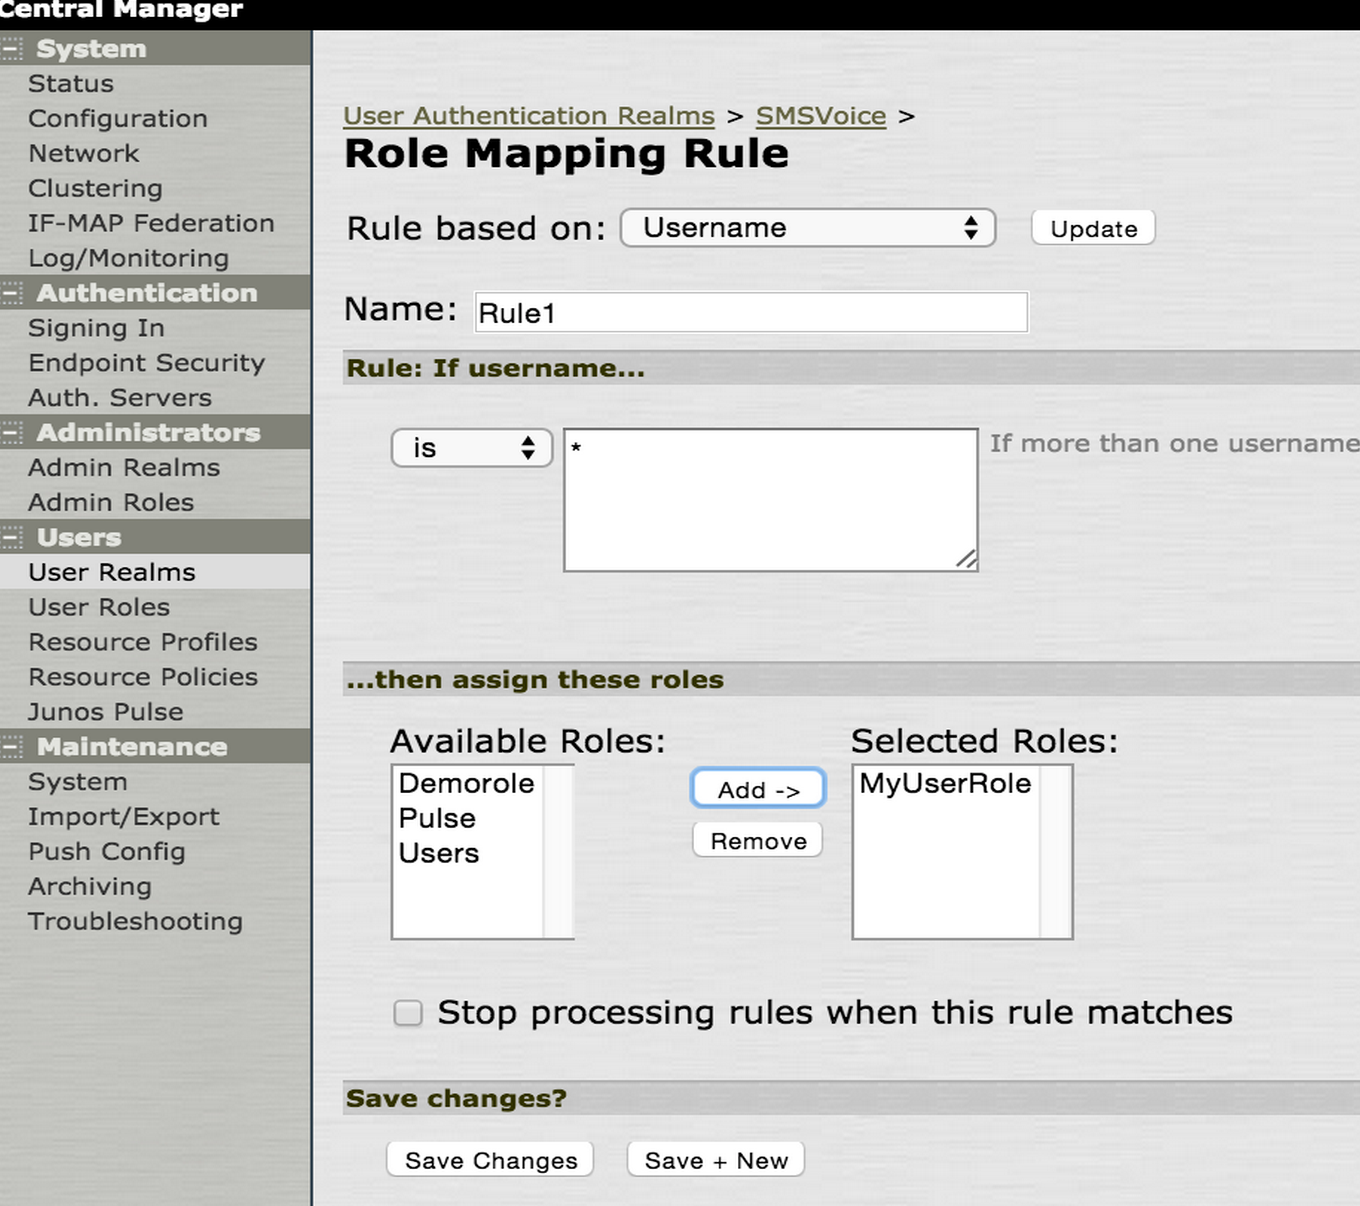
When done, it should look like this:

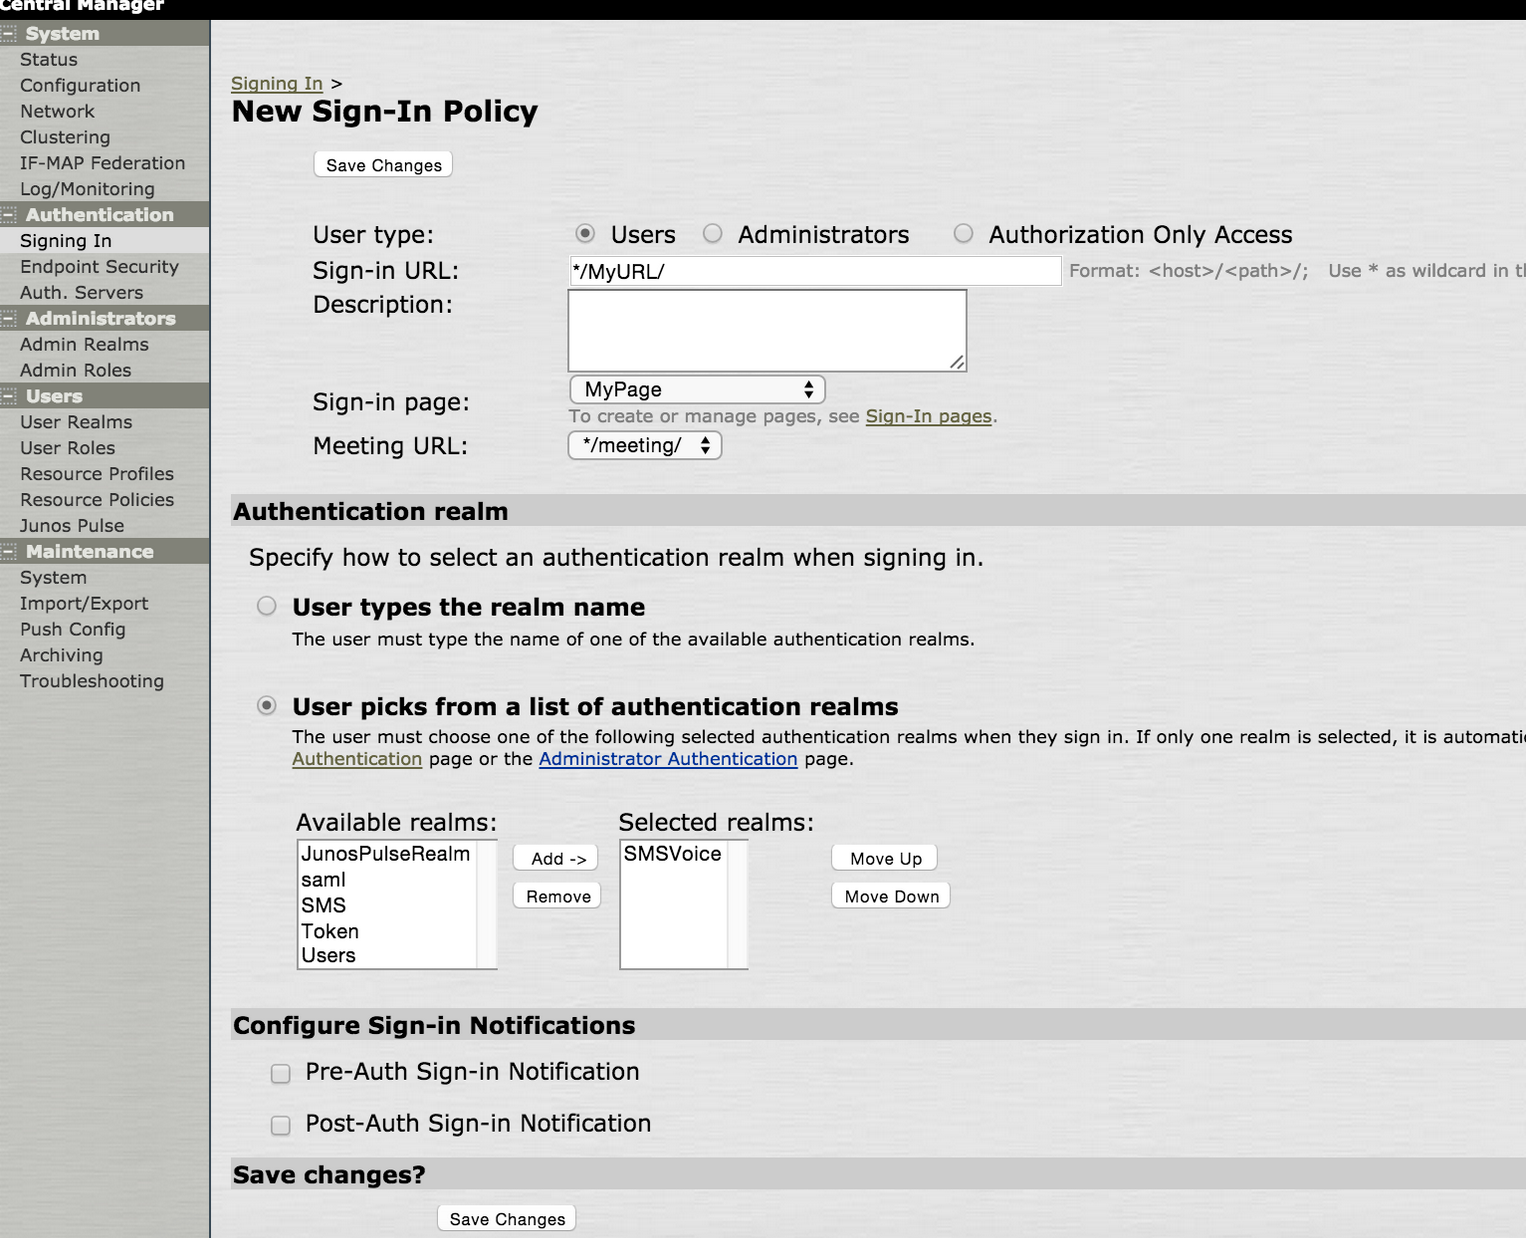
7 – Last step is to create a Sign In Policy that uses the Sign-in Page created earlier as well as the User Authentication realm.
Go to Authentication -> Signing In/Sign-in Policies and click New URL….
7.1 – Set a Sign-in URL, choose your Sign-in page and add your realm to Selected realms
The setting for the realms should be set to Users picks from a list..
If only one realm is added, users will not have to choose. But if more than one realm is added to “Selected realms”, users will have the choice available on the login page, /MyURL/ in the example below.
8 – Now when users go to IP-address/ServerName of Juniper/MyURL and login, they should be presented with a One-Time Password field after successful authentication using username and password.
DISCLAIMER
Information provided in this document is for your information only. PhenixID makes no explicit or implied claims to the validity of this information. Any trademarks referenced in this document are the property of their respective owners.The origin of this information may be internal or external to PhenixID. PhenixID makes all reasonable efforts to verify this information.
PhenixID - support.phenixid.se