Summary
This document will guide you through the steps to secure the authentication of your Clavister VPN solution with PhenixID Server, delivering multifactor authentication via PhenixID One Touch. You will be able to test the product, with your current Clavister VPN solution and your local user store, without making any changes that affect existing users.
System Requirements
- PhenixID MFA Server 2.x
- One Touch Scenario to enable the service
- MFA Admin/Self Service Scenario to enable enrollment of One Touch
- Clavister Firewall
Configure One Touch for PhenixID MFA
Start by following these instruction in order do configure PhenixID MFA as a RADIUS server protected with PhenixID One Touch:
http://document.phenixid.net/m/63284/l/657120-username-password-one-touch
Configure Clavister SSL-VPN for MFA with PhenixID Server
Create Objects
IP4 Address
We will start off by creating the objects that we need, in order to configure the L2TP/IPsec tunnel and the Radius/MFA settings.
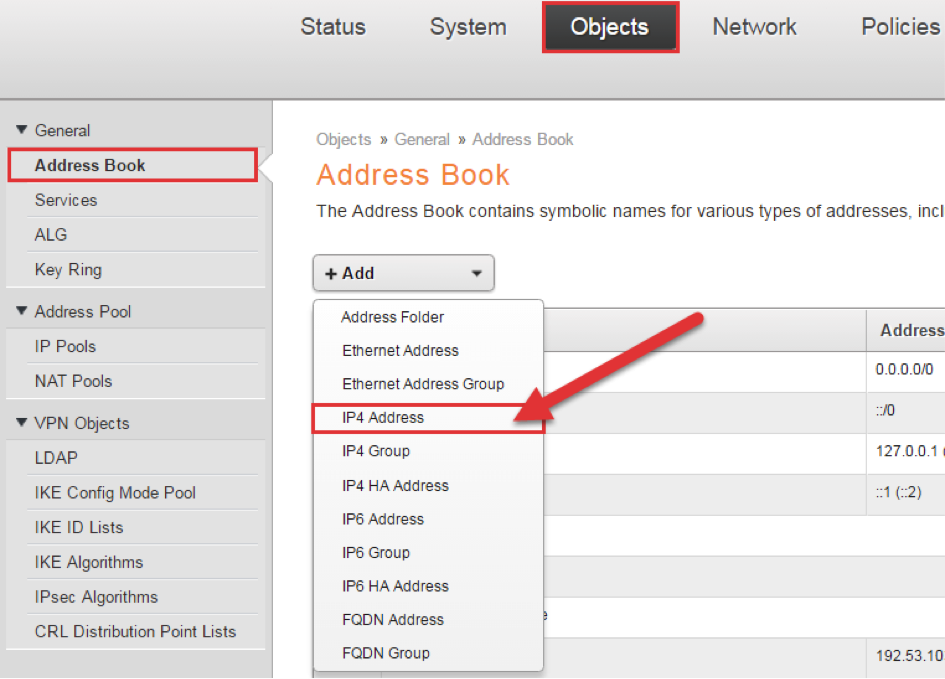

- The inner IP of the L2TP tunnel. The IP address should be part of the network where the clients are assigned addresses from.
- The L2TP pool specifies the addresses that are assigned to the clients.
- The IP address of the MFA server.
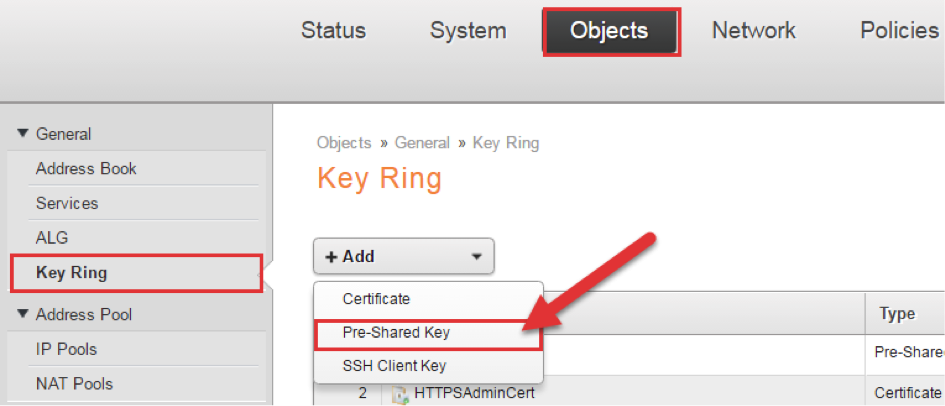
Pre-Shared Key
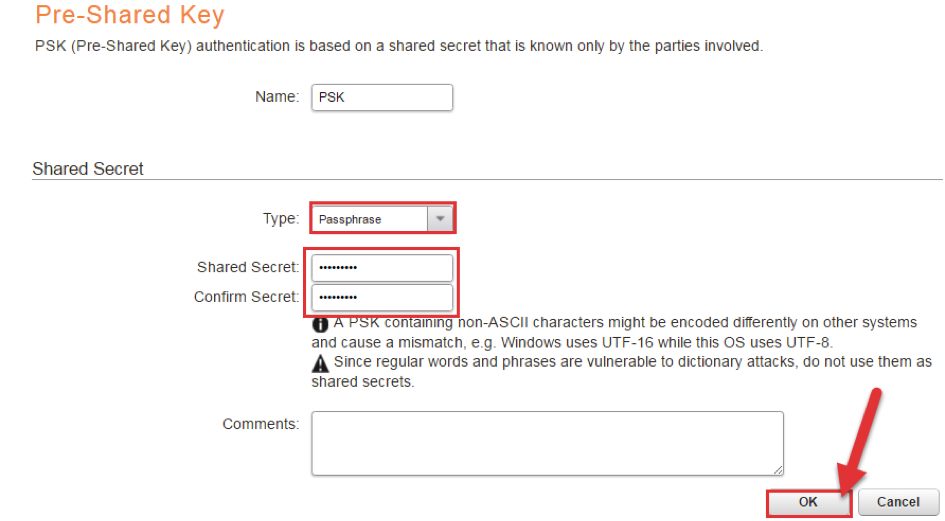
Create the Pre-shared Key that will be used for the IPsec tunnel.
Choose Passphrase and a suitable Secret, press OK to save.
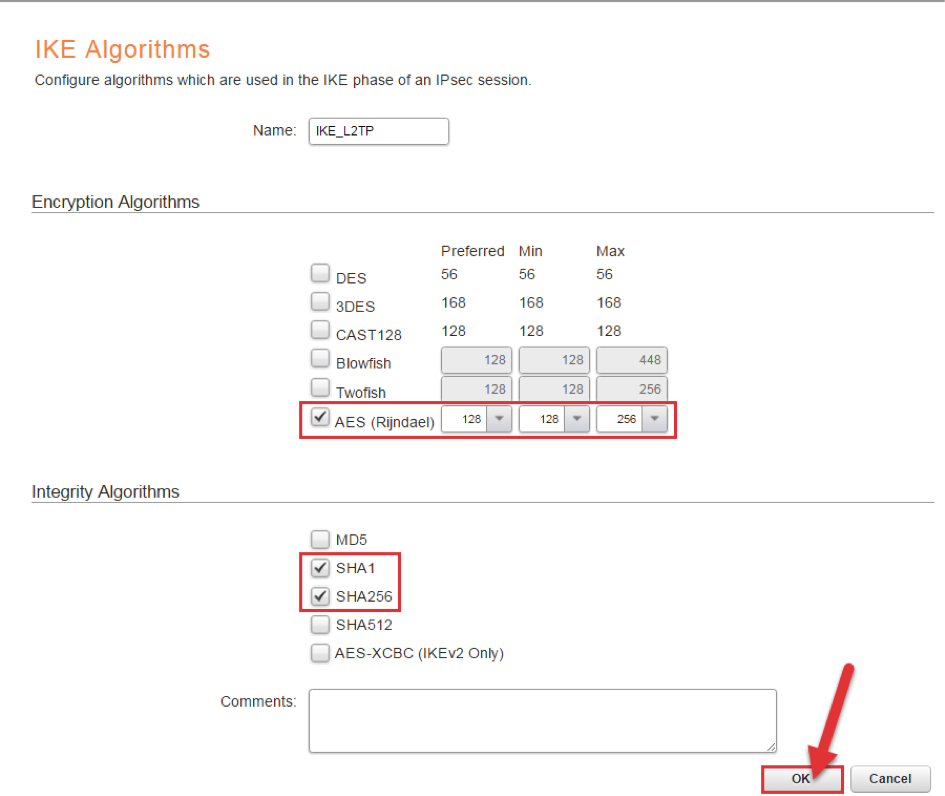
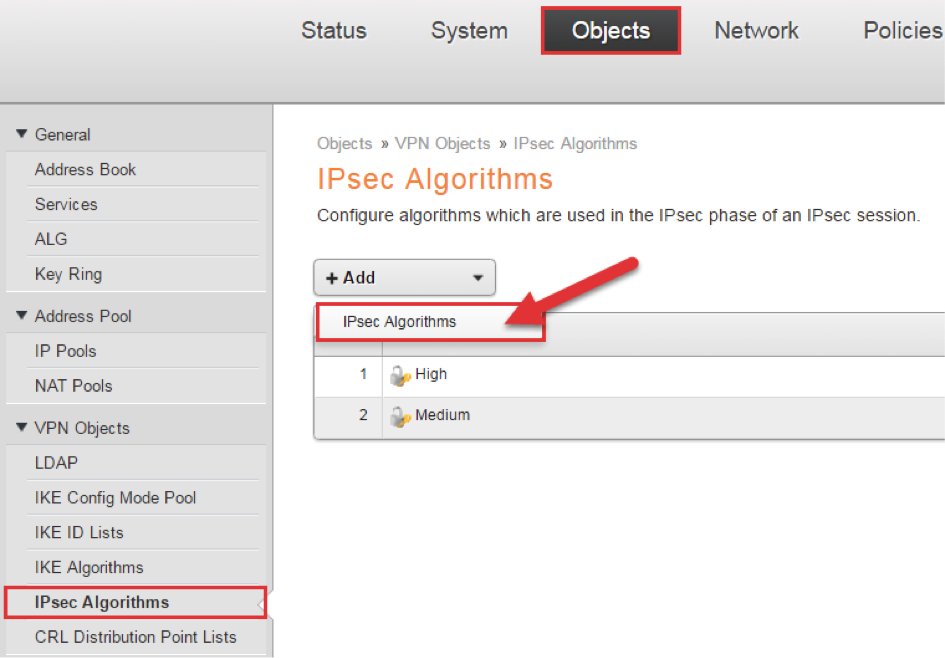
IKE and IPsec algorithms
Create the IKE and IPsec algorithms that will be used in the IPsec negotiations.
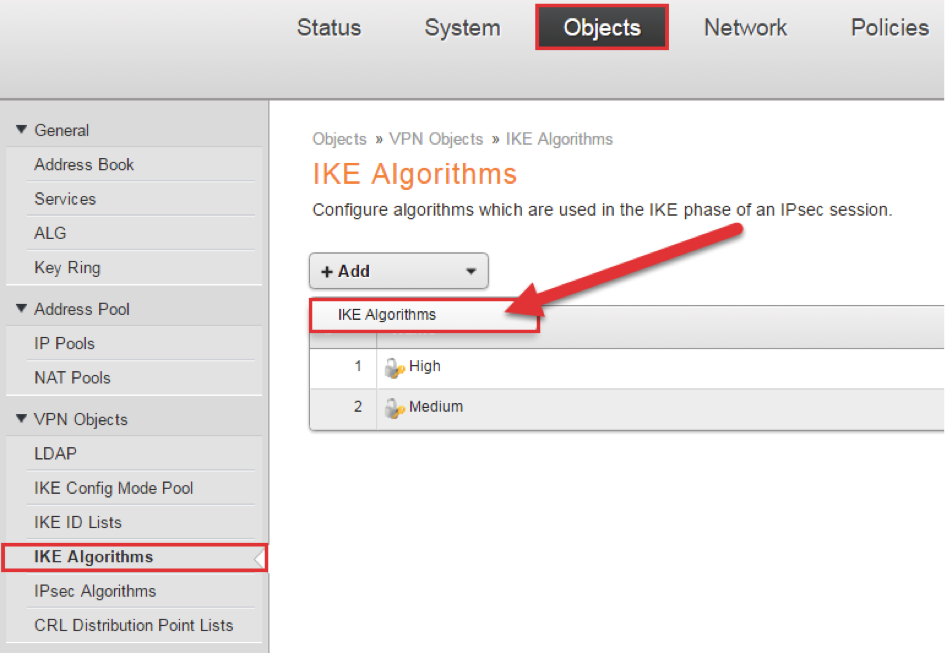
NOTE: Most OS/clients send either SHA1 or SHA256 as Integrity Algorithm. You should always try to use the most secure Algorithm, but it might not always be possible. As an example, Windows will only send SHA1 by default. Since both SHA-1 and SHA-256 is enabled in this example, they will both work.
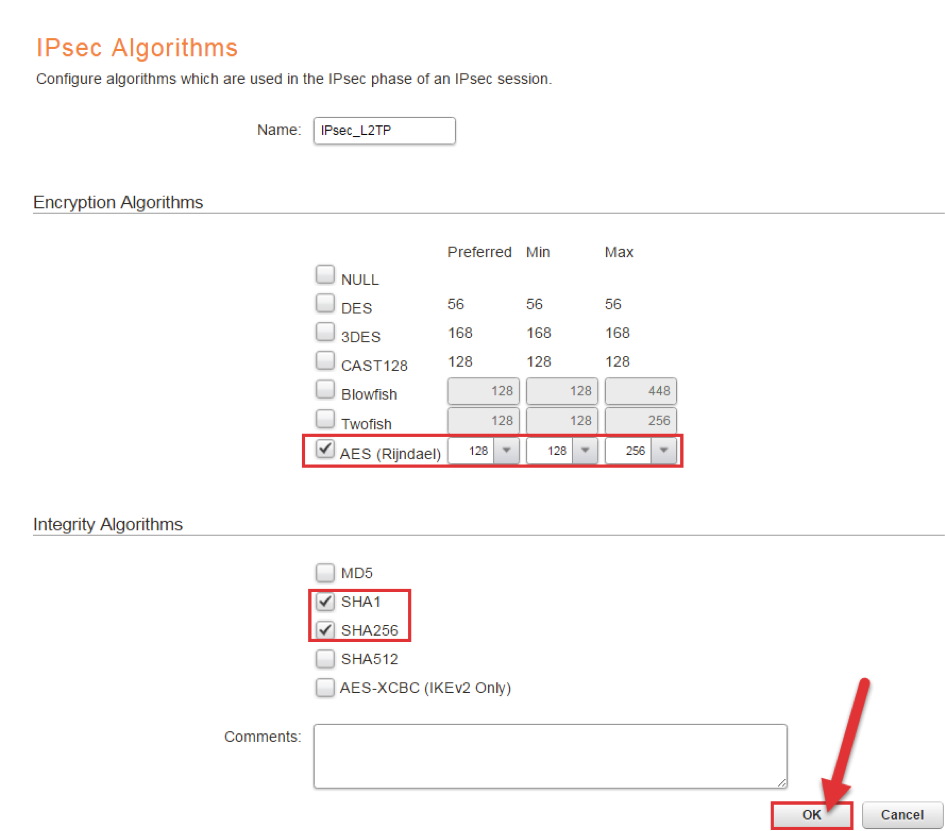
RADIUS Settings
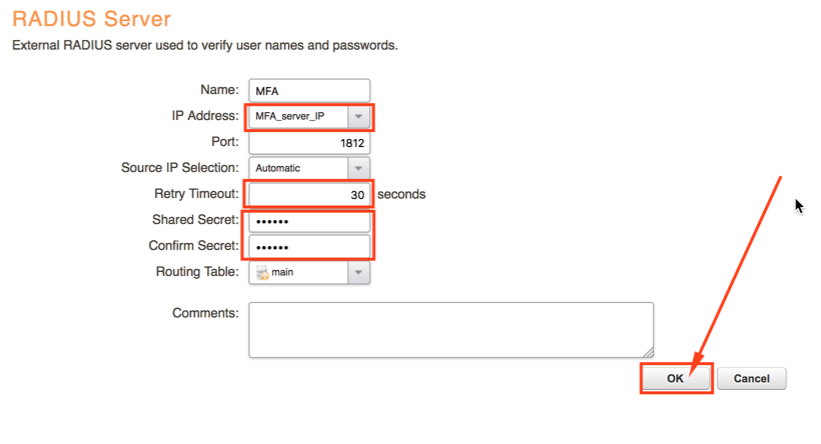
Configure RADIUS Server settings, so cOS core knows how to communicate with the MFA server.
Choose the previously configured MFA_server_IP as IP Address and enter the Shared Secret that will be used in the RADIUS requests. Remember to increase the Retry Timeout, to give end users the time needed to complete the login.
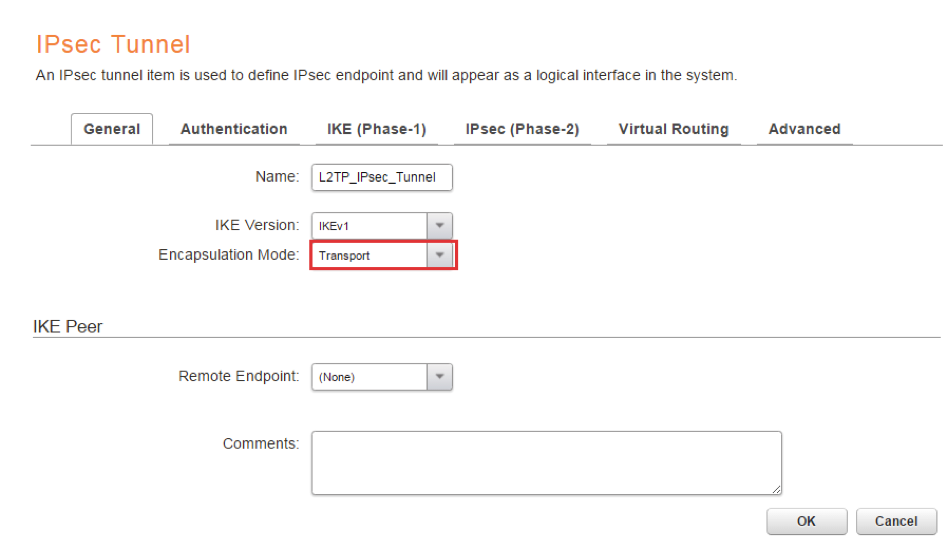
IPsec Tunnel
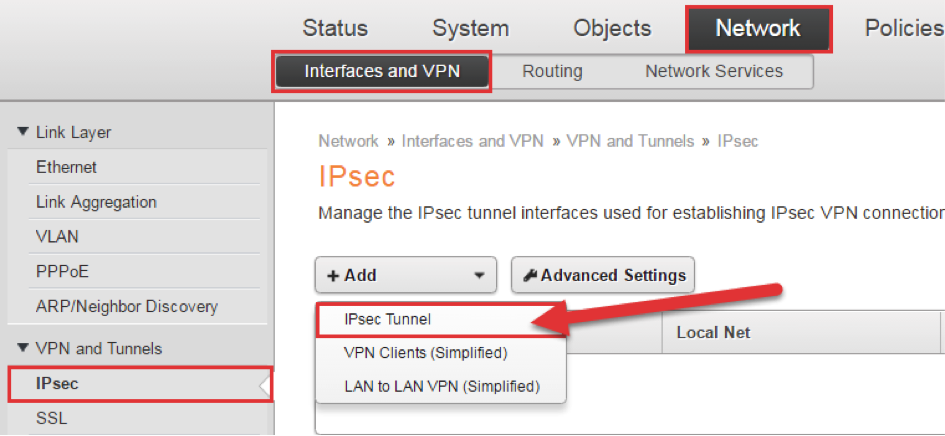
Go to the tab Network -> Interfaces and VPN -> IPsec click Add and choose IPsec Tunnel.
Since we are setting up a L2TP/IPsec tunnel, transport mode will be used for the IPsec tunnel.
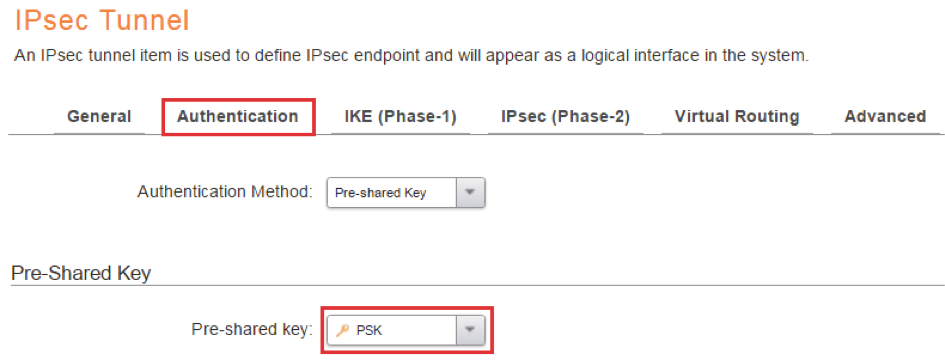
On the Authentication tab, choose the previously configured Pre-shared key object (PSK) as Pre-shared key.
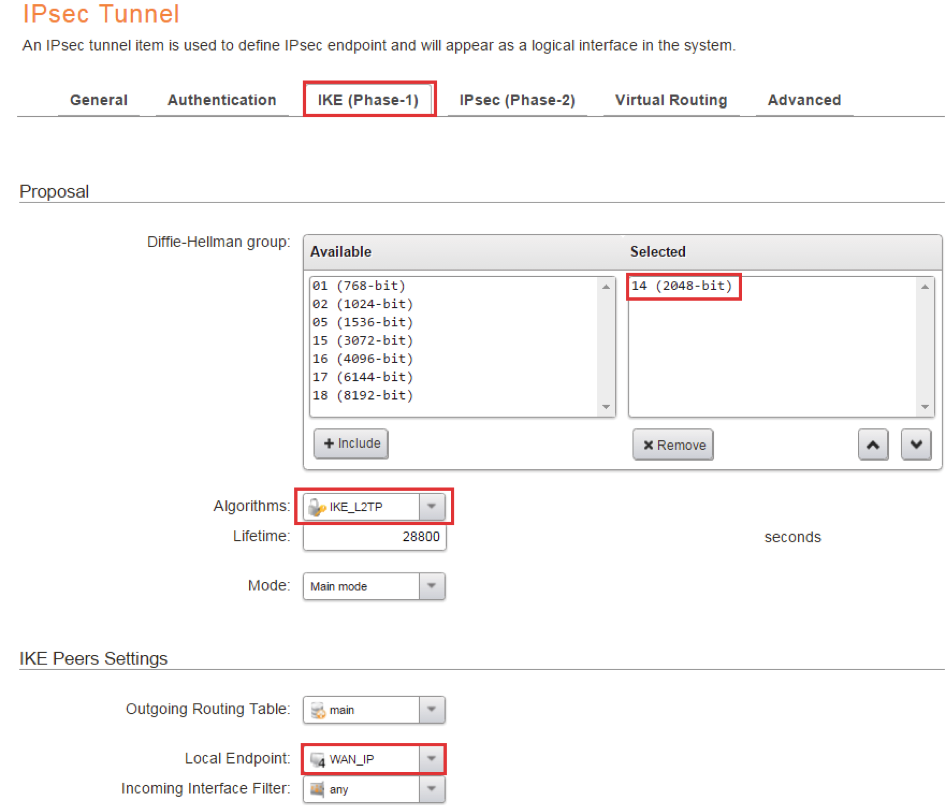
On the IKE (Phase-1) tab, choose the Diffie-Hellman groups to be used. In this example DH group 14 will be used, since that is the most secure group used by Windows when sending IPsec negotiations. Depending on the clients, you might need to allow other DH groups as well.
Choose IKE_L2TP that we configured previously as Algorithm.
In the example below the parameter Local Endpoint has been specified and set to WAN_IP. The Local IP parameter needs to be specified in certain scenarios. For example if you have a dual ISP scenario or if the clients are going to connect to another ARP published IP on the WAN interface.
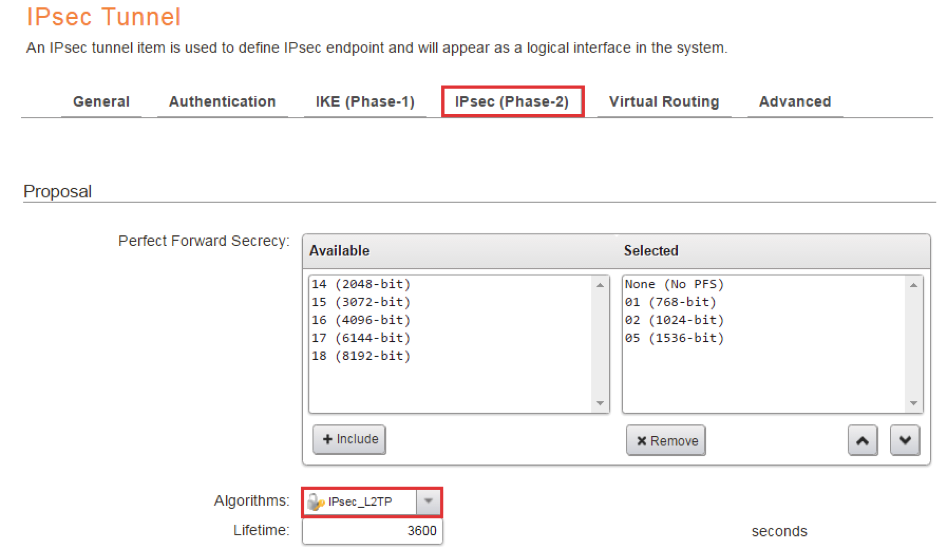
On the IPsec (Phase-2) tab, choose the previously configured IPsec_L2TP as Algorithms.
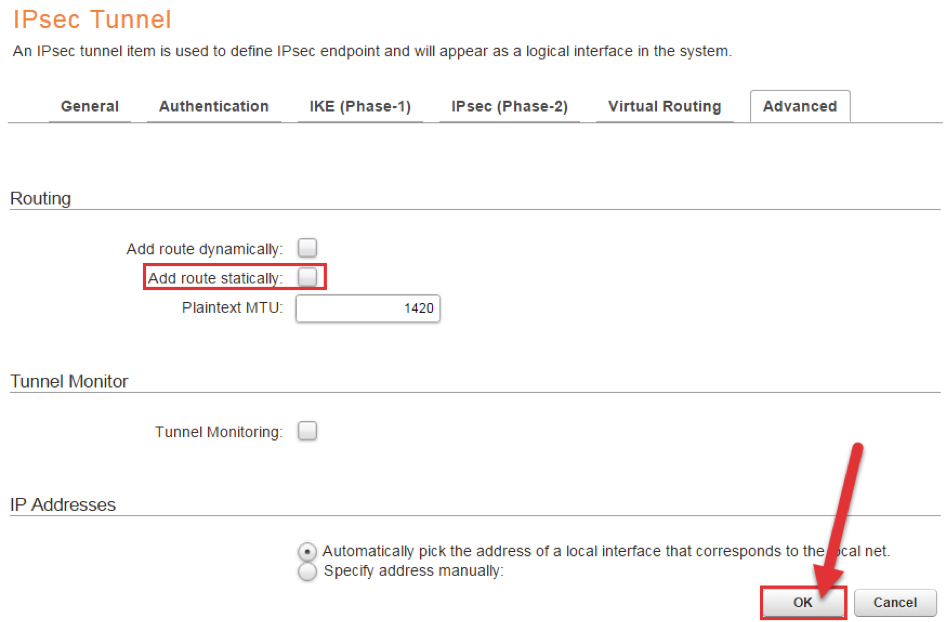
On the Advanced tab we MUST disable “Add route statically”. If this option is enabled, an all-nets route will be added to the main routing table and that will most likely cause network disruption.
Press OK to save!
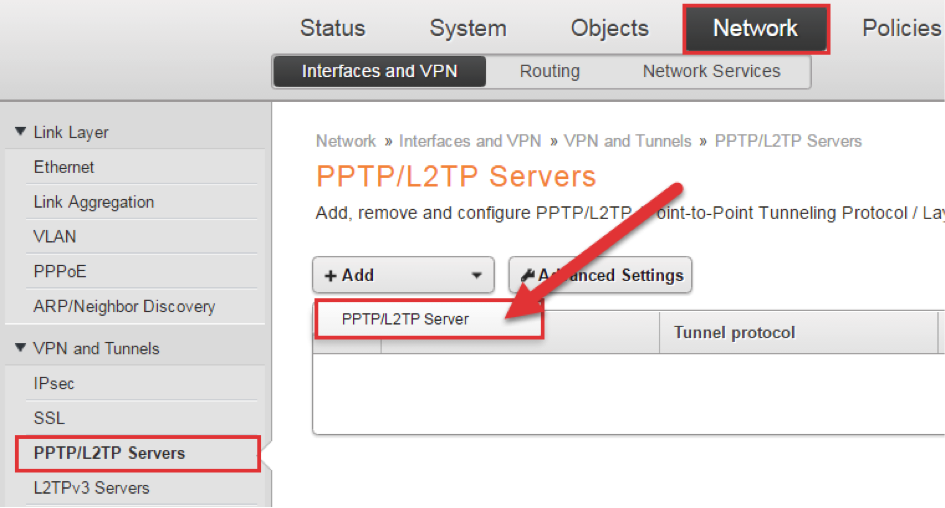
L2TP Server
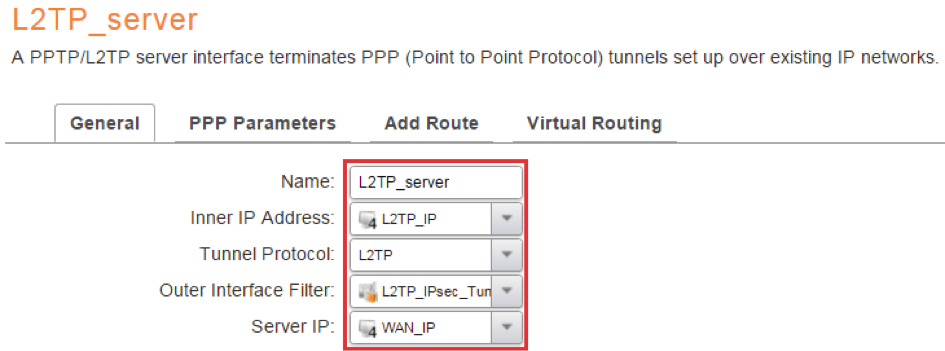
Next we will create the L2TP server.
Choose the L2TP_IP as Inner IP Address, L2TP as Tunnel Protocol, the server IP as WAN_IP and the L2TP_IPsec_Tunnel, previously created, as the Outer Interface Filter.
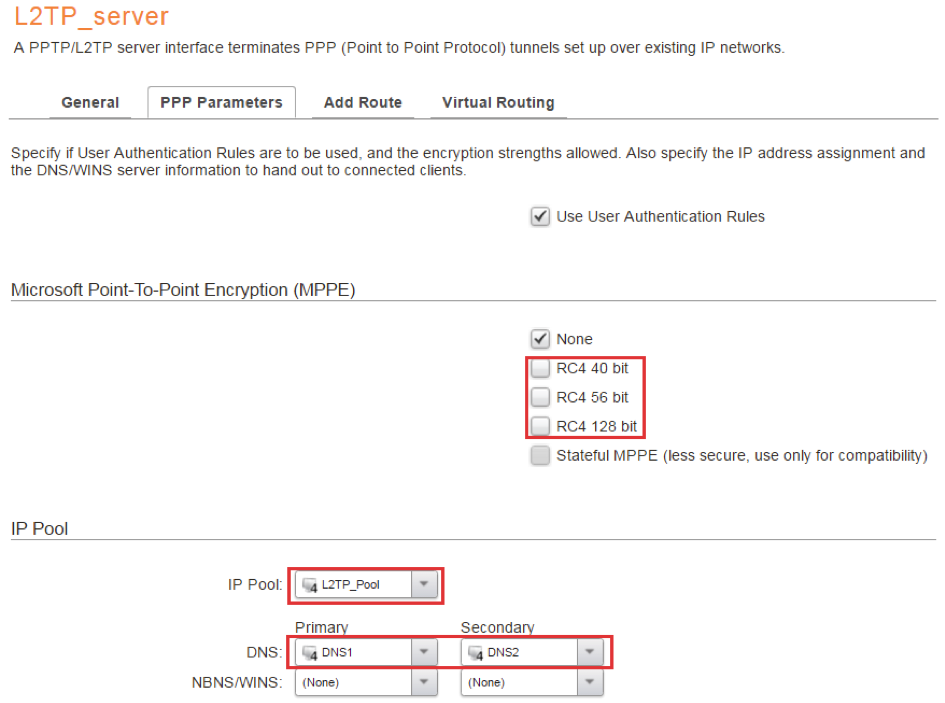
On the PPP Parameters tab, disable RC4 40 bit, RC4 56 bit and RC4 128 bit. We already have IPsec encryption, there is no need to encrypt once more.
Choose the previously created L2TP_Pool as IP Pool. The L2TP server will distribute IP addresses in the pool when clients connect.
You can also configure DNS servers to be distributed by the L2TP server, if needed.
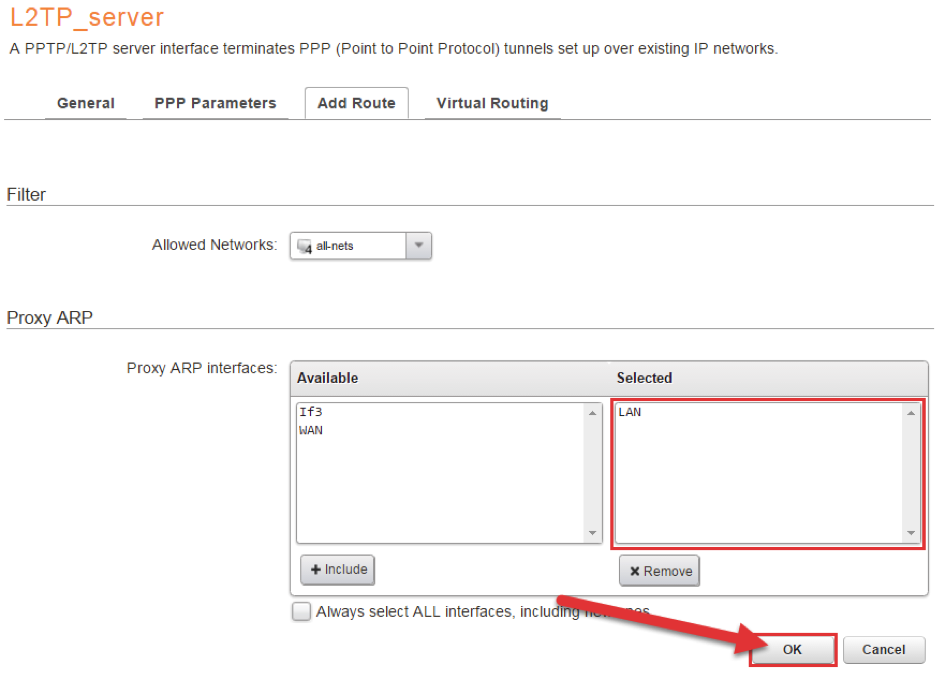
This step only applies if the L2TP IP Pool is a part of the same subnet as “LAN”. You then need to “Proxy ARP” the L2TP IP Pool on the LAN interface.
Authentication
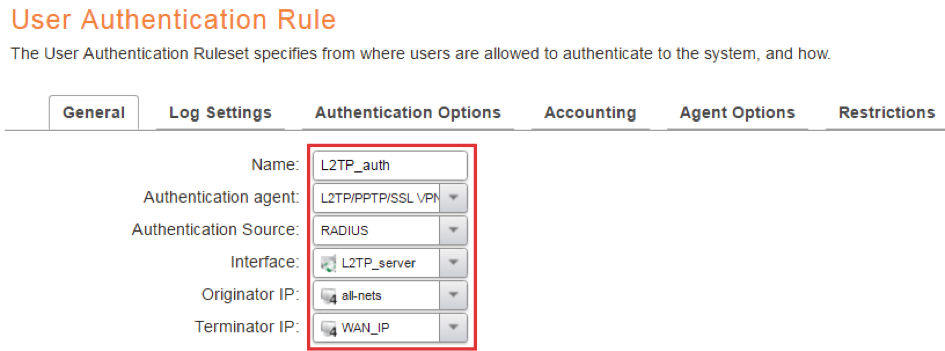
We will now configure the Authentication rule, that will allow cOS core to communicate with MFA, when a client connects.
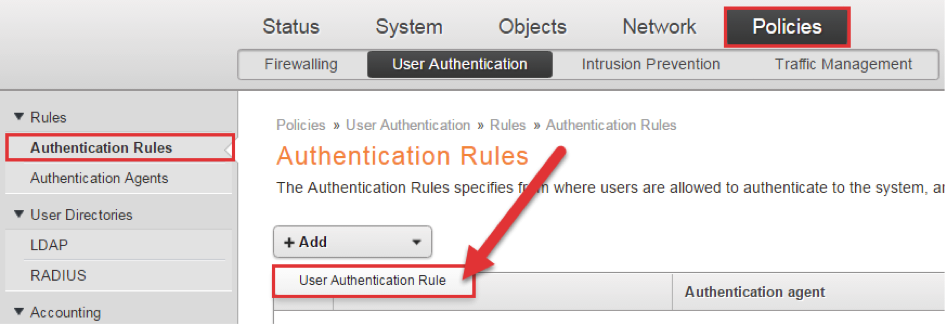
Change Authentication agent to L2TP/PPTP/SSL VPN since we are using L2TP. Set Authentication Source to RADIUS, Interface to L2TP_server, Originator IP to all-nets and Terminator IP to WAN_IP.
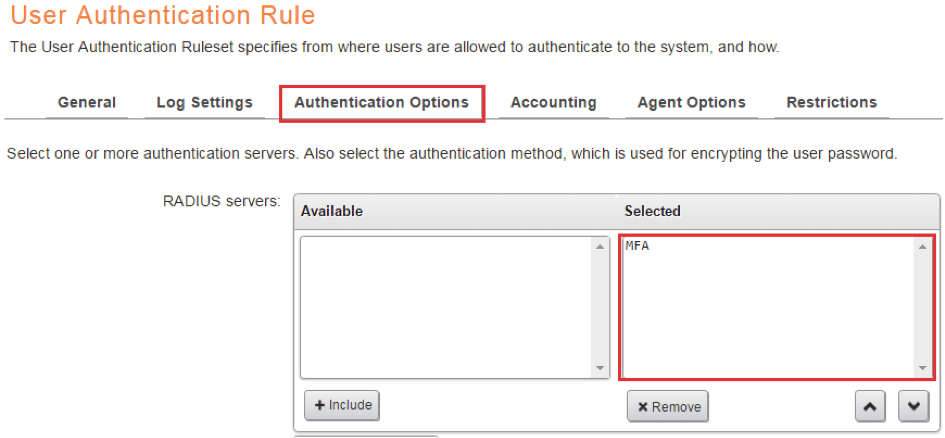
On the Authentication Options tab, select the previously configured “MFA” as RADIUS server.
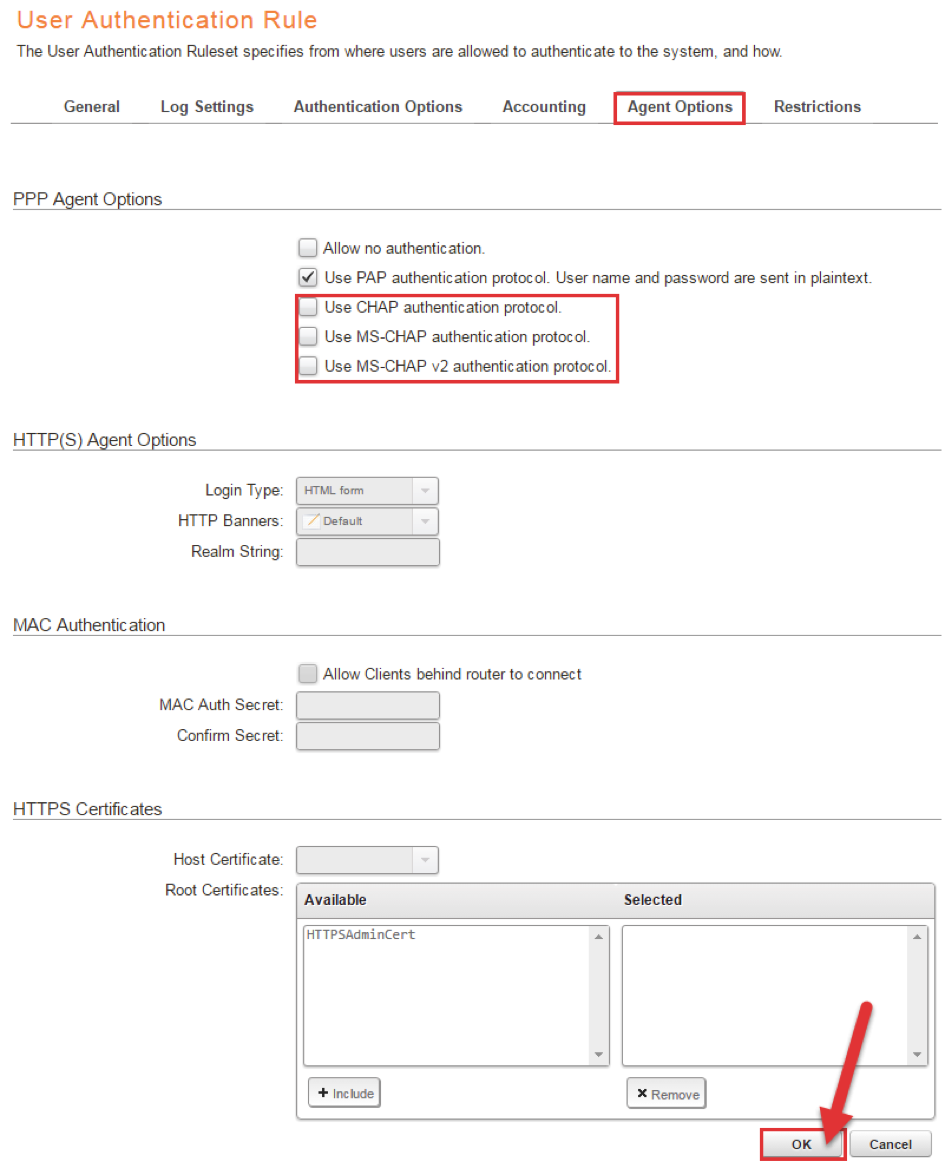
On the Agent Options tab, deselect CHAP, MS-CHAP and MS-CHAP v2, we will only use PAP.
Press OK to save!
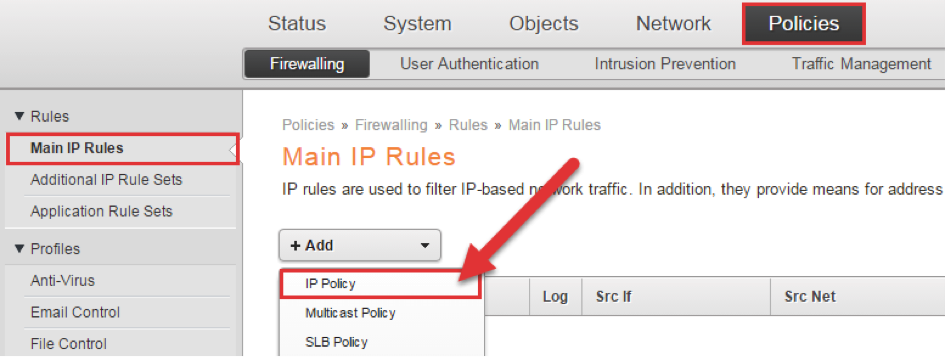
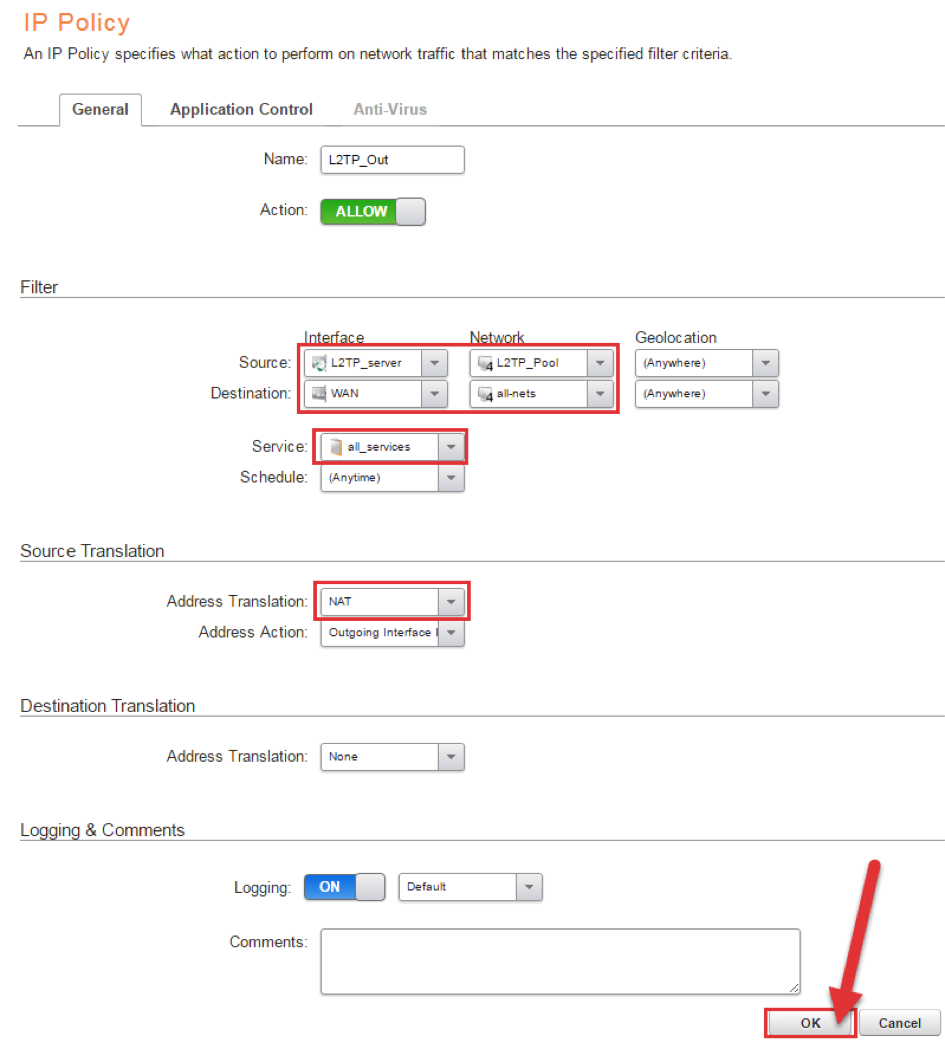
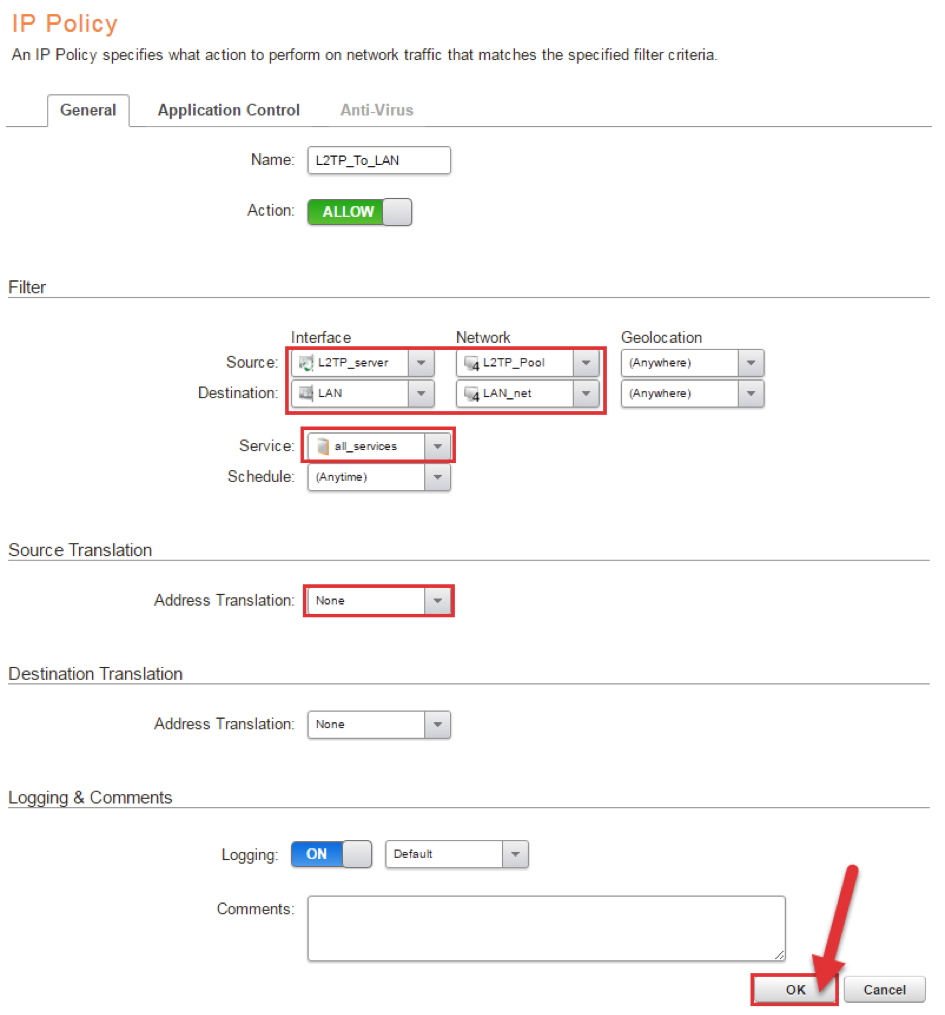
IP Policy
In order for the clients to be able to access anything, we need to create some IP Policys. We will create two, the first one will be NAT Policy so that clients can access the Internet, the second one will be a Policy that allows the clients to access resources on LAN.

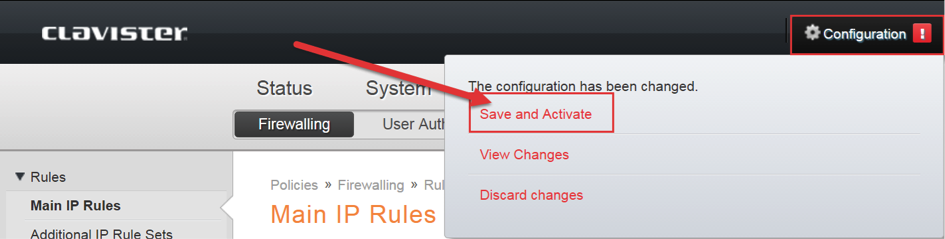
Finish the configuration
The configuration is now complete, so we can do ”Save and Activate”.
NOTE:
For more information about L2TP/IPsec, please have a look at this document in the Clavister forum:
https://forums.clavister.com/viewtopic.php?f=8&t=4491
DISCLAIMER
Information provided in this document is for your information only. PhenixID makes no explicit or implied claims to the validity of this information. Any trademarks referenced in this document are the property of their respective owners.The origin of this information may be internal or external to PhenixID. PhenixID makes all reasonable efforts to verify this information.
PhenixID - support.phenixid.se