Document version (last updated) : 2022, April 8th.
Summary
This PhenixID Solution Document (PSD) is written for PhenixID Identity Manager (PIM) 5.6.0 or later and PhenixID Identity Provisioning (PIP) 5.3.0 or later.
With PIP 5.2.0 there are a new REST Web Service and with PIM 5.5.0 a REST Web Service client. In this PSD you have a number of use cases with associated PIM forms and files and PIP polices to easily install and configure in your environment to get started.
This PSD focus only to explain the use cases. For an more in-depth understanding about the different parameters for the PIM REST WS client and how to configure and working with the PIP REST Web Service, please read the following PSD´s:
System Requirements
- PhenixID Identity Manager 5.6.0 or later installed
- PhenixID Identity Provisioning 5.3.0 or later installed
- Microsoft Active Directory
Overview
This document gives you a number of example roles, forms, searches and policies for an environment with Active Directory, if you have another LDAP directory you can easily change the forms and policies to fit you environment. This is only examples, change the configuration in any way you want to fit to your environment or needs.
Below is a screenshot of the different use cases (self service is also included):
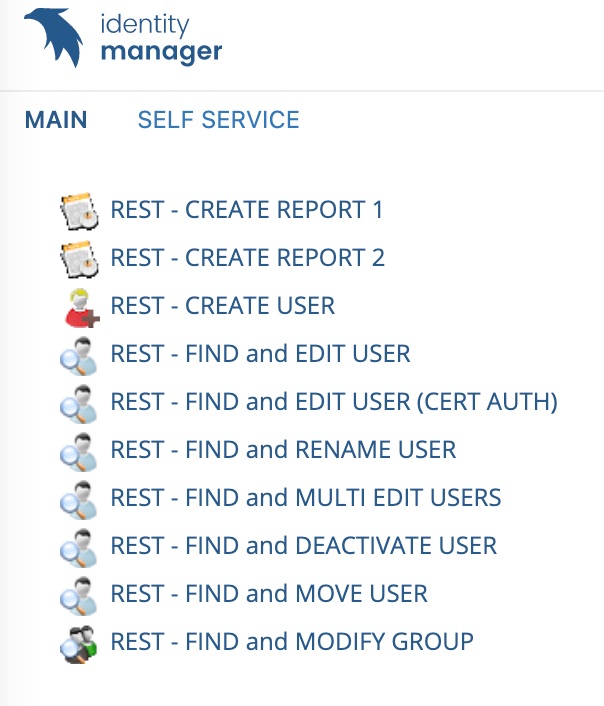
Most of the examples using basic authentication except one that uses certification authentication.
Setup the environment
First you need to download a ZIP file that contains a number of PIM/PIP use cases.
Open the different files and update them to map your environment, e.g change to your Active Directory name.
1. Download and extract RESTEdition.zip
Download the PSD1169 RESTEdition.zip file.
Extract the zip-file.
2. Create an example Active Directory structure
In the use case the forms and policies will refer to some OU´s, users and groups. Run the three scripts mentioned below to add the example structure in your environment.
- In the /PSD1169 RESTEdition folder, open folder /ExampleScripts
- Open the three files:
- 1_CreateExampleOUStructure.bat
- 2_CreateExampleUser.bat
- 3_CreateExampleGroup.bat
- Replace the DN DC=demo,DC=phenixid,DC=net and replace it with the DN in your environment.
- Run the three scripts.
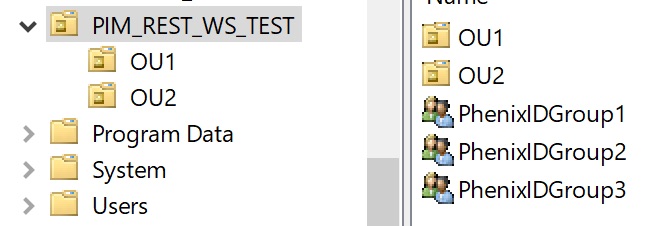
- Verify that you have an OU structure created in your Active Directory that look like below.
3. Add example roles to PIM
Add the example PIM role to the role folder of your installation.
- In the /PSD1169 folder, open folder /PIM_files
- Copy the UC – PSD1169 – RESTEdition folder
- In your current PIM environment, add the UC – PSD1169 – RESTEdition folder to drive:\..\PhenixID\IM\customer\role
- Use for example Notepad++ and do a search and replace in all files. Look for DC=demo,DC=phenixid,DC=net and replace it with the DN in your environment.
- Restart PIM and login to verify that the role is available
4. Add example configuration file to PIP
Import the example policy to your PIP installation.
- Open the Identity Provisioning Configurator
- Click File -> Import Objects
- In the extracted ZIP you downloaded, open /PSD1169 folder and then the /PIP_files folder
- Choose PSD1169 – REST WS examples.aax
- Click Import Objects
- When imported it should look below. verify that Data source LDAP PIM-UC matches your environment and connection works ok.
- Save the PIP configuration
5. Create two global parameters
Create two global parameters that matches your Active Directory. It is used in some of the action.
1. Global parameter for LDAP root
- Open the Identity Provisioning Configurator
- Click Tools -> Global Parameters
- Click Add
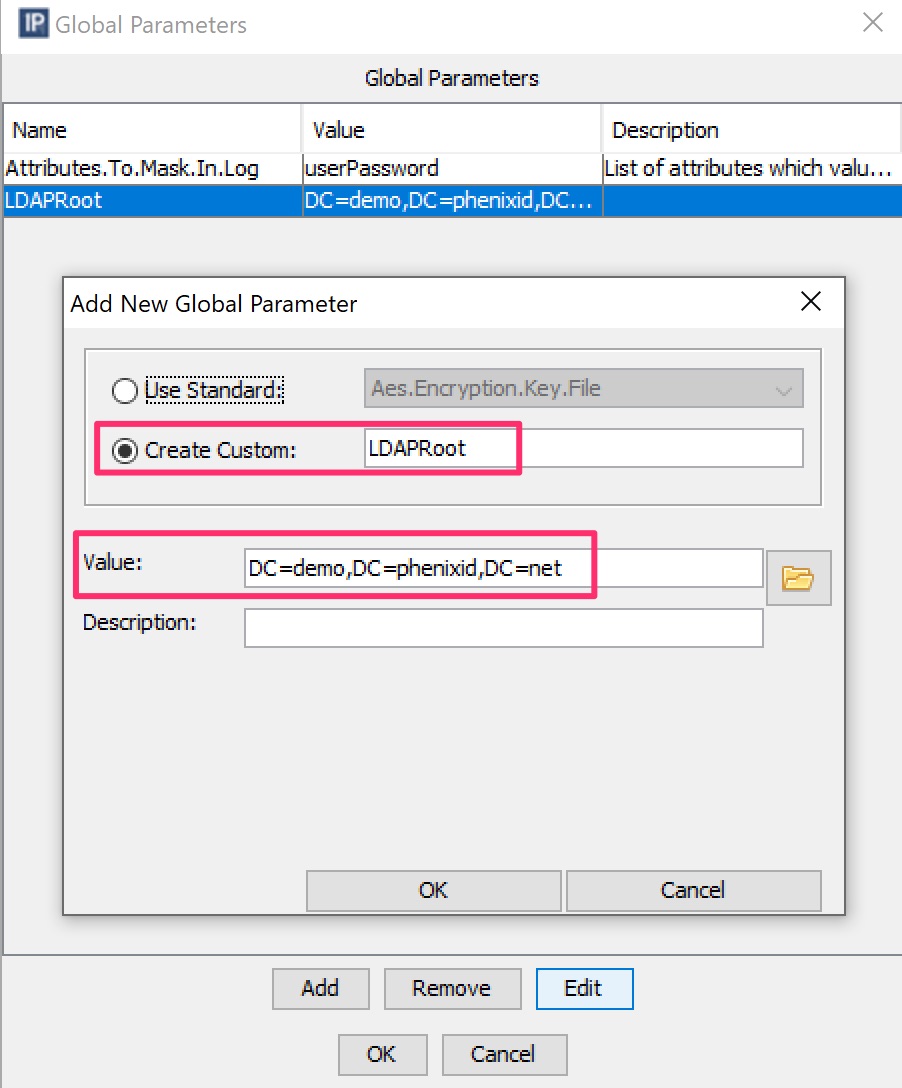
- Click Create Custom and add LDAPRoot. In value you type the DN for your Active Directory root.
- Save the PIP configuration
1. Global parameter for UPN suffix
- Open the Identity Provisioning Configurator
- Click Tools -> Global Parameters
- Click Add
- Click Create Custom and add UPNSuffix. In value you type the upn suffix for your Active Directory root.
For example demo.phenixid.net. (note, there is no at character) - Save the PIP configuration
6. Change port to map use cases
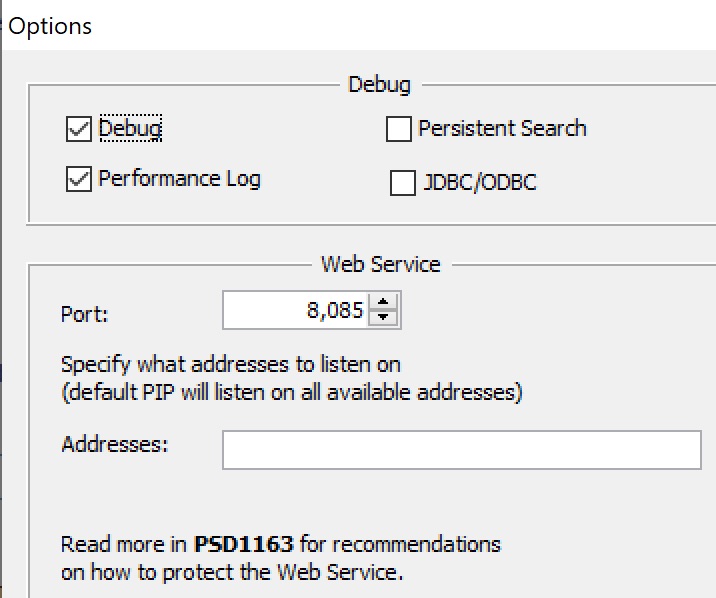
PIM will search for PIP on http://127.0.0.1:8085
- Open the Identity Provisioning Configurator
- Click Tools -> Options
- Change port to 8085. It should look something like below.
- Save the PIP configuration
7. Create a folder in file system
All use cases will create a text file with some info of what the outcome of the PIP policy was. In you file system, create a folder called c:\PIP_Temp
Explanation of the environment
To make it simple to follow I have named the searches and create/edit forms in PIM with the same name as the data sources and policies in PIP.
So, for example.
In PIM there is a predefined search called:
REST – FIND and EDIT USER
That search has one PIM edit form associated called
REST – EDIT USER
In PIP there is a REST data source called
REST – EDIT USER
waiting to receive incoming request for the PIM form.
The incoming request is forward to a policy called
REST – EDIT USER
All use cases have the same naming relation between each other.
Note 1: Controls in PIM forms are only example.
Note 2: Actions in PIP policies are only example.
Note 3: All PIP policies has a dump action in the beginning so you can easily se what is received from PIM.
Test the REST Edition
Start PIP
There is three ways to have PIP enabled to start receiving REST requests. Choose one and start testing the use case below.
- Start the PhenixID Provisioning Service service
- Open Identity Provisioning configurator and click the Start or stop Web Service listener.

- Click on one of the policy and click Run Policy and Start!. Now PIP is listening for REST request. You have to click Refresh to view incoming requests. Click the Transaction Number of the request and Select.
I will use the first Use case Use case – CREATE REPORT to explain how what will happen and is expected when testing. All other use cases will work in the same fashion and may only includes some specific notes for that use case.
Use case – CREATE REPORT 1 and 2
This covers both CREATE REPORT 1 and CREATE REPORT 2. There is one difference between the two and that is that REPORT 2 has the check box Send response immediately before policy runs checked on its data source. If you in PIP runs the policy manually so you can step through the action you will see that REPORT 2 will send response before the first action is executed and REPORT 1 will send after the last action is executed.
- Login to PIM a select the UC – PSD1169 – RESTEdition role
- Click REST – CREATE REPORT 1 or 2
- PIM – Select an OU
- PIM – The selected OU will be sent to PIP
- PIP – Authenticated the request using basic auth (username and password)
- PIP – All use cases includes a dump action so you easily can se what is received from PIM.
- PIP – Then the use case specific action takes place
- PIP – Last there is a Write to LDIF action that will write the outcome to a text file for more information. The text file will be stored in a folder called C:\PIP_Temp. Verify that you have it created.
Use case – CREATE USER
Note 1. NewDN action will be send back the dn of the new user so PIM act on it if PIM likes. For example if user select check box to edit directly after creation.
Note 2. If user already exist there is a Run Action added to handeld that. Test this use case creating a user with available sAMAccountName and one user where the sAMAccountName already exists.
Use case – EDIT USER
This Use Case has an action that will return a status messages that all went good. When last action is run PIP will return PIP REST WS has received all data! which will be prompted in PIM for the user.
Use case – EDIT USER (CERT AUTH)
REST – FIND and EDIT USER (CERT AUTH)
Use case – RENAME USER
This use case will return the new DN NewDN to PIM. If you user click Apply the form is still open and PIM needs to knew new DN or an error will occur.
Use case – MULTI EDIT USERS
This use case lets you select several user and update them with the same value. For example all selected user will get ACME as Company.
Note 1. On the General tab of the policy the check box for Add all headers as session attributes in pre policy is selected. This means that all headers picked up in the pre policy is available in main policy. Examples with PIM as client is User-Agent, Host to name two.
Note 2. On the General tab of the policy the check box for Use session objects from pre policy in main policy is selected. This means that any session objects picked up in pre policy also will be available in main policy. For this use case you will see that statuscode 22 is added.
Use case – DEACTIVATE USER
Even though the PIM forms have a calendar date added the PIP policy will only manage userAccountControl attribute.
Use case – MOVE USER
This will like some use cases above use NewDN and status message.
Use case – MODIFY GROUP
Adds and removes users to Active Directory groups.
Use case – Self Service
This uses the PIM view SelfService and lets user reset its own password.
DISCLAIMER
Information provided in this document is for your information only. PhenixID makes no explicit or implied claims to the validity of this information. Any trademarks referenced in this document are the property of their respective owners.The origin of this information may be internal or external to PhenixID. PhenixID makes all reasonable efforts to verify this information.
PhenixID - support.phenixid.se